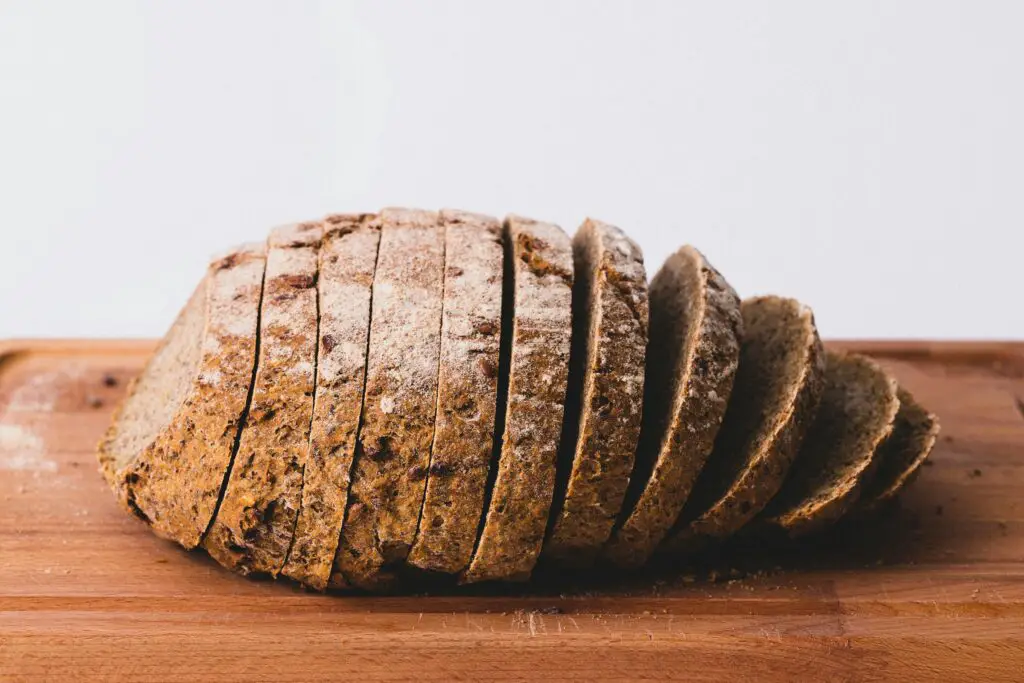
Craving bread that’s soft, wholesome, and made with real ingredients? Whole wheat bread checks all the boxes—high in fiber, low in fuss, and way better than store-bought.
You don’t need a bread machine, a fancy mixer, or a culinary degree. Just your hands, a loaf pan, and a little patience.
In this guide, I’ll show you exactly how to bake whole wheat bread at home—from simple ingredients to a warm, golden loaf. Let’s turn your kitchen into a fresh bread haven!
Why Bake Your Own Whole Wheat Bread?
It’s Healthier—Period.
Store-bought bread often hides behind buzzwords like “multigrain” or “heart healthy,” but turn the package over and you’ll see a parade of preservatives, added sugars, and unpronounceable additives.
When you bake your own whole wheat bread, what you see is what you eat—flour, water, yeast, salt, and maybe a touch of honey. That’s it.
Whole wheat flour is naturally rich in fiber, which helps with digestion and keeps you fuller, longer.
It’s also loaded with vitamins and minerals like iron, magnesium, and B vitamins—none of which need artificial boosting when you use the real stuff.
Plus, no preservatives means no mystery shelf life. Your bread will be fresh and nourishing, just the way nature intended.
It Saves Money (Yes, Really).
A decent loaf of whole wheat bread at the store can cost anywhere from $3 to $7—sometimes more if it’s organic or labeled “artisan.”
But homemade? A single loaf costs less than a couple of bucks. Even when using high-quality flour and add-ins like seeds or oats, the math still works in your favor.
Buy ingredients in bulk and you’ll stretch that savings even further. Over time, those dollars add up.
And if you’re baking weekly, you could save hundreds each year—without skimping on flavor or quality.
You Control Everything.
Want it a little softer? Add a touch of oil. Prefer it sweet? Mix in honey or molasses. Don’t do dairy? Skip the butter. Going low-sodium? Cut back the salt.
When you bake at home, you get to decide. No surprise allergens. No unnecessary sugar. No weird chemicals. Just clean, custom bread tailored to your taste and dietary needs.
You can even experiment—think sunflower seeds, flax, raisins, cinnamon swirls. The loaf becomes your canvas.
It’s Honestly Just More Rewarding.
There’s something magical about pulling a golden loaf out of your own oven. The smell fills your kitchen.
The crust crackles as it cools. You slice into it while it’s still warm, smear on some butter, and think: Why didn’t I do this sooner?
Baking bread connects you to something simple and timeless. It slows you down, even just for a moment. It’s not just about feeding your body—it’s about feeding your soul.
And yes, it’s okay to feel like a wizard every time your dough rises. Because you kind of are.
Key Ingredients Needed
Here’s what you’ll need to make a simple, delicious whole wheat bread at home:
• 3 Cups Whole Wheat Flour
- Type matters: You can use traditional whole wheat flour for a hearty, nutty flavor, or white whole wheat flour for a lighter taste and softer crumb.
- Protein content: Look for flour with at least 12% protein—this helps the bread rise and gives it structure.
- Tip: For beginners, you can mix 2 cups whole wheat + 1 cup bread flour for a lighter texture.
• 2¼ Teaspoons Instant Yeast (1 packet)
- Instant yeast (aka rapid rise yeast) can be mixed directly into the flour—no need to proof.
- If you’re using active dry yeast, dissolve it in warm water first and let it sit for 5–10 minutes until foamy.
- Both types work, but instant yeast is faster and more beginner-friendly.
• 1 Cup Warm Water (110–115°F / 43–46°C)
- Not too hot! Anything above 120°F can kill the yeast.
- Use a thermometer if you’re unsure, or test it with your wrist—it should feel like warm bathwater.
- If your dough feels too dry, you can add 1–2 extra tablespoons of water, one at a time.
• 1½ Tablespoons Sweetener (Optional)
- This helps feed the yeast and adds a touch of flavor.
- Choose from:
- Honey for mild sweetness
- Molasses for a darker, richer taste
- White or brown sugar for a neutral option
- You can skip it entirely, but the rise might be slower and the flavor more flat.
• 1 Teaspoon Salt
- Essential for flavor and for regulating yeast activity.
- Too little salt = bland and overly fast fermentation.
- Use fine sea salt or kosher salt—not large flakes.
• 2 Tablespoons Oil or Melted Butter
- Keeps the crumb soft and tender.
- Choose from:
- Olive oil for a savory note
- Canola or sunflower oil for a neutral flavor
- Melted unsalted butter for a richer texture
- This ingredient helps extend freshness, too.
Tools You’ll Need
You don’t need a bakery setup to make great whole wheat bread—just a few basic tools you probably already have at home. Here’s the lineup:
• Mixing Bowl & Wooden Spoon
- Your bread journey starts here.
- A large bowl gives you room to mix and knead by hand.
- Wooden spoons are sturdy and dough-friendly, but a clean hand works just as well.
• Measuring Cups & Spoons
- Accuracy is key in baking.
- Use dry measuring cups for flour and liquids measuring cups for water.
- Teaspoons and tablespoons help you get salt, yeast, and sweetener just right.
• Loaf Pan (8½ x 4½ or 9 x 5 inches)
- This gives your bread structure and that classic sandwich loaf shape.
- Metal pans work best for an even bake.
- Lightly grease the pan before use, or line with parchment paper if you prefer easy cleanup.
• Stand Mixer with Dough Hook (Optional)
- Not required—but a game-changer if you plan to bake often.
- Cuts kneading time in half and keeps things less messy.
- Set it to low and let the dough hook do the heavy lifting for 5–7 minutes.
• Kitchen Towel or Plastic Wrap
- You’ll need to cover the dough during rising.
- A clean towel lets the dough breathe while staying protected.
- Plastic wrap traps heat and moisture for a faster rise—especially helpful in cooler kitchens.
• Instant-Read Thermometer (Optional but Helpful)
- For checking water temp (110–115°F is the sweet spot for yeast).
- Also great for checking if your bread is done—190–200°F internal temp means it’s fully baked.
- Not required, but takes the guesswork out of baking.
Step-by-Step Instructions
You’ve got your ingredients, your tools are ready—now it’s time to bring that dough to life!
Step 1: Proof the Yeast (if using active dry)
In a small bowl, combine:
- 1 cup warm water (110–115°F)
- 1½ tablespoons sweetener (honey, sugar, or molasses)
- 2¼ teaspoons active dry yeast
Stir gently and let it sit for 5–10 minutes. You’re looking for a foamy top—it should look like a mini root beer float. If nothing happens, your yeast might be expired or your water too hot.
Toss it and try again. If you’re using instant yeast, skip this step and just add everything directly in the mixing bowl.
Step 2: Mix the Dough
In a large mixing bowl (or the bowl of your stand mixer), combine:
- 3 cups whole wheat flour
- 1 teaspoon salt
- 2 tablespoons oil or melted butter
- Your proofed yeast mixture (or dry ingredients + 1 cup warm water if using instant yeast)
Stir with a wooden spoon until it starts to come together. If the dough seems too dry, add 1–2 tablespoons of water, one at a time. If it’s too wet and sticky, sprinkle in a little flour.
You’re not aiming for perfection here—just a shaggy, slightly sticky dough that holds together.
Step 3: Knead the Dough
Now the fun begins.
- By hand: Lightly flour your counter. Knead the dough for 10 minutes, folding, pressing, and turning like you’re giving it a firm massage. The dough should get smoother and more elastic as you go.
- With a stand mixer: Attach the dough hook and knead on low for 5–6 minutes. Stop and scrape the bowl if needed.
You’re done when the dough is slightly tacky but doesn’t stick to your fingers. It should spring back a bit when you press it.
Step 4: First Rise
Shape the dough into a ball and place it in a lightly oiled bowl. Turn it once to coat the top with oil (this keeps it from drying out). Cover with a kitchen towel or plastic wrap.
Let it rise in a warm, draft-free spot for 1 to 2 hours, or until it has doubled in size.
Tip: If your kitchen’s chilly, place the bowl inside your (off) oven with just the oven light on for gentle warmth.
Step 5: Shape the Loaf
Once risen, gently punch down the dough to release extra gas (yes, this is as satisfying as it sounds).
Turn it out onto a lightly floured surface and shape it into a log the length of your loaf pan. Tuck the ends under and smooth the top.
Place it into a greased loaf pan, seam-side down.
Step 6: Second Rise
Cover the loaf pan and let the dough rise again until it domes about 1 inch above the rim of the pan—usually 30 to 60 minutes.
This step gives you that light, airy texture. Don’t rush it. If it’s rising too slowly, move it somewhere warmer.
Step 7: Bake
Preheat your oven to 375°F (190°C).
Bake the bread for 30 to 35 minutes, until the top is golden brown and the loaf sounds hollow when tapped.
If the top starts browning too fast, tent it with foil halfway through baking.
For extra precision, check the internal temperature—it should read 190–200°F when done.
Step 8: Cool
This step matters more than people think.
Remove the loaf from the pan and let it cool on a wire rack for at least 30 minutes before slicing.
Yes, it’s hard to wait. But cutting too early can make the inside gummy and ruin the texture.
Once it’s cooled? Slice, toast, slather, enjoy.
Tips for Perfect Whole Wheat Bread
Even though whole wheat bread is simple, a few smart tweaks can take your loaf from “pretty good” to “holy wow.”
Use a 50/50 Flour Blend for a Lighter Loaf
Whole wheat flour is nutritious, but it’s also dense. If your loaf turns out a little heavy or brick-like, don’t panic—it’s normal.
To lighten things up, try a 50/50 blend:
- 1½ cups whole wheat flour
- 1½ cups bread flour or all-purpose flour
Bread flour has more gluten, which gives better structure and rise.
This combo still gives you the flavor and fiber of whole wheat, but with a fluffier texture and better lift. Perfect for sandwiches.
Don’t Skip the Second Rise
This step might feel optional—but it’s not. The second rise gives the dough time to relax and expand before baking. Skip it, and you’ll get a squat, tight crumb instead of a soft, airy loaf.
Let the shaped dough rise until it domes 1 inch above the loaf pan. If it’s slow, be patient. Good bread doesn’t like to be rushed.
Pro tip: If you’re in a cooler kitchen, turn on your oven for 1 minute, then turn it off and place the dough inside. Instant proofing box.
Add Mix-Ins for Extra Flavor and Texture
Want to level up your loaf? Toss in some goodies:
- Rolled oats (¼ cup) for a rustic, hearty feel
- Sunflower or flax seeds (2–3 tablespoons) for crunch
- Chopped nuts, raisins, or herbs for a custom twist
Mix-ins should go in during the final 1–2 minutes of kneading. If they’re too wet or salty (like olives or tomatoes), pat them dry first.
This is where you get to be creative—each loaf can have its own personality.
Let It Cool Fully Before Slicing
It’s tempting, I know. The smell is ridiculous. But slicing bread fresh out of the oven is a rookie mistake.
Cut too soon, and the steam inside hasn’t settled. You’ll get a gummy, undercooked middle—even if it’s technically done.
Let your bread cool for at least 30 minutes on a wire rack. It’s worth the wait. The texture will set, the flavor will deepen, and your knife won’t tear it to shreds.
Store It Right to Keep It Fresh
Once your loaf has cooled completely, wrap it in:
- A clean kitchen towel
- A bread bag
- Or beeswax wrap (eco-friendly and breathable)
Avoid plastic unless you’re freezing—it traps moisture and makes the crust soft and spongy. Stored right, your bread will stay fresh for up to 4 days at room temp.
For longer storage, slice it and freeze it. That way, you can toast a piece whenever the craving hits.
Common Mistakes to Avoid
Baking whole wheat bread isn’t rocket science, but it is a little bit of kitchen chemistry. A few simple slip-ups can turn your perfect loaf into a doorstop.
Let’s break down the most common bread blunders—and how to dodge them like a pro.
Water Too Hot = Dead Yeast
This one’s a heartbreaker. Yeast is alive, and like any living thing, it has a comfort zone. If your water is too hot—anything above 120°F (49°C)—you’ll kill it before the dough even gets going.
The sweet spot is 110–115°F (43–46°C). That’s warm enough to wake the yeast up, but not hot enough to shock it into silence.
No thermometer? No problem. Dip a clean finger or your wrist in the water—it should feel like a warm bath, not a sauna. If it’s uncomfortably hot, let it cool a bit before using.
Not Kneading Enough = Dense Loaf
Think of kneading like building the bread’s skeleton. It creates gluten—the stretchy network that traps air and gives your loaf structure.
Skimp on this step, and you’ll get a flat, heavy loaf that could double as a paperweight.
By hand, knead for a solid 10 minutes. With a stand mixer, go for 5–6 minutes on low. The dough should feel smooth, elastic, and slightly tacky—not sticky or dry.
If your arms are tired, you’re probably doing it right.
Over-Flouring = Dry, Crumbly Bread
More flour doesn’t mean better bread—it just means drier bread. And dry bread = sad sandwiches.
When you’re mixing or kneading, it’s easy to panic if the dough feels sticky. Resist the urge to dump in more flour. Start by flouring your hands or surface lightly and see if that’s enough.
Whole wheat flour absorbs more water over time, so a slightly sticky dough at first is normal. Give it a few minutes and it’ll firm up.
Stick to the recipe quantities as closely as possible, and only add extra flour in small sprinkles, not big scoops.
Rushing the Rise = Poor Texture
Bread dough needs time to rise. This isn’t fast food—it’s slow magic.
If you cut the rise short, the yeast doesn’t have enough time to do its job. Your loaf won’t be light or airy. It’ll bake up dense, tight, and possibly uneven.
Let it rise until it doubles in size during the first proof. Then again until it rises about 1 inch above the loaf pan for the second. Use your eyes and touch more than your timer.
If your kitchen is cold, don’t be afraid to give it an extra 15–30 minutes. Patience = fluffiness.
Whole Wheat Bread Variations
Once you’ve nailed the basic loaf, it’s time to have some fun. Whole wheat bread is like a blank canvas—it plays well with a variety of add-ins and tweaks.
Honey Oat Bread
Want something a little softer and slightly sweet? Enter honey oat bread.
Just add 2 tablespoons of honey to your dough and sprinkle ¼ cup of rolled oats on top before baking. You can also knead in 2–3 tablespoons of oats for extra texture.
The honey gives it a warm, mellow flavor and helps the crust turn a beautiful golden brown. The oats on top? That’s your rustic bakery vibe right there. This one’s perfect for toast or slathered in butter.
Seeded Multigrain Loaf
For something hearty and full of texture, toss in a mix of seeds and grains.
Think:
- 1 tablespoon each of sunflower seeds, flaxseeds, sesame seeds, and chia
- Or go with a premixed seed blend—just keep it to about ¼ cup total
Add them during the last minute or two of kneading. You can also press some seeds onto the top of the loaf just before baking for that eye-catching finish.
This variation is especially good for sandwiches—it’s chewy, nutty, and loaded with personality.
Cinnamon Raisin Whole Wheat
This one smells like a hug.
After your first rise, flatten the dough into a rectangle and sprinkle it with:
- 2 teaspoons ground cinnamon
- 2–3 tablespoons brown sugar (optional)
- ⅓ cup raisins (or chopped dates for a twist)
Roll it up like a jelly roll, seam-side down, then shape and rise as usual. The end result is a subtly sweet, swirled bread that’s amazing toasted with a bit of butter or cream cheese.
Kids love it. Adults pretend they bought it from a fancy café.
Whole Wheat Rolls (Same Dough, Different Shape!)
Don’t want a full loaf? Turn your dough into rolls instead. After the first rise, divide it into 8–10 equal portions, roll into balls, and place them in a greased baking dish.
Let them rise until puffy, then bake at 375°F (190°C) for 18–22 minutes until golden brown.
You can brush the tops with melted butter right after baking for extra softness and shine. These make excellent dinner rolls, sandwich buns, or grab-and-go snacks.
Same dough, same flavor—just a more sharable (and dippable) format.
Serving Suggestions
You’ve baked the bread. Your kitchen smells like heaven. Now what?
Don’t let that beautiful loaf sit on the counter wondering what its purpose is. Whole wheat bread is versatile—think of it as the Swiss Army knife of carbs.
Toast It Like a Pro
Let’s start with the obvious: toast.
Slice it thick or thin—your call. Then give it a good golden crunch in the toaster or on a skillet with a bit of butter.
Top it with:
- Avocado + chili flakes + a squeeze of lemon for that café-style bite
- Peanut butter (or almond butter) + banana slices = instant energy boost
- Jam or honey for a sweet and simple breakfast
- Cream cheese + cucumber or smoked salmon if you’re feeling fancy
Homemade bread makes every topping taste better. No cardboard texture. Just flavor and heart.
Build Better Sandwiches, Paninis, or French Toast
Homemade whole wheat bread isn’t just for toasting—it makes stellar sandwiches.
Try:
- Grilled cheese with sharp cheddar and tomato
- Turkey or veggie paninis pressed on a grill or in a cast iron skillet
- PB&J that doesn’t fall apart halfway through lunch
- French toast that actually holds its shape and soaks up all the goodness without turning to mush
Thick slices? Amazing for hearty sandwiches or weekend brunch spreads. Thin slices? Great for quick lunches or kid-friendly bites.
Pair It with Soups, Stews, or Salads
Whole wheat bread loves a good sidekick.
Tear off a chunk and dunk it into:
- A warm bowl of soup (tomato, lentil, butternut squash)
- A hearty beef or bean stew
- Even a chilled summer salad for texture and balance
You can also toast cubed slices to make homemade croutons—just toss with olive oil and seasonings, then bake at 375°F for 10–15 minutes. Boom. Instant crunch upgrade.
Storage & Freezing
Once your loaf has cooled completely, storing it properly is the key to keeping it fresh and delicious.
At room temperature, your bread will stay soft for 3–4 days if kept in a breathable bag like a cloth bread bag, a paper bag, or wrapped in a clean kitchen towel—anything that lets a little air in without drying it out.
Avoid plastic bags unless you’re planning to eat it quickly, as they can trap moisture and make the crust rubbery or even invite mold.
If you know you won’t finish the loaf in a few days, slice it up and freeze the extras.
Simply wrap individual slices (or the whole loaf) tightly in plastic wrap or foil, then place them in a freezer-safe zip-top bag.
Label it with the date and stash it in the freezer—your bread will keep well for 2 to 3 months.
When you’re ready to enjoy it, pop a slice in the toaster straight from frozen or let a full loaf thaw on the counter, still wrapped, to avoid condensation.
This way, you’ll always have fresh homemade bread ready to go—no waste, no guilt, no sad dry slices.
Final Words
Whole wheat bread isn’t just healthier—it’s cheaper, tastier, and surprisingly fun to make. You control the ingredients, the flavor, and the vibe.
Even if your first loaf leans a little lopsided, you still made bread from scratch. That’s a win.
So go ahead—flour your counter, fire up the oven, and give it a shot.
Baked your first loaf? Tag us in your bread pics—we’d love to see!
FAQs
Can I use a bread machine?
Yes! Use the whole wheat setting if available.
What if my dough isn’t rising?
Check your yeast and the warmth of your kitchen.
Can I make it oil-free or sugar-free?
Yes, but the texture may change slightly.
Can I use 100% whole wheat flour?
Yes, but consider adding vital wheat gluten or be prepared for a denser texture.