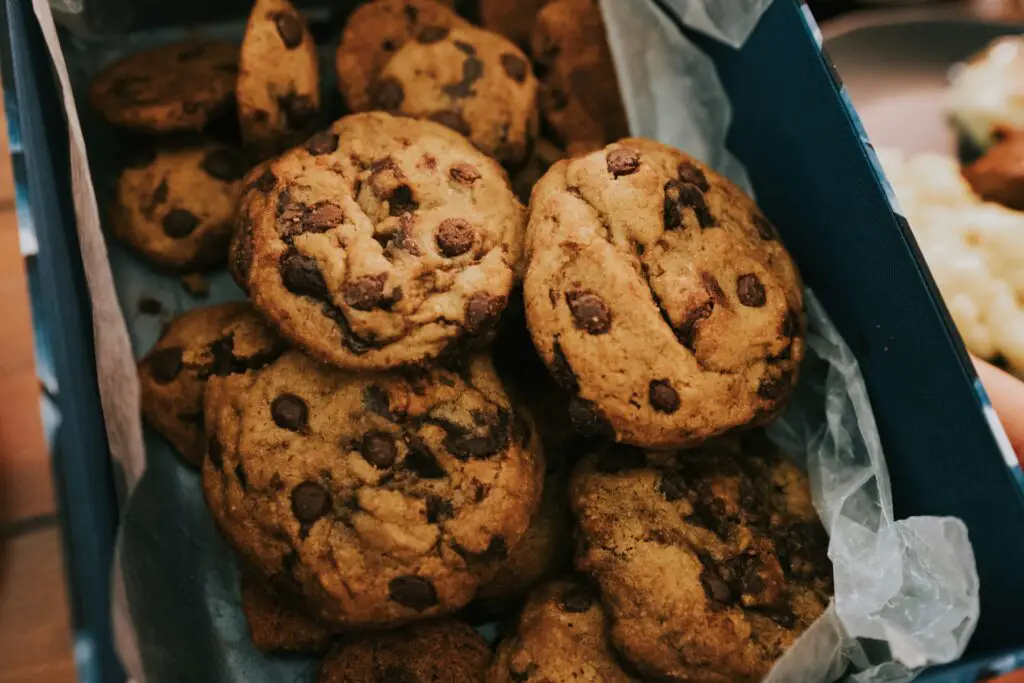
We’ve all been there—craving cookies but staring at the oven like it’s your worst enemy. Some days, the thought of preheating, mixing, and waiting seems overwhelming.
That’s where no-bake cookies swoop in to save the day. They’re quick, fuss-free, and just as satisfying as anything you’d pull from the oven.
Perfect for hot afternoons, last-minute cravings, or when life’s already messy enough—these no-bake recipes deliver sweetness without the hassle.
Why No-Bake Cookies Are a Lifesaver
Time-Saving
When life feels like a sprint, no-bake cookies are your shortcut to sweet relief. No oven, no timers, no endless waiting.
You mix, shape, chill, and you’re done—sometimes in less time than it takes to brew a cup of coffee.
On days packed with errands or work deadlines, these cookies give you the joy of homemade treats without stealing hours from your schedule.
Beginner-Friendly
If baking has ever left you with burnt bottoms or flat, sad-looking cookies, no-bake recipes are like a reset button. The steps are simple, and the ingredients are pantry basics.
There’s no science experiment happening in the oven—just mix and set. Even if you’ve never baked a day in your life, you can pull these off with confidence.
Family-Friendly
Ovens are hot and sharp tools can be risky, but no-bake cookies let kids join in safely. They can measure, stir, or decorate without stress.
For parents, it’s a fun way to keep little hands busy while sneaking in some learning—fractions from measuring cups, patience while waiting for cookies to set.
Plus, there’s something magical about kids proudly showing off “their” cookies at the table.
Versatile
No-bake cookies are a blank canvas. Chocolate and peanut butter? Classic. Coconut, nuts, or sprinkles? Go wild. Want something healthy? Swap in oats, seeds, or dried fruit.
They fit every craving, diet, or season with ease. It’s like having a recipe toolkit where you can mix and match until you find your signature combo.
Classic No-Bake Cookie Recipes
Chocolate Peanut Butter Oat Cookies
These cookies are the definition of comfort food made simple. Rolled oats bring the chewy bite, while peanut butter and cocoa powder do the heavy lifting on flavor.
A touch of butter and sugar holds it all together, giving you that classic, rich cookie feel without the oven drama.
The best part? You likely already have everything sitting in your pantry.
One bowl, a quick stir, and a little time to set—suddenly, you’ve got a plate of cookies that feel like a warm hug on a busy day.
Ingredients:
- 2 cups quick oats
- 1 cup sugar
- ½ cup butter
- ½ cup milk
- ¼ cup cocoa powder
- ½ cup peanut butter
- 1 tsp vanilla extract
Instructions:
- In a saucepan, combine butter, sugar, milk, and cocoa. Bring to a boil for about 1 minute.
- Remove from heat and stir in peanut butter and vanilla until smooth.
- Mix in oats until fully coated.
- Drop spoonfuls onto parchment paper and let them set at room temperature or in the fridge until firm.
Coconut Macaroons (No-Bake Version)
If tropical beaches had a snack mascot, it would be these macaroons. They’re chewy, sweet, and loaded with coconut flavor.
All you need is shredded coconut, a sticky binder like condensed milk or honey, and a quick chill in the fridge. They hold their shape beautifully and taste like a vacation in every bite.
For a fancy touch, dip the bottoms in melted chocolate. It’s the kind of upgrade that makes people think you spent hours, when in reality, you just let the fridge do the work.
Ingredients:
- 3 cups shredded coconut
- 1 cup sweetened condensed milk (or honey for a lighter option)
- 1 tsp vanilla extract
- Optional: melted chocolate for dipping
Instructions:
- Mix coconut, condensed milk, and vanilla in a bowl until sticky and well combined.
- Shape into small balls or mounds.
- Place on a tray lined with parchment and refrigerate for 1–2 hours until firm.
- Optional: Dip bottoms in melted chocolate and chill again until set.
Oreo Truffles
Three ingredients. That’s it. Oreos, cream cheese, and a coating of melted chocolate. Crush, mix, roll, dip—and suddenly you’ve got truffles that look like something from a bakery window.
They’re bite-sized, rich, and dangerously addictive. Perfect for parties, gifting, or just snacking straight from the fridge when you’re pretending you’ll only eat one (spoiler: you won’t).
These little gems prove that sometimes less really is more.
Ingredients:
- 36 Oreo cookies
- 8 oz cream cheese, softened
- 12 oz semi-sweet chocolate (for coating)
Instructions:
- Crush Oreos into fine crumbs (a food processor works best).
- Mix crumbs with cream cheese until fully blended.
- Roll mixture into small balls and place on a lined tray.
- Melt the chocolate and dip each ball, coating completely.
- Refrigerate until the chocolate is firm.
Healthy No-Bake Cookie Options
Almond Butter Energy Bites
Think of these as cookies disguised as little power packs. They’re sweet enough to feel like a treat but balanced with protein and healthy fats to keep you full.
Almond butter gives them a creamy base, while oats add chew and structure. A drizzle of honey or maple syrup holds everything together. Toss in extras like chia seeds, flaxseed, or dark chocolate chips if you want to level them up.
The best part? You don’t even need to shape them into perfect spheres—just roll, chill, and snack. They’re the kind of cookie that fuels you through that 3 p.m. slump without the sugar crash.
Ingredients:
- 1 cup almond butter
- 2 cups rolled oats
- ¼ cup honey or maple syrup
- ¼ cup mini chocolate chips or dried fruit
Mix everything in a bowl, roll into bite-sized balls, and chill for 30 minutes. Done.
Instructions:
- Add oats, almond butter, and honey to a mixing bowl. Stir until fully combined.
- Fold in chocolate chips or dried fruit.
- Scoop out spoonfuls and roll into small balls with your hands.
- Place them on a tray lined with parchment and chill in the fridge for at least 30 minutes.
- Store in an airtight container for up to a week.
Date & Nut Cookies
These cookies are nature’s candy in disguise. Dates bring natural sweetness and stickiness, while nuts add crunch and depth.
Blend them together and you’ve got a chewy, wholesome cookie that feels indulgent without a grain of processed sugar.
They’re perfect for anyone cutting back on refined sweets but still craving dessert. Add a sprinkle of cinnamon or cocoa powder if you want extra flair.
Pop them in the fridge, and you’ve got a snack that’s equal parts healthy and satisfying.
Ingredients:
- 2 cups pitted dates
- 1 cup almonds or walnuts
- 1 tsp cinnamon
Pulse dates and nuts in a food processor until sticky. Roll into balls or press into small cookie shapes. Chill until firm.
Instructions:
- Add dates and nuts to a food processor.
- Pulse until the mixture is sticky and crumbly but holds together when pressed.
- Sprinkle in cinnamon and pulse again to mix.
- Scoop out spoonfuls and shape into balls or press flat into cookie rounds.
- Chill in the fridge for 1 hour before serving.
No-Bake Granola Cookies
Granola isn’t just for breakfast bowls—it makes fantastic no-bake cookies too.
These are crunchy, chewy, and packed with fiber, which means kids can snack away while you feel secretly proud of sneaking something healthy into their hands.
The trick is to bind granola with nut butter and a touch of sweetener, then shape it into cookies.
They set up nicely in the fridge and taste like a cross between a granola bar and a cookie jar classic.
Think school lunchbox upgrade, or even a grab-and-go breakfast when mornings are chaotic.
Ingredients:
- 2 cups granola
- ½ cup peanut or almond butter
- ¼ cup honey or maple syrup
- ¼ cup dried fruit or seeds
Mix well, scoop into rounds, and flatten slightly. Chill for 1 hour before serving.
Instructions:
- In a saucepan, gently warm nut butter and honey until smooth and slightly runny.
- Pour the mixture over the granola in a bowl. Stir until everything is well coated.
- Add dried fruit or seeds and mix again.
- Scoop spoonfuls onto a parchment-lined tray. Flatten slightly into cookie shapes.
- Refrigerate for 1 hour, or until firm.
Fun & Kid-Friendly No-Bake Cookies
Rice Krispie Treat Cookies
Rice Krispie treats are already a childhood classic, but shaping them into cookies makes them even more fun. They’re gooey, chewy, and take almost no effort.
Marshmallows and butter melt down into sticky magic that binds everything together. The result is a cookie that crunches and melts at the same time.
Kids love helping press them into shapes, and parents love that they only need a microwave or stovetop—no oven drama.
Ingredients:
- 3 tbsp butter
- 4 cups mini marshmallows
- 6 cups Rice Krispies cereal
Instructions:
- Melt butter in a large pot over low heat.
- Add marshmallows and stir until completely melted and smooth.
- Remove from heat and fold in Rice Krispies until evenly coated.
- Scoop spoonfuls onto a parchment-lined tray and gently press into cookie shapes.
- Let cool for 20–30 minutes before serving.
Funfetti Sprinkle Cookies
These are the definition of “party in a bite.” They’re sweet, colorful, and ridiculously easy.
Sprinkles bring the fun, while a simple mix of white chocolate and cookie crumbs holds it all together.
Perfect for birthdays, playdates, or any day that needs a little brightness. They look fancy but require no baking skill whatsoever—kids will think you’re a genius.
Ingredients:
- 2 cups crushed vanilla wafers or shortbread cookies
- 1 cup white chocolate chips, melted
- ¼ cup sprinkles
Instructions:
- Crush cookies into fine crumbs using a food processor or rolling pin.
- Stir crumbs into melted white chocolate until evenly coated.
- Mix in most of the sprinkles, saving a few for topping.
- Scoop spoonfuls onto parchment paper and shape into rounds.
- Add extra sprinkles on top and refrigerate for 30 minutes to set.
S’mores-Inspired No-Bake Cookies
No campfire? No problem. These cookies capture the same gooey, chocolatey marshmallow goodness without the smoke or burnt marshmallows.
Graham crackers bring crunch, marshmallows add chew, and chocolate ties it all together. They’re messy in the best way, and kids will go wild for them.
Ingredients:
- 2 cups graham cracker crumbs
- 1 cup mini marshmallows
- 1 cup chocolate chips, melted
- 2 tbsp honey or corn syrup
Instructions:
- Mix graham cracker crumbs with honey in a large bowl.
- Fold in mini marshmallows.
- Pour in melted chocolate and stir until everything sticks together.
- Scoop spoonfuls onto a tray lined with parchment and flatten slightly.
- Chill for 1 hour before serving.
Tips for Perfect No-Bake Cookies
Chill Time Matters
Patience pays off here. No-bake cookies need time to firm up, otherwise you’ll end up with sticky piles instead of neat little rounds.
A quick 20–30 minutes in the fridge is usually enough, but an hour gives you the best texture.
If you’re in a rush, pop them in the freezer for a fast set. Think of it like letting paint dry—skip the wait, and things get messy fast.
Store in Airtight Containers
Air is the enemy of freshness. If you leave your cookies sitting out, they’ll go stale or dry in no time. The fix is simple: stash them in airtight containers.
In the fridge, they’ll last up to a week. For longer storage, freeze them in layers with parchment between each cookie. That way, you can grab a few whenever the craving strikes.
Adjust Sweetness Naturally
Not everyone wants a sugar bomb. The beauty of no-bake cookies is how easily you can swap sweeteners.
Honey, maple syrup, or even mashed bananas can replace refined sugar in many recipes.
It’s all about balance—just enough sweetness to keep them fun, but not so much that you feel like you’ve eaten dessert for breakfast (unless you want to, no judgment).
Experiment with Toppings
Here’s where you can let your inner artist out. A sprinkle of flaky sea salt adds contrast to rich chocolate cookies. A drizzle of melted white or dark chocolate makes them look bakery-worthy.
Crushed nuts or even toasted coconut bring crunch and flavor. These finishing touches don’t just look good—they also let you tweak each batch to suit your mood or occasion.
Storage & Make-Ahead Guide
No-bake cookies might be quick to make, but knowing how to store them properly makes all the difference.
In the fridge, most batches will stay fresh and chewy for about a week, while the freezer can stretch that timeline to two or even three months if you layer them with parchment paper to prevent sticking.
Airtight containers are your best friend here—plastic containers with snap lids or glass jars with tight seals keep out air and moisture, which means your cookies won’t turn into sad, dry crumbles.
If you need to transport them, pack them in shallow containers so they don’t get squished, and slip parchment between layers if they’re sticky.
For gifting or party prep, think ahead: roll them into neat, uniform shapes, let them chill overnight, then dress them up in small boxes, tins, or even cellophane bags tied with ribbon.
It’s a simple way to turn a batch of easy no-bake cookies into a thoughtful gift that looks like you put in way more effort than you actually did.
Final Words
No-bake cookies prove that dessert doesn’t need an oven or hours of work. They’re quick, versatile, and hit the sweet spot every time.
Try new mix-ins, swap flavors, and make each batch your own.
Tried one of these recipes? Share your no-bake cookie pics—we’d love to see them!
FAQs
Can I make no-bake cookies without oats?
Yes, absolutely. You can swap oats for crushed cereal, shredded coconut, or even finely chopped nuts.
The key is to use something dry that gives the cookies structure and keeps them from turning into fudge.
Can I use gluten-free or vegan substitutions?
Definitely. Gluten-free oats or gluten-free cereal work just as well.
For vegan options, replace butter with coconut oil or vegan butter, and use plant-based milk. Maple syrup or agave can easily take the place of honey too.
How do I keep them from getting too sticky?
Sticky cookies usually need more chill time or a better balance of dry ingredients. If they’re too wet, add extra oats, coconut, or crushed crackers to soak up the moisture.
Always let them set in the fridge until firm—impatience is usually the culprit.