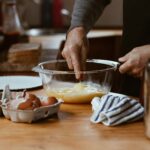
Baking isn’t guesswork—it’s chemistry in an apron. One extra spoonful of flour and your cake feels like a brick. A splash too much milk and your cookies spread like pancakes.
The truth is simple: precision in measuring turns good intentions into great bakes. Learn the right way to measure, and every recipe becomes repeatable magic.
Why Accurate Measuring Matters
Baking isn’t like cooking a pot of soup, where you can toss in “a little of this, a little of that.” It’s closer to mixing chemicals in a lab—tiny changes in amounts can completely change the end result.
That’s why measuring ingredients the right way isn’t just a nice-to-have. It’s the foundation of every successful bake.
Small Errors, Big Consequences
A single scoop of flour can make or break a cake. Add too much and you’ll end up with something dry and crumbly, the kind of cake that begs for a glass of water to wash it down.
Use too little and the cake turns dense and heavy, like it skipped leg day. The same goes for liquids—an extra splash of milk can make your cookies spread thin, while too little leaves them hard as hockey pucks.
The Power of Consistency
When you measure correctly, your recipes turn out the same every single time. That means no more “perfect cookies last week, flat ones this week” situations.
Consistency builds trust both in your recipes and in yourself as a baker. It’s the secret to turning family favorites into traditions because everyone knows what to expect when the oven timer dings.
Less Waste, More Wins
Accurate measuring also saves you from wasted ingredients. No one wants to toss out a sunken cake or rock-hard bread loaf that used up half a bag of flour and a dozen eggs.
Precise measuring helps you get it right the first time, saving money and frustration. It’s a small habit that pays big dividends in both taste and efficiency.
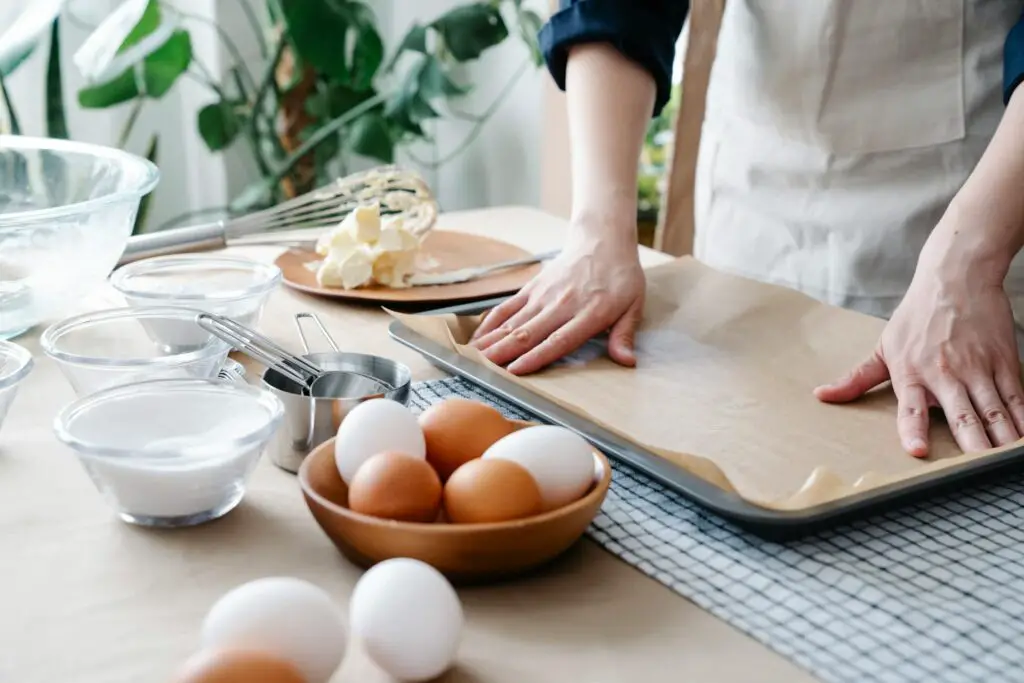
Essential Measuring Tools
The right tools make all the difference. You wouldn’t use a hammer to stir soup, so why measure liquids in the wrong cup?
Each tool has its role, and when you use them correctly, your baking goes from guesswork to precision.
Dry Measuring Cups
These are the solid cups that come in a set—usually ¼, ⅓, ½, and 1 cup sizes. They’re made for ingredients you can scoop and level, like flour, sugar, or cocoa powder.
The trick is to fill the cup and then scrape the excess off with a straight edge. Think of it like giving your ingredients a nice haircut. This ensures you’re not sneaking in extra flour that makes your cookies tough.
Liquid Measuring Cups
These are the clear cups with spouts, often marked with measurements along the side. They’re designed for liquids like water, milk, or oil. Unlike dry cups, you don’t level them off—you pour until the liquid hits the line.
Always check at eye level on a flat surface. If you’re holding it up in the air, you’re basically guessing, and that’s how pancakes turn into puddles.
Measuring Spoons
Never underestimate the power of these little guys. Baking soda, salt, and vanilla may look like small players, but they pack a punch. One teaspoon too many and your bread tastes like a science experiment.
Use the spoons exactly as labeled—tablespoon and teaspoon are not interchangeable. Trust me, mixing those up once is enough to teach anyone a lifelong lesson.
Digital Kitchen Scale
This is the MVP of measuring tools. A scale gives you gram-perfect accuracy, something no cup can guarantee. One cup of flour can vary by as much as 40 grams depending on how you scoop it.
A scale eliminates that guesswork. If you’re serious about baking—or just tired of inconsistent results—this is the tool to invest in. Professional bakers swear by it for a reason.
Optional but Helpful Extras
- Scraper/leveler: Perfect for flattening the tops of dry ingredient cups.
- Sifter: Keeps flour and powdered sugar light and lump-free.
- Clear prep bowls: Great for organizing ingredients before you start, so you’re not scrambling mid-recipe.
Measuring Dry Ingredients the Right Way
Dry ingredients can be sneaky. They look simple enough, but measure them the wrong way and your recipe takes a detour.
Each ingredient behaves differently, so the way you scoop matters more than you think.
Flour
Flour is the most common culprit in baking mishaps. Scooping it straight from the bag packs it down, giving you way more than you need. That’s how soft cookies suddenly become hockey pucks.
The right way? Lightly spoon the flour into your measuring cup, then sweep off the excess with a flat edge like a knife. Think of it as giving your flour a little trim at the top—neat and precise.
Brown Sugar
Unlike flour, brown sugar is meant to be packed. Scoop it in and press down firmly until it fills the cup completely. When you turn it out, it should hold the shape of the cup, almost like a mini sandcastle.
If a recipe says “loosely packed,” don’t press as hard—otherwise, go for the solid pack. This ensures your cookies and cakes get that deep, caramel sweetness they’re famous for.
Powdered Sugar & Cocoa Powder
These ingredients are prone to clumping. Nobody wants a lump of cocoa powder ruining the smoothness of a cake batter. Sifting is your friend here.
If the recipe calls for sifted sugar or cocoa, pass it through a fine sieve before measuring. This keeps the texture light and airy, helping your batters and frostings blend like silk.
Nuts, Chocolate Chips, and Extras
When measuring chunky add-ins like nuts, chocolate chips, or dried fruit, the goal is simple: fill the cup and level it off. Don’t shake or tap the cup to “fit more in.”
That little extra handful might not seem like much, but it can throw off the balance of a delicate recipe. Think of it as portion control for your batter—it gets just enough, not too much.
Measuring Liquid Ingredients the Right Way
Liquids are tricky. They like to slosh, slide, and settle wherever they please. That’s why using the right cup and technique matters.
A little too much milk or oil may not sound like a big deal, but it can tip the balance of your batter faster than you think.
Use the Right Cup
Liquid measuring cups are designed with spouts and see-through sides for a reason. They give you room at the top so liquids don’t spill over, and the markings let you see exactly how much you’ve poured.
Using a dry cup for liquids is like trying to drink soup with a fork—it’ll technically work, but it’s a mess waiting to happen.
Check at Eye Level
Here’s where most people go wrong: holding the cup up in the air while pouring. That’s basically guesswork. Set the cup on a flat surface, then bend down so your eyes are level with the markings.
Pour slowly until the liquid reaches the line. This small step prevents those “why is my pancake batter so runny?” moments.
Pour with Care
Rushing leads to overshooting, and overshooting means starting over or pretending it doesn’t matter (spoiler: it does). Pour steadily and stop just as you hit the line.
If you go over, don’t panic—just grab a spoon and scoop a little out. Better to fix it than bake with bad math.
Sticky Liquids Made Easy
Honey, molasses, and maple syrup love to cling to cups like a toddler who won’t let go of your leg. The trick? Lightly spray the measuring cup with cooking oil before pouring.
The liquid will slide right out, leaving nothing behind. It’s a simple hack that saves both time and frustration.
Measuring Sticky or Unusual Ingredients
Not everything fits neatly into a cup or spoon. Some ingredients like to play hard-to-get, clinging to spoons or coming in unpredictable sizes.
Knowing the tricks to measure them properly saves time, mess, and frustration.
Butter
Butter is one of the easiest ingredients to measure if it’s wrapped in sticks. Most wrappers are marked with tablespoon and cup measurements, so you can simply slice where needed. It’s quick, tidy, and reliable.
If your butter doesn’t come with markings—or if you want extra precision—use a kitchen scale. Weighing butter ensures you’re not short-changing a recipe that relies on fat for structure or flavor.
Sticky Ingredients
Peanut butter, honey, and molasses are notorious for sticking to spoons and cups. You scoop, you pour, and then half of it stays behind like a stubborn houseguest.
The fix? Lightly coat the measuring spoon or cup with oil or water first. The thin layer creates a barrier, and suddenly your peanut butter slides out like it’s on a slip ’n slide. It’s a small hack with a big payoff.
Eggs
Eggs are a little wild card in baking. Most recipes assume you’re using large eggs, each weighing around 50 grams without the shell. If you’re working with smaller or jumbo eggs, a scale can help you adjust.
Always crack eggs into a separate bowl before adding them to your mix.
That way, if a shell sneaks in—or the egg isn’t fresh—you won’t ruin the entire batter. Think of it as a safety checkpoint before your ingredients join the party.
Why Weighing Ingredients is Best
When it comes to true accuracy, nothing beats a kitchen scale.
Measuring by grams or ounces removes all the guesswork that comes with cups and spoons—no more wondering if your flour was packed too tightly or scooped too lightly.
A scale guarantees consistency, even when humidity or climate changes mess with ingredient volume (because yes, flour actually weighs differently on a damp day).
To put it in perspective, one cup of flour can swing anywhere from 110 grams to 150 grams, depending on how it’s measured, and that gap can mean the difference between fluffy bread and a dense brick.
With a scale, you always hit the sweet spot. Plus, weighing speeds things up: no fiddling with leveling off or scraping, just pour until the numbers match.
If the idea feels intimidating, start small—maybe weigh flour for bread or sugar for cookies—and slowly build the habit. Before long, you’ll wonder how you ever trusted measuring cups to do a scale’s job.
Common Measuring Mistakes (and Fixes)
Even the most enthusiastic bakers trip up when it comes to measuring. The good news? Most mistakes are easy to fix once you know what to look out for.
Scooping Flour Straight from the Bag
This is the classic rookie move. Scooping directly packs flour into the cup, giving you far more than you need. The fix? Spoon the flour into the cup and level it off.
Better yet, weigh it. Your cakes will thank you by staying soft instead of turning into building bricks.
Guessing with Liquids
Pouring milk or oil straight into the bowl “by eye” feels rebellious, but it rarely ends well. A little too much and your batter is soup. Too little and it’s dry as sand.
Always measure in a proper liquid cup at eye level. Precision doesn’t kill creativity—it saves your brownies from disaster.
Using Dry Cups for Liquids (and Vice Versa)
Dry cups aren’t designed for sloshy liquids, and liquid cups aren’t meant for flour. Mixing them up leads to subtle but frustrating errors.
Think of it like using chopsticks to eat soup—it can be done, but it’s not pretty. Stick to the tool made for the job.
Not Leveling Off
Mounded flour or sugar may look generous, but it’s a recipe’s worst enemy. Leveling ensures you’re not sneaking in “just a little extra.” Grab a knife or a straight edge and swipe it clean.
That tiny adjustment keeps your recipe balanced.
The Golden Routine
Want a foolproof system? Adopt the “scoop, spoon, level, weigh” routine. Spoon dry ingredients, level them off, and weigh when possible. For liquids, pour slowly and check at eye level.
This simple rhythm takes the guesswork out and sets you up for consistent, bakery-worthy results every single time.
Step-by-Step: Quick Measuring Checklist
Even with the best intentions, it’s easy to rush through measuring and end up with lopsided results.
A simple checklist keeps you on track and saves you from mid-bake regrets.
1. Read the Recipe Carefully
Before you touch a spoon or cup, read the instructions all the way through. Recipes often hide small but important details—like “sifted flour” or “loosely packed brown sugar.” Missing these cues can throw everything off balance.
2. Choose the Correct Tool
Dry ingredients go in dry cups, liquids in liquid cups. Measuring spoons are for the little stuff, and a scale is the gold standard when you want to be extra precise. Picking the right tool at the start is half the battle.
3. Spoon and Level Dry Ingredients
Never scoop flour or sugar straight from the bag. Instead, spoon it gently into the cup and level it off with a straight edge. This keeps your measurements clean and consistent.
4. Check Liquids at Eye Level
Set your liquid cup on a flat surface and bend down to check. Holding it in the air is like playing darts blindfolded—you’ll rarely hit the mark. Eye level makes sure you nail it every time.
5. Pack Where Required
Some ingredients, like brown sugar, are meant to be packed tightly. Press it down until it fills the cup and holds its shape when turned out. Unless the recipe says otherwise, assume it wants that little sugar “sandcastle.”
6. When in Doubt—Use the Scale
If you’re ever unsure, let the scale settle the debate. Grams and ounces don’t lie. Whether it’s flour, sugar, or even eggs, a quick weigh-in keeps your bake from going sideways.
Final Words
Accuracy in measuring isn’t about being fussy—it’s about setting yourself up for success. The fewer flops, the more wins, and the more fun baking becomes.
With a little practice, precision feels natural, almost like muscle memory. So dust off that recipe that gave you trouble before, measure the right way, and give it another go.
You might be surprised at how sweet the difference tastes.
FAQs
Do I really need separate cups for dry and liquid ingredients?
Yes. Dry cups are designed to be filled and leveled, while liquid cups give you space to pour without spilling. Mixing them up may seem harmless, but those small errors add up in baking.
Is weighing always better than cups?
Absolutely. A scale removes the guesswork and gives you consistent results every time. Cups can vary depending on how ingredients are packed, but grams and ounces never lie.
What’s the best way to measure sticky ingredients?
Lightly coat the spoon or cup with oil or water before scooping. Honey, peanut butter, and molasses will slide out easily instead of clinging like glue.
Can I “eyeball” small amounts like spices?
If you’re cooking dinner, maybe. But in baking, even a little extra baking soda or salt can throw off the recipe. It’s worth grabbing the measuring spoons to be safe.
How do professional bakers measure ingredients?
Most pros rely almost entirely on scales. They weigh everything—flour, sugar, butter, even eggs. It’s faster, cleaner, and ensures every batch turns out the same, whether it’s the first loaf or the hundredth.