Nothing beats the smell of apple pie drifting through the kitchen—it’s like wrapping your home in a warm hug.
One bite takes you straight back to family gatherings, holidays, or that one neighbor who always baked “the good stuff.”
Making an apple pie from scratch might sound tricky, but it’s simpler than you think.
With the right apples, a buttery crust, and a few classic spices, you can create a dessert that feels both nostalgic and impressive.
In this guide, I’ll walk you through everything step by step—from mixing the dough to getting that golden, bubbly finish.
By the end, you’ll have a pie that not only looks beautiful but tastes like pure comfort!
Essential Ingredients
Apples: The Stars of the Show
Not all apples are created equal when it comes to pie. You need ones that hold their shape and bring a balance of sweet and tart.
Granny Smith apples are the go-to for their bright, tangy flavor that cuts through the sweetness.
Honeycrisp adds a juicy crunch and natural sweetness. Mixing both creates the perfect flavor harmony—sharp and sweet, soft yet sturdy.
Aim for about 6–7 medium apples (roughly 2 ½ pounds once peeled and sliced).
Dough Ingredients: Building the Flaky Crust
A pie is only as good as its crust, and the secret is keeping it simple and cold. You’ll need:
- 2 ½ cups all-purpose flour (the base for structure)
- 1 cup (2 sticks) unsalted butter, cold and cubed (for those flaky layers)
- 1 teaspoon salt (brings out flavor)
- 1 tablespoon sugar (just a hint of sweetness)
- 6–8 tablespoons ice water (adds moisture without making it sticky)
Cold butter is your best friend here. Think of it as little pockets of flavor that melt during baking and create that dreamy, flaky texture.
Filling Ingredients: The Cozy Blend
Once your apples are sliced, it’s time to dress them up. Here’s the classic lineup:
- ¾ cup granulated sugar
- 1 teaspoon ground cinnamon
- ¼ teaspoon ground nutmeg
- 2 teaspoons fresh lemon juice
The sugar sweetens, the spices warm things up, and the lemon juice keeps the apples from browning while adding brightness.
Toss it all together, and your kitchen will already start smelling like fall.
Optional Add-Ins: The Little Extras
Want to give your pie a twist? Try mixing in:
- ¼ cup brown sugar for deeper, caramel-like sweetness
- 1 teaspoon vanilla extract for a subtle, cozy aroma
- ¼ teaspoon allspice if you like a more complex spice blend
These aren’t required, but they’re like the cherry on top—or in this case, the spice in the pie. Small touches can make your version feel unique.
Step 1: Make the Pie Dough
The crust is the backbone of your pie—it’s what holds everything together. Get this right, and you’re already halfway to success.
Mixing Dry Ingredients
Start with a large mixing bowl. Add 2 ½ cups all-purpose flour, 1 teaspoon salt, and 1 tablespoon sugar. Whisk them together so the salt and sugar are evenly distributed.
This step might feel simple, but it ensures your dough has a consistent flavor in every bite.
Cutting in the Butter Until Crumbly
Next comes the magic ingredient: butter. Add 1 cup (2 sticks) cold unsalted butter, cut into small cubes. Cold is non-negotiable—it’s what creates those flaky layers.
Use a pastry cutter, two knives, or even your fingertips to cut the butter into the flour. The goal is to end up with pea-sized bits of butter scattered through the mix.
Think of it like little butter nuggets waiting to melt in the oven and puff up into layers of flakiness.
Adding Cold Water Slowly
Now, drizzle in 6–8 tablespoons of ice-cold water, one tablespoon at a time. Gently mix with a fork after each addition. Stop as soon as the dough starts to come together.
If you can pinch it between your fingers and it holds, you’re good to go.
Don’t be tempted to add too much water, or you’ll end up with a tough crust. Pie dough likes to be handled gently—treat it like a fragile secret.
Shaping into Two Discs, Wrapping, and Chilling
Once the dough comes together, divide it into two equal portions. Shape each into a flat disc, wrap tightly in plastic wrap, and refrigerate for at least 1 hour.
Chilling does two things: it relaxes the gluten (so your crust isn’t chewy) and keeps the butter firm (so it can do its flaky magic in the oven).
If you’re pressed for time, you can even make this a day ahead.
Step 2: Prepare the Apple Filling
The apples are the heart of this pie. Treat them right, and the filling will be rich, cozy, and full of flavor.
Peel, Core, and Slice Apples Evenly
Start with about 6–7 medium apples (roughly 2 ½ pounds total once peeled and sliced). Peel the skins off with a vegetable peeler, core them, and then slice into ¼-inch thick pieces.
Try to keep the slices uniform—this way, they’ll all cook at the same pace. If the slices are too thick, they’ll stay crunchy; too thin, and you’ll end up with applesauce in your pie.
Even slices are your ticket to that perfect tender bite.
Toss with Sugar, Spices, and Lemon Juice
Place your apple slices in a large bowl. Add ¾ cup granulated sugar, 1 teaspoon ground cinnamon, ¼ teaspoon ground nutmeg, and 2 teaspoons fresh lemon juice.
Give it all a good toss until every slice is coated.
The sugar sweetens and draws out moisture, the spices bring warmth, and the lemon juice brightens the flavor while keeping the apples from turning brown.
It’s like giving your apples a cozy sweater and a splash of sunshine at the same time.
Let Sit to Draw Out Juices
Once coated, let the apples rest for about 10–15 minutes. During this time, the sugar pulls out the natural juices, creating a syrupy coating.
This step does two things: it balances the sweetness and keeps your pie from turning into a soggy mess.
If you see a little puddle forming at the bottom of the bowl, don’t panic—that’s liquid gold.
Some bakers even spoon a bit of it back over the apples after they’re in the crust for extra flavor.
Step 3: Assemble the Pie
This is the part where your kitchen starts to feel like a scene from a holiday movie. All the prep comes together here, and suddenly it looks like a real pie.
Roll Out the Bottom Crust and Line the Pie Dish
Take one chilled dough disc out of the fridge. Lightly flour your work surface and rolling pin. Roll the dough into a circle about 12 inches across and roughly ⅛ inch thick.
Don’t stress if it’s not a perfect circle—rustic is charming. Gently transfer the rolled dough into a 9-inch pie dish, pressing it down to fit snugly without stretching.
Let the excess hang over the edges for now.
Add Filling and Dot with Butter
Pour your prepared apple filling into the crust, spreading it out evenly. If there’s extra syrup at the bottom of the bowl, drizzle a little over the apples, but don’t drown them.
Next, cut 2 tablespoons of unsalted butter into small cubes and scatter them over the filling.
This little trick enriches the juices as the pie bakes and helps create that glossy, caramel-like sauce inside.
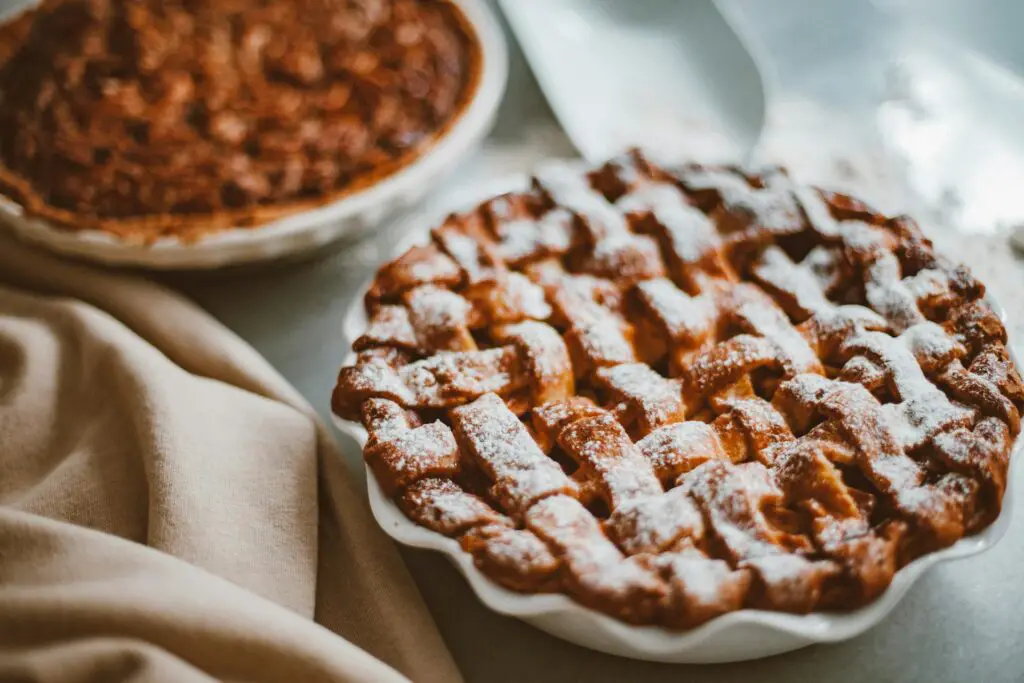
Roll Out Top Crust: Lattice or Full Cover with Vent Holes
Grab your second dough disc and roll it out to about the same size as the first. For a classic full crust, lay it right over the apples.
Remember to cut a few small slits in the center so steam can escape. If you’re feeling fancy (or just playful), go for a lattice top.
Cut the dough into strips about ½ to ¾ inch wide and weave them over the filling. It’s like basket weaving, but tastier.
Seal Edges and Crimp
Now, tuck the overhanging dough from the bottom crust up and over the top layer. Press the edges together to seal. Then crimp using your fingers or a fork for that signature wavy look.
This step isn’t just decorative—it keeps all those sweet juices locked inside the pie instead of running all over your oven.
Step 4: Baking the Pie
Now comes the moment where your hard work pays off. The oven does the magic, and your kitchen will smell like pure comfort.
Brush with Egg Wash or Milk for Golden Crust
Before sliding the pie into the oven, give the crust a little glow-up. Beat 1 egg with 1 tablespoon of water and brush it lightly over the top crust.
This egg wash gives you that golden-brown bakery finish. If you don’t have eggs on hand, brushing with 2 tablespoons of milk works too—just a bit softer in color but still appetizing.
Sprinkle with Sugar for Sparkle
For that extra touch, sprinkle 1–2 teaspoons of coarse sugar (like turbinado or even plain granulated sugar) over the crust.
It adds a sweet crunch and makes your pie sparkle like it belongs in a window display. Think of it as the pie’s jewelry—small detail, big effect.
Bake at 375–400°F Until Crust is Golden and Filling Bubbles
Preheat your oven to 375–400°F (190–200°C), depending on how hot your oven tends to run. Place the pie on the lower rack to make sure the bottom crust gets fully baked.
Bake for about 50–60 minutes. You’ll know it’s ready when the crust is golden and the filling bubbles up through the vents or lattice.
Those bubbling juices mean the apples are cooked and the filling has thickened. If the edges brown too quickly, cover them with strips of foil or a pie shield.
Cooling Time for Proper Setting
Here’s the hardest part: waiting. Let the pie cool on a wire rack for at least 2 hours before cutting. This allows the filling to set so it’s sliceable instead of soupy.
It’s tough to resist diving in right away, but trust me—your patience will be rewarded with clean, picture-worthy slices.
Tips for Success
Even the best bakers know apple pie has its quirks. A few smart tricks will save you from common mishaps and make sure your pie tastes as good as it looks.
Keep Everything Cold for Flaky Crust
Butter is the secret weapon for flakiness, but only if it stays cold. Always start with 1 cup (2 sticks) unsalted butter, chilled and cubed.
Even your water should be ice-cold—about 6–8 tablespoons. If your kitchen runs hot, pop the flour in the freezer for ten minutes before mixing.
Cold ingredients mean the butter won’t melt into the flour too soon. Instead, it creates steam pockets in the oven, which puff into those irresistible layers.
Think of it as baking’s version of magic popcorn.
Preventing Soggy Bottoms
Nobody likes cutting into a pie only to find a mushy crust. To dodge this, bake your pie on the lower rack of the oven so the bottom gets maximum heat.
If your edges brown too fast, use a pie shield or strips of foil to protect them while the bottom catches up. For extra insurance, some bakers partially pre-bake (or “blind bake”) the crust.
To do this, roll out the bottom crust, line it with parchment, fill it with pie weights or dried beans, and bake at 375°F for 15 minutes before adding the filling.
It’s an extra step, but it guarantees a crisp base that can hold up to juicy apples.
Balancing Tart and Sweet Apples
One type of apple rarely does the job alone. A blend creates depth and keeps things interesting.
For balance, try 3 Granny Smith apples (tart and firm) with 3 Honeycrisp apples (sweet and juicy). If Honeycrisp is pricey or hard to find, Golden Delicious or Braeburn make good backups.
Mixing varieties gives you layers of flavor—sharp, mellow, and sweet all in one bite. It’s the difference between a one-note song and a full symphony.
Serving Suggestions
A freshly baked apple pie deserves a grand entrance. Serving it right makes the experience even sweeter.
Classic Pairing: Warm Slice with Vanilla Ice Cream
The ultimate combo? A warm slice of apple pie with a scoop of vanilla ice cream. The contrast of hot and cold is unbeatable.
Serve each slice with about ½ cup (one generous scoop) vanilla ice cream.
As it melts into the pie, you get that creamy, dreamy sauce without lifting a finger. It’s comfort food in stereo—warmth and chill playing in harmony.
Alternative Toppings: Whipped Cream, Caramel Drizzle
If ice cream isn’t your thing, a dollop of whipped cream works beautifully. Spoon on about 2 tablespoons freshly whipped cream per slice.
Want to go bolder? Drizzle 1–2 teaspoons caramel sauce over the top. The caramel deepens the apple’s natural sweetness and adds a little gourmet flair.
Mix and match if you like—nobody ever complained about too much topping on a pie!
Storage and Reheating Tips
If you have leftovers (rare, but it happens), store them properly so every bite still tastes fresh. Cover the pie loosely with foil or plastic wrap and keep it at room temperature for up to 2 days.
For longer storage, refrigerate it for up to 5 days. To reheat, place slices in a 350°F oven for 10–15 minutes. The oven keeps the crust crisp, unlike the microwave, which can turn it soggy.
If you’re in a rush, microwaving works—just 30–40 seconds per slice—but know you’ll trade crunch for convenience.
Final Words
Homemade apple pie isn’t as intimidating as it looks. With the right apples, a flaky crust, and a little patience, you can bake a dessert that feels like pure comfort.
Don’t be afraid to put your own twist on it. Try mixing different apple varieties, or play with lattice designs and creative crust edges.
Now it’s your turn—bake one up, snap a photo, and share your apple pie story. Who knows? Your version might just become the new family favorite.
FAQs
Can I make the dough ahead of time?
Yes. Pie dough can be made up to 3 days in advance and stored in the fridge. You can also freeze it for up to 3 months—just thaw it overnight in the fridge before rolling out.
What’s the best substitute if I don’t have a pastry cutter?
No pastry cutter? No problem. Use two knives in a crisscross motion, or even your fingertips. Just work quickly so the butter stays cold.
Can I freeze apple pie before or after baking?
Both work. To freeze before baking, assemble the pie, wrap it tightly in plastic and foil, and freeze for up to 3 months.
Bake straight from frozen, adding about 15–20 minutes extra to the bake time. To freeze after baking, let the pie cool, wrap well, and reheat in a 350°F oven for 20–30 minutes.
How do I keep the crust from burning?
If the edges brown too quickly, cover them with strips of foil or a pie shield. That way, the center keeps baking while the edges are protected.
Can I use pre-made crust?
Absolutely. Store-bought crust saves time and still gives you a solid pie. Just follow the same steps for filling and baking.
Homemade adds extra flavor, but pre-made will still win hearts at the table.