Ever pulled a cake out of the oven only to find it’s sunken in the middle, dry as dust, or glued to the pan like it owes rent?
You’re not alone.
Even the best bakers burn a batch now and then. Baking is part science, part art—and one wrong move can leave you with a flop instead of a fluffy masterpiece.
In this post, we’ll cover 10 common cake baking mistakes and how to fix them, fast. So the next time you’re mixing up a batter, you’ll know exactly what not to do.
Let’s save your cakes before they crack, collapse, or crumble.
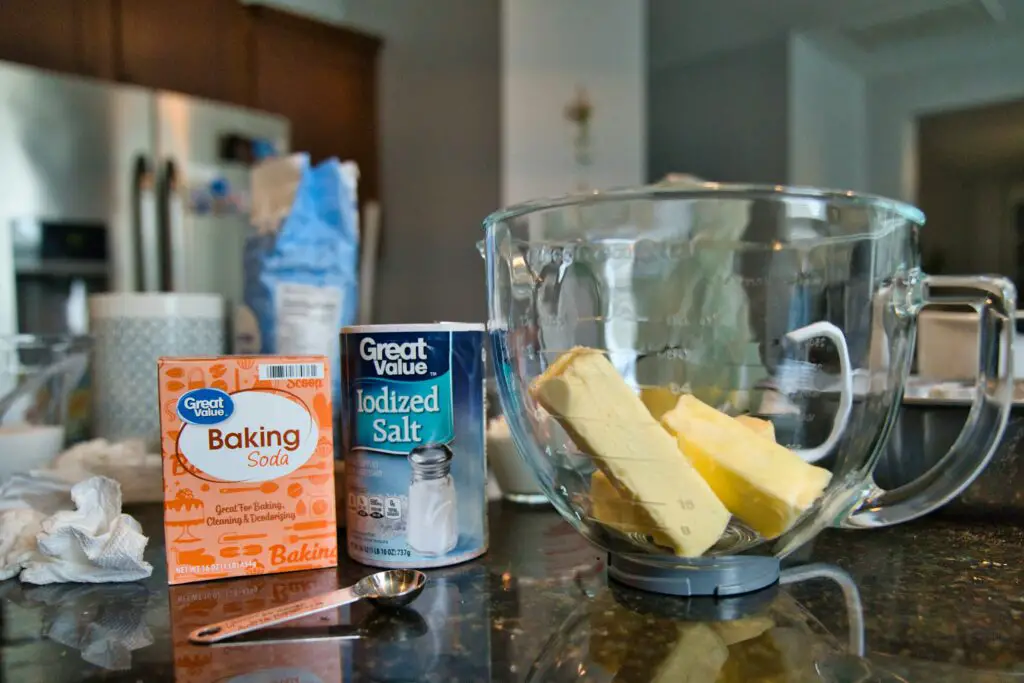
Mistake #1: Using Cold Ingredients
The Problem:
Cold ingredients might seem harmless—after all, they’re just sitting in the fridge, right? But when it comes to cake batter, temperature matters more than you think.
Cold butter won’t cream properly with sugar. Cold eggs won’t blend well with other ingredients. And cold milk can cause the batter to curdle or clump.
This messes with emulsification, which is just a fancy word for getting fats and liquids to play nice together.
When they don’t, you’re left with a lumpy, uneven batter that won’t rise evenly or bake as intended. The result? Dense, heavy, or cracked cakes that feel more like bricks than birthday treats.
The Fix:
Always bring your ingredients to room temperature—unless the recipe specifically tells you not to. That includes eggs, milk, butter, sour cream, yogurt, or anything else that usually lives in the fridge.
Room temperature means soft but not melted butter, and eggs that don’t feel like they came from the Arctic. This helps everything mix more smoothly and evenly, giving your cake that dreamy, tender crumb.
Pro Tip:
Forget to take your eggs or milk out in time? No sweat.
Pop your eggs in a bowl of warm (not hot) water for about 10 minutes. Microwave your milk in 10-second bursts until it’s slightly warm to the touch—not boiling.
For butter, cut it into chunks and let it sit on the counter for 15–20 minutes, or zap it in the microwave for just a few seconds—watch it like a hawk.
Room temp ingredients aren’t just a suggestion—they’re a secret weapon for better bakes.
Mistake #2: Overmixing the Batter
The Problem:
You know that moment when your batter looks so smooth and glossy you just have to keep mixing? Resist the urge. Overmixing is one of the sneakiest ways to ruin an otherwise perfect cake.
Here’s why: Flour contains gluten, and the more you stir, the more gluten develops. While that’s great for chewy bread or pizza dough, it’s a total disaster for cakes.
Too much mixing turns your batter into a tough, rubbery mess. Instead of light and airy, your cake comes out dense and springy—in the worst possible way.
The Fix:
When it’s time to add the dry ingredients (usually flour, baking powder, cocoa, etc.), slow things way down.
Mix just until you no longer see streaks of flour—no more, no less. If you’re using a stand mixer, stop it early and finish by hand.
This isn’t the time to flex your biceps or whip things into oblivion. Be gentle. Think of your batter like a sleepy cat—you want to fold it softly, not startle it into running under the bed.
Tip:
Swap out the mixer for a spatula once you hit the dry ingredient stage. Folding the batter by hand helps prevent overmixing and gives you more control.
Plus, you can scrape the sides and bottom of the bowl better this way—no rogue flour pockets hiding at the bottom.
Bottom line? Less is more when it comes to mixing. A few lumps won’t hurt, but an overworked batter definitely will.
Mistake #3: Not Measuring Ingredients Accurately
The Problem:
Baking isn’t like cooking. You can’t just eyeball a scoop of flour or toss in “about a cup” of sugar and hope for the best.
If you’ve ever ended up with a cake that’s dry as a desert or flat as a pancake, bad measuring might be the culprit.
Too much flour? Your cake turns out dry, dense, and crumbly. Too little? It sinks in the middle or feels undercooked no matter how long you bake it.
Even small mistakes in measuring can throw off the entire structure of your cake. It’s like building a house with crooked bricks—nothing stacks right.
The Fix:
Invest in a digital kitchen scale. It’s the gold standard for accurate baking. Most recipes written by serious bakers use grams or ounces for a reason—it eliminates guesswork.
If you’re sticking with cups, make sure you’re using the spoon-and-level method for flour. Don’t dig your measuring cup straight into the bag. That packs the flour and gives you way more than you need.
Instead, spoon the flour into your measuring cup lightly, then level it off with a knife. It’s slower than scooping, sure—but it saves your cake from turning into a crumbly brick.
Tip:
Don’t skip measuring liquids correctly, either. Use a clear liquid measuring cup set on a flat surface. Get eye-level with the lines. Tilted cups or guessing can lead to batter that’s too runny or too stiff.
Bottom line: baking is a science lab in your kitchen. A little precision goes a long way. Measure right, and your cakes will thank you with perfect texture and rise every time.
Mistake #4: Opening the Oven Door Too Early
The Problem:
We’ve all been there. You put the cake in the oven, set the timer, and five minutes later, you just want to peek. Maybe it smells amazing, or maybe you’re not sure it’s rising. So you crack open the oven door for a quick look…
And that’s where things go wrong.
Opening the oven door too soon can cause a sharp drop in temperature. That sudden chill can shock your cake and make it collapse in the middle like a deflated balloon.
All that lovely rise you were so excited about? Gone in seconds. It’s one of the most common reasons cakes end up with that dreaded sunken center.
The Fix:
Patience, baker. Let your cake do its thing without interruptions. A good rule of thumb: don’t open the oven until at least two-thirds of the bake time has passed.
If your cake bakes for 30 minutes, don’t even think about touching that door before the 20-minute mark.
By then, the structure has usually set enough to handle a little heat loss. But the earlier you open the door, the more likely the center will cave in.
And no, sticking it back in the oven doesn’t “fix” the sink.
Tip:
Use your oven light and peek through the glass instead. Most modern ovens have a light for a reason—take advantage of it. If your oven doesn’t have a window, resist the urge altogether.
Trust the timer, and follow the recipe. Opening the oven too early is like opening a surprise gift mid-wrap—it ruins the magic.
Give your cake the quiet baking time it needs. It’s not being rude—it’s just rising.
Mistake #5: Using the Wrong Pan Size
The Problem:
It might not seem like a big deal to use that random cake pan in the back of the cupboard—but pan size matters. A lot more than most people realize.
Too small? The batter overflows like a volcano, burning onto your oven floor and giving your cake a domed top with a gooey center.
Too large? The batter spreads too thin, bakes too fast, and dries out. Either way, the texture, bake time, and rise get totally thrown off.
Your cake ends up uneven, underbaked, or overcooked—and sometimes all three in one sad slice.
The Fix:
Always check what pan size the recipe calls for—and follow it. If it says 9-inch round, don’t swap it for an 8-inch square unless you know how to adjust the bake time.
Pan shape and depth also matter. A deeper pan takes longer to bake through, while a shallower one may dry out faster.
If you need to substitute, try using a pan conversion chart or online calculator.
And always keep an eye on the cake during baking—start checking it earlier if you’re using a wider pan, or give it more time if your pan is deeper.
Bonus Tip:
Don’t forget about pan prep. Use parchment paper to line the bottom of your pan and grease the sides well (or use pan spray with flour in it).
This helps the cake release cleanly, no wrestling matches required. There’s nothing worse than nailing the texture—only to have half the cake stuck to the pan.
Right pan, right prep, right result. Think of it like choosing the right shoes for the job—you wouldn’t wear flip-flops to a marathon, and your cake shouldn’t have to either.
Mistake #6: Overbaking or Underbaking
The Problem:
There’s a fine line between golden perfection and cake heartbreak. Leave it in too long, and you’ll get dry, crumbly edges that taste like cardboard.
Take it out too early, and you’re slicing into a raw, gooey middle that oozes like pudding. Neither is what you signed up for.
The tricky part? Cakes don’t come with built-in timers. Baking times in recipes are guidelines, not gospel.
Your oven might run hot, cool, or just plain moody—and if you rely solely on the timer, your cake might suffer the consequences.
The Fix:
Doneness checks are your best friend. Start checking a few minutes before the lowest time listed in the recipe. Gently insert a toothpick or skewer into the center of the cake.
If it comes out clean or with a few dry crumbs, you’re good. If it’s wet or streaky, give it more time.
Another method? The spring-back test. Lightly press the top of the cake with your fingertip. If it springs back instantly, it’s done. If it leaves an indent, it needs more baking.
Don’t be afraid to check more than once. A few extra pokes now are better than regrets later.
Tip:
Get to know your oven like it’s your baking partner. Use an oven thermometer to find out if the temperature on the dial actually matches what’s going on inside.
You’d be surprised—many ovens are off by 10–25°F.
Also, rotate your pans halfway through the bake if your oven has hot spots. It helps everything cook evenly and prevents burnt sides or uneven browning.
Remember, baking is a balance. It’s not just about time—it’s about timing. Watch, test, and trust your senses. That’s how you hit the sweet spot.
Mistake #7: Not Preheating the Oven
The Problem:
Skipping the preheat is like jumping into a swimming pool while it’s still filling up—awkward, uneven, and a little disappointing.
When you don’t fully preheat your oven, your cake starts baking in a lukewarm environment. That means the batter won’t rise the way it should, and the texture will suffer.
You might end up with a sunken center, an uneven crumb, or edges that overbake while the middle stays undercooked.
Baking is all about heat timing. Cakes need that immediate, consistent heat from the start to activate the leavening agents (like baking powder or baking soda).
If the oven’s still warming up, your cake’s not rising—it’s stalling.
The Fix:
Let your oven preheat completely before your cake goes in. Most ovens take about 10 to 15 minutes to reach the correct temperature.
Wait until that preheat indicator light or beep tells you it’s ready. And if your oven doesn’t signal when it’s done, use an oven thermometer to be sure. Trust, but verify.
Putting your cake in too early is a fast track to disappointment. It’s like waking someone up before their alarm—things get grumpy real fast.
Tip:
Never put your cake in while the oven is “getting there.” It might seem like you’re saving time, but you’re really sabotaging your bake.
While you wait for the oven to heat up, use that time to clean up your counter, prep your pans, or dance it out to your kitchen playlist.
Hot oven = happy cake. Simple as that.
Mistake #8: Skipping Sifting or Whisking Dry Ingredients
The Problem:
You’re in a rush. The oven’s preheating. The wet ingredients are mixed. And those dry ingredients? You just dump ’em in and call it a day.
But here’s the catch: skipping the sifting or whisking step can come back to bite you—hard. Ingredients like flour, baking powder, cocoa powder, or powdered sugar tend to clump.
And when you toss them straight into the batter, those clumps don’t always break down. They hide, stubbornly, and leave you with streaks, dry pockets, or weird little flour bombs in your cake.
Worse? You might end up with an uneven distribution of rising agents. That means some parts of your cake puff up beautifully… while others sink like a stone.
The Fix:
Take 60 seconds—seriously, that’s all it takes—and whisk or sift your dry ingredients together before adding them to the wet mix.
Whisking works great for most things. It helps break up clumps and combines everything evenly.
Sifting is ideal when you’re working with super-fine ingredients like cocoa powder, cake flour, or powdered sugar. It makes everything lighter, airier, and easier to mix into the batter without overworking it.
This tiny step makes a big difference in texture and rise.
Tip:
If you’ve ever had a bite of cake where the cocoa clung together like dry cement—yeah, that’s why this matters.
Cocoa powder is notorious for clumping. Same with powdered sugar. Always sift these for smooth, lump-free results.
And no, this isn’t just for “fancy” baking. Even your basic chocolate cake deserves a little dry ingredient prep. Whisk, sift, mix smart—and your cake will thank you with every slice.
Mistake #9: Frosting a Warm Cake
The Problem:
You’ve just pulled your cake out of the oven. It smells amazing. You’re excited. The frosting’s ready. You think, “Why wait?”
So you go in—frosting spatula in hand—and that’s when it all starts to go sideways. Literally.
The frosting melts. It slides off the edges like warm butter on toast. Instead of a beautiful, layered masterpiece, you’ve got a lopsided mess with gooey, greasy streaks. It’s heartbreaking.
Frosting a warm cake is like putting makeup on a sweaty face—it just doesn’t stick.
The Fix:
Wait. No, really—wait. Let your cake cool completely before you touch it with frosting. That usually takes at least 1–2 hours, depending on the size and thickness of the layers.
The inside might still be warm even when the outside feels cool, so don’t rush it.
If you’re short on time, you can speed things up by popping the cake layers into the fridge. Just make sure they’re out of the pan and on a wire rack or plate so air circulates all around.
A cool cake gives your frosting a smooth, even canvas. No melting, no sliding, no stress.
Tip:
Want ultra-clean layers? Chill the cake and the frosting. Cold layers are firmer and easier to stack, especially if you’re doing a layer cake or crumb coat.
You’ll get neater edges, better structure, and fewer crumbs dragging through your buttercream.
Patience is your secret ingredient here. A little chill time turns frosting from a battle into a breeze.
Mistake #10: Not Following the Recipe Exactly
The Problem:
We’ve all had that moment. You’re mid-bake and realize you’re out of buttermilk. So you grab almond milk and hope for the best.
Or maybe the recipe calls for cake flour, but all you’ve got is all-purpose. “Close enough,” right?
Not exactly.
Baking is not like cooking, where you can swap chili flakes for paprika and still get a tasty stew. It’s more like chemistry.
One wrong move—too much sugar, the wrong leavening, skipping a step—and the whole thing can fall apart. Literally.
Subbing baking soda for baking powder (or vice versa) can totally throw off the rise and flavor. Swapping flours can affect texture.
Even ignoring the mixing order can change how your cake bakes.
The Fix:
When trying a new recipe, treat it like sacred scrolls—at least the first time. Follow every step, every measurement, every instruction to the letter.
This gives you a solid foundation. Once you’ve nailed it, then you can tweak with confidence.
Want to swap oil for butter? Try a gluten-free flour? Cut the sugar a bit? That’s totally fine—after you know how the original behaves.
Recipes are tested with precision. Your best results come from respecting that process—especially if you’re baking for something important (like birthdays or bribes).
Tip:
Leavening swaps are not one-size-fits-all. Baking powder and baking soda might look similar, but they’re not interchangeable.
They react differently depending on the ingredients around them. If you don’t know the science behind it, don’t wing it.
Think of the recipe as your roadmap. Don’t take detours until you know where the potholes are.
Bonus Tips for Foolproof Cake Baking
Read the Entire Recipe First
Before you even think about cracking an egg, read the whole recipe. Top to bottom. No skimming.
You’d be surprised how many baking fails happen because someone missed a “chill overnight” or “divide batter evenly between two pans” step.
Reading ahead helps you plan, avoid surprises, and feel more confident from the start. It’s like checking the map before you start the road trip—you’ll get there a lot smoother.
Prep Everything Before You Mix
Baking moves fast once the wet and dry ingredients meet. That’s why it’s crucial to have your butter softened, eggs cracked, flour measured, and pans greased before you mix.
This is called mise en place (fancy French for “everything in its place”), and it’s the secret weapon of every good baker.
It keeps your batter smooth, your nerves calm, and your timing spot-on. No scrambling for vanilla mid-whisk.
Don’t Rush the Cooling
Once your cake is out of the oven, don’t go straight into frosting, cutting, or stacking. Let it cool fully—on a wire rack, not in the pan.
The structure needs time to set, and the flavors actually deepen a bit as it rests.
Trying to rush it can lead to soggy bottoms, frosting disasters, or crumbling layers. Give your cake time to settle and shine. It’s like letting a good story breathe before the big finale.
In short? Be prepared, stay patient, and follow the rhythm of the recipe. Great cake isn’t about luck—it’s about a few smart habits, done right every time.
Final Words
Cake disasters happen—even to the pros. But most baking mistakes come down to small, fixable habits. A little less guessing. A little more patience.
So don’t hang up your apron after one sunken sponge. Every flop is a step closer to getting it right.
Got a funny baking fail or a proud save you’ll never forget? Share it in the comments—I’d love to hear your sweetest (or stickiest) stories!