Starting your baking journey is exciting, but let’s be real—without the right tools, your cookies might double as hockey pucks.
The truth is, good baking isn’t just about the recipe; it’s about having the essentials that make mixing, measuring, and baking smooth and stress-free.
With the right gear, you’ll save time, avoid frustration, and actually enjoy the process.
In this post, you’ll find a simple list of must-have tools every beginner should start with—nothing fancy, just the basics that guarantee better bakes from day one.
1. Measuring Tools
Accuracy is everything in baking. Unlike cooking, you can’t just “eyeball” a scoop of flour and hope for the best. A little too much flour and your bread turns out dense.
Too little sugar and your cookies lose their magic. The right measuring tools keep your bakes consistent and save you from kitchen heartbreak.
Dry Measuring Cups
These are designed for ingredients like flour, sugar, cocoa, and oats. Each cup is meant to be filled to the top and leveled off.
A common mistake is using them for liquids, but that usually leads to under- or over-measuring. Imagine trying to fill a flat cup with milk—it’s a spill waiting to happen.
Stick to dry ingredients only and use a straight edge (like the back of a knife) to level it off. That simple move can mean the difference between fluffy muffins and heavy bricks.
Liquid Measuring Cups
Liquid measuring cups are clear, usually glass or plastic, with a handle and spout. They’re designed so you can see exact measurements without bending your neck like a flamingo.
Pour your milk, water, or oil, then check the measurement at eye level—don’t guess from above. The spout makes pouring smooth, so you’re not dripping batter all over your counter.
A one-cup version is handy, but a larger four-cup size saves you time when recipes call for bigger amounts.
Measuring Spoons
These tiny tools often get overlooked, but they’re crucial. Baking powder, vanilla extract, cinnamon—every teaspoon counts. A little too much baking soda and your cake tastes like soap.
Too little vanilla and you lose that warm, cozy flavor. Invest in a sturdy set that includes both teaspoons and tablespoons, preferably ones that fit into spice jars.
You’ll thank yourself later when you’re not trying to awkwardly tilt the jar just to scoop out a half teaspoon.
Pro Tip: Level for Consistency
Whatever you measure—flour, sugar, or spices—make leveling a habit. Use the flat edge of a knife, bench scraper, or even a ruler if you’re desperate.
It takes two seconds, but it’s the baking equivalent of tightening the screws on a wobbly chair. Everything holds together so much better.
2. Mixing Tools
Every baker needs a solid set of mixing tools. They’re the backbone of your kitchen—the things you’ll reach for whether you’re whipping up pancake batter on a Sunday morning or tackling your first layer cake.
Without them, you’re basically trying to build a house without a hammer. Let’s break down the essentials.
Mixing Bowls
A good set of mixing bowls is non-negotiable. You’ll want at least three: small, medium, and large.
Stainless steel is durable, light, and easy to clean, while glass lets you see what’s happening inside (and looks nice on the counter).
Bonus points if the bowls have non-slip bottoms—no one enjoys chasing a runaway bowl across the kitchen while stirring cookie dough.
They also nest together, saving you cabinet space, which is gold when your kitchen feels more like a shoebox.
Whisk
A whisk is like the Swiss army knife of baking. It aerates eggs, smooths out pancake batter, and blends dry ingredients in a pinch.
A balloon whisk is your best bet—it’s wide and flexible, making it easier to incorporate air. Yes, you could technically use a fork, but trust me, once you get a proper whisk, you’ll never go back.
It’s the difference between scrambled eggs that are fluffy and ones that feel like rubber bands.
Spatula (Silicone)
The silicone spatula might not look like much, but it’s a quiet hero in the kitchen. It scrapes every last bit of brownie batter from the bowl (no waste, more brownies).
It folds egg whites gently without deflating them. And because it’s heatproof, you can use it for stirring melted chocolate or caramel without fear of melting the spatula itself.
If you’ve ever tried scraping a bowl with a stiff wooden spoon, you’ll quickly see why silicone spatulas are worth every penny.
Wooden Spoon
Simple, sturdy, and reliable—the wooden spoon has been around forever, and for good reason. It’s tough enough for thick doughs but gentle enough not to scratch your pans.
Unlike metal, it won’t transfer heat and burn your hand mid-stir. And let’s be honest, something is charming about baking with a tool that your grandmother probably used too.
Just don’t put it in the dishwasher—hand wash it and it’ll last for years.
3. Bakeware Basics
Your oven might heat up like a champ, but if you’re using flimsy pans, your results will suffer. Bakeware is the stage where all your hard work—mixing, measuring, and prepping—finally comes to life.
The right pans make a big difference in how evenly things cook, how easily they release, and how stress-free cleanup is.
Baking Sheets / Cookie Sheets
Every baker needs at least one good baking sheet. Flat with a raised edge, they’re perfect for cookies, biscuits, and even sheet-pan dinners.
A sturdy baking sheet holds heat evenly, so your cookies don’t come out half-burnt, half-raw. Avoid the super thin ones that warp in the oven—they’ll twist like a bad magic trick.
A rimmed sheet also keeps melted butter or oil from spilling over the edge, which saves you from scrubbing the bottom of your oven later.
Cake Pans
A round cake pan is classic, but a square one works just as well. You’ll use them for birthday cakes, brownies, or layered desserts.
A good cake pan bakes evenly and releases cleanly, which means less drama when flipping your masterpiece onto a plate.
Stick with aluminum or heavy-duty non-stick versions. Skip the cheap, dark pans—they often over-brown your cakes before the center is ready.
Muffin Tin
A muffin tin might look like it’s only for cupcakes, but it’s actually a multitasking tool. Beyond muffins and cupcakes, you can make mini cheesecakes, egg bites, or even small rolls.
It’s a simple way to portion out treats and makes them easy to share.
Line the cups with paper liners for less mess, or lightly grease them if you want golden, crisp edges. Once you start using it, you’ll wonder how you ever managed without one.
Loaf Pan
A loaf pan is non-negotiable if you want to bake bread, banana loaves, or pound cake. The tall sides help the batter rise properly and hold its shape.
It’s also handy for meatloaf or even ice cream bread (yes, that’s a thing). A standard 9×5 inch loaf pan covers most recipes, so it’s worth investing in one solid, long-lasting pan.
Quality Matters
Good bakeware isn’t just about looks. Heavy-duty aluminum or non-stick pans distribute heat more evenly, last longer, and reduce sticking.
While it might be tempting to buy the cheapest set on the shelf, think of it this way: a reliable pan is like a trusty pair of sneakers—it supports you, lasts longer, and makes the whole journey smoother.
4. Prep Tools
Once your batter or dough is ready, prep tools step in to make the process smoother—and a whole lot less messy.
They’re like the backstage crew at a play: you don’t always notice them, but without them, the show falls apart. Let’s look at the key players.
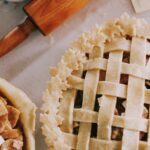
Rolling Pin
If you plan on making pie crusts, cookies, or biscuits, a rolling pin is a must. It flattens dough evenly, giving you consistent thickness and better results.
Wooden rolling pins are classic and sturdy, while marble ones stay cooler and help keep buttery dough from melting in your hands.
If you’ve ever tried flattening dough with a drinking glass, you know it works… sort of. But a proper rolling pin makes the job faster, easier, and much less frustrating.
Parchment Paper / Silicone Mats
Parchment paper and silicone baking mats are lifesavers. They prevent sticking, reduce burning, and make cleanup ridiculously easy. Parchment is disposable, great for lining pans or wrapping dough.
Silicone mats, on the other hand, are reusable and eco-friendly. Plus, they pay for themselves after a few uses. Think of them as your non-stick insurance policy—cookies slide right off, and sheet pans stay spotless.
Cooling Rack
Cooling racks might look like simple wire grids, but they’re more important than they seem. They allow air to circulate around your baked goods, preventing soggy bottoms and speeding up cooling time.
Leave cookies on a hot pan too long, and they’ll keep baking until they’re dry and hard. Transfer them to a rack, and they’ll stay crisp on the outside and soft on the inside. It’s a small tool that makes a big difference.
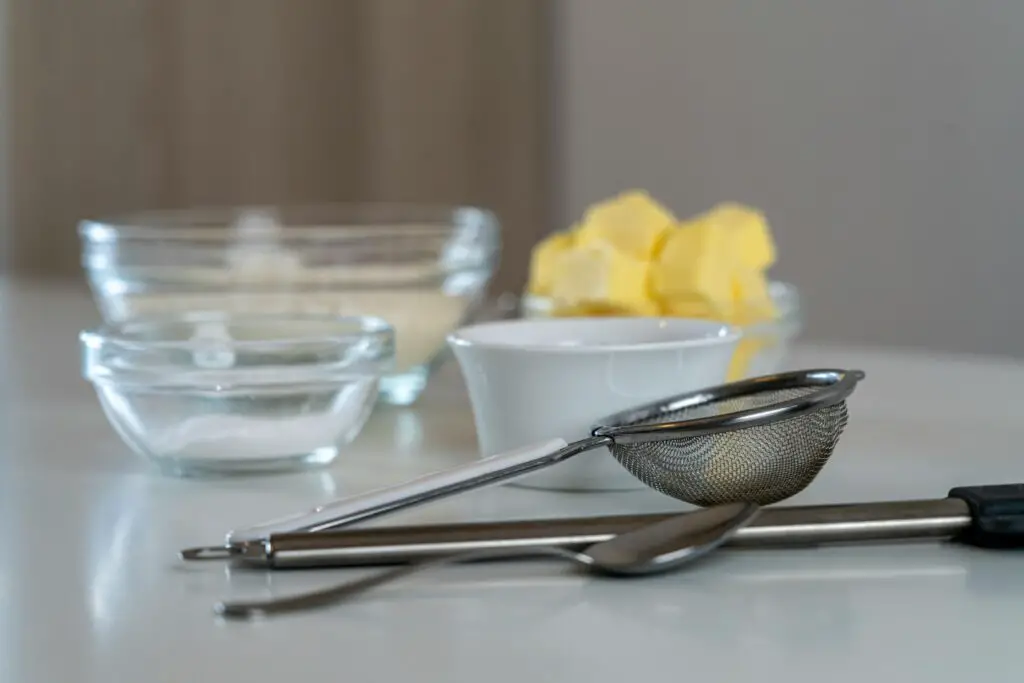
Sifter or Fine-Mesh Sieve
Clumpy flour or cocoa powder can ruin the smoothness of your batter. A sifter or fine-mesh sieve solves that by aerating dry ingredients and removing lumps.
It also helps evenly dust powdered sugar or cocoa on top of finished desserts, making them look bakery-worthy.
Some bakers skip this step, but it’s like skipping stretching before a workout—you can do it, but the results won’t be nearly as good.
5. Cutting and Shaping Tools
Once your dough is mixed and ready, cutting and shaping tools step in to give it form. These little helpers make the difference between rustic and refined.
Precision doesn’t just make your bakes look good—it also helps them bake evenly. Let’s go through the essentials (and a couple of fun extras).
Pastry Cutter / Blender
If you’ve ever tried to cut butter into flour with just a fork, you know it’s not fun. A pastry cutter, sometimes called a pastry blender, makes the job quick and clean.
The curved blades cut cold butter into pea-sized pieces that blend perfectly with flour. That’s the secret to flaky pie crusts and tender biscuits.
It also keeps your hands out of the dough, which prevents the butter from melting too soon. In short, it’s a small tool that saves you time and keeps your pastry light and delicate.
Bench Scraper
A bench scraper is like an extra hand in the kitchen. It slices dough into even portions, scrapes sticky bits off the counter, and helps transfer chopped ingredients without spilling them everywhere.
It’s a flat, rectangular blade with a handle, and it’s one of those tools you don’t realize you need until you get one.
Bakers love it because it keeps work surfaces tidy and makes handling dough much less of a sticky nightmare.
Cookie Cutters
Cookie cutters aren’t strictly necessary, but they add a touch of fun and creativity. They come in every shape you can imagine—stars, hearts, animals, even letters.
While they’re most popular during the holidays, you can use them year-round for themed parties or just to make snack time more exciting. Kids especially love them, and honestly, adults do too.
Even a simple round cutter can make your cookies look neat and professional.
6. Thermometers and Timers
Here’s the truth: ovens lie. That “350°F” flashing on the display doesn’t always mean it’s actually 350 inside. And let’s be honest—humans aren’t much better at guessing either.
That’s why thermometers and timers are lifesavers. They take out the guesswork and save you from burnt bottoms, undercooked centers, and all-around baking disasters.
Oven Thermometer
An oven thermometer is small, cheap, and shockingly important. Many ovens can be off by 25–50 degrees, which is enough to ruin a cake or leave cookies raw in the middle.
By placing a thermometer inside your oven, you know the real temperature, not the optimistic number on the dial. It’s like having a translator between you and your oven.
Set your oven to 350, check the thermometer, and adjust if needed—your bakes will instantly become more reliable.
Instant-Read Thermometer
This tool isn’t just for grilling meat—it’s a baker’s secret weapon. Use it to check if bread is fully baked (usually around 190–200°F in the center), or to test custards, cheesecakes, and even melted chocolate.
No more poking a loaf and wondering, “Does it sound hollow enough?” With an instant-read thermometer, you get a clear answer. It’s quick, precise, and takes away the stress of guessing.
Kitchen Timer (or Phone App)
Sure, you can “just keep an eye on it,” but we both know distractions happen. Enter the humble kitchen timer. It frees your brain from constant clock-watching and lets you multitask without fear.
Many ovens have built-in timers, but a standalone one (or even your phone) is handy for setting multiple reminders.
Because nothing’s worse than realizing you were so close—and now your cookies are two minutes past perfection.
7. Optional but Helpful Extras
Once you’ve got the basics down, you might find yourself craving a few extra tools that make baking smoother and more fun.
These aren’t absolute must-haves, but they’ll save you time, add polish to your bakes, and make the process feel less like work and more like play. Think of them as the “bonus level” of your baking kit.
Stand or Hand Mixer
Sure, you can whisk cream by hand—but your arm might not thank you for it. A hand mixer or stand mixer speeds up the process of whipping cream, kneading dough, and mixing thick batters.
A stand mixer is a bigger investment, but it can handle heavy lifting and lets you multitask while it works. A hand mixer is lighter on the wallet and still makes creaming butter and sugar a breeze.
Either way, once you try one, you’ll wonder how you ever lived without it.
Pastry Brush
A pastry brush may seem small, but it adds big flair. It’s perfect for brushing an egg wash onto pie crusts for that golden shine, glazing rolls with melted butter, or painting syrup on cakes.
Silicone brushes are easy to clean and durable, while traditional bristle brushes give you a lighter touch. It’s like a paintbrush for your bakes—only instead of painting walls, you’re painting flavor and shine.
Zester / Grater
Want to level up your flavor game? A zester or fine grater is your secret weapon.
Citrus zest brightens cakes and cookies, freshly grated nutmeg adds warmth to custards, and a sprinkle of grated chocolate instantly makes desserts look fancy.
It’s one of those tools that turns “good” bakes into “wow, did you really make this?” desserts. Plus, it’s fun to use—it feels like adding fairy dust to your batter.
Pie Weights
If you’ve ever tried blind baking a crust without pie weights, you know the struggle: puffed-up dough and uneven bottoms. Pie weights solve that problem by keeping the crust flat while it bakes.
You can buy ceramic or metal ones, but even dried beans or rice will do in a pinch. They may not be glamorous, but they guarantee that your pie shell looks bakery-worthy before you even add the filling.
Tips for Building Your Baking Kit on a Budget
Baking doesn’t have to drain your wallet. It’s easy to get carried away when you walk through the kitchen aisle—all those shiny gadgets practically beg to come home with you.
But here’s the secret: you don’t need everything at once. Building your baking kit slowly and smartly is the way to go.
Start with the Basics
Focus on the essentials first: a set of measuring tools, mixing bowls, a baking sheet, and one or two pans. These basics will cover 90% of beginner recipes.
Don’t worry about the fancy extras until you actually feel the need for them. It’s like learning to drive—you don’t start with a sports car, you start with something reliable.
Borrow Before Buying
Not sure if you’ll use a rolling pin more than once a year? Borrow one from a friend or family member. This “test-drive” approach helps you figure out what tools you’ll actually use versus what will just collect dust.
You might discover that some tools are worth the splurge, while others you can live without.
Invest in Multipurpose Items
Look for tools that pull double duty. A muffin tin, for example, isn’t just for cupcakes—it works for savory bakes like mini quiches or even meatloaf portions.
A good spatula works for folding batter, scraping bowls, and cooking scrambled eggs. Multipurpose tools stretch your money further and take up less space in your kitchen.
Watch for Sales or Secondhand Options
Kitchen gear can get pricey, but you don’t have to pay full price. Check seasonal sales, clearance racks, or even secondhand shops.
Many people donate barely used pans and utensils, and a quick scrub makes them as good as new.
Online marketplaces are also full of hidden gems. With a little patience, you can score high-quality tools for a fraction of the cost.
Final Words
Baking doesn’t require a mountain of gadgets—just a few reliable tools to set you up for success. Start small, keep it simple, and add more as you go. Don’t let the endless options overwhelm you.
Pick one recipe, grab the basics, and get baking today. The best way to learn is by rolling up your sleeves and diving in—messy counters and all.
FAQs
Do I really need both dry and liquid measuring cups?
Yes. Dry cups are meant to be filled to the top and leveled off, while liquid cups are designed for easy pouring and accurate viewing at eye level.
Using the wrong one can throw off your measurements, and in baking, small errors matter.
What’s the difference between silicone mats and parchment paper?
Parchment paper is disposable and great for one-time use. Silicone mats are reusable, eco-friendly, and last for years.
Both prevent sticking, but silicone mats save money long-term, while parchment is more flexible for odd-shaped pans.
Can I bake without an electric mixer?
Absolutely. A whisk, wooden spoon, and spatula can get the job done for most beginner recipes. An electric mixer just saves time and energy, especially with thick doughs or whipped cream.
What size cake pan is most versatile for beginners?
A standard 9-inch round or 8×8-inch square pan will cover most beginner recipes. They’re versatile for cakes, brownies, bars, and even layered bakes.
How do I know which tools to upgrade first?
Upgrade the items you use most often. If you bake cookies every week, invest in a quality baking sheet. If you’re mixing thick batters regularly, a good hand mixer is worth it. Let your habits guide your upgrades.