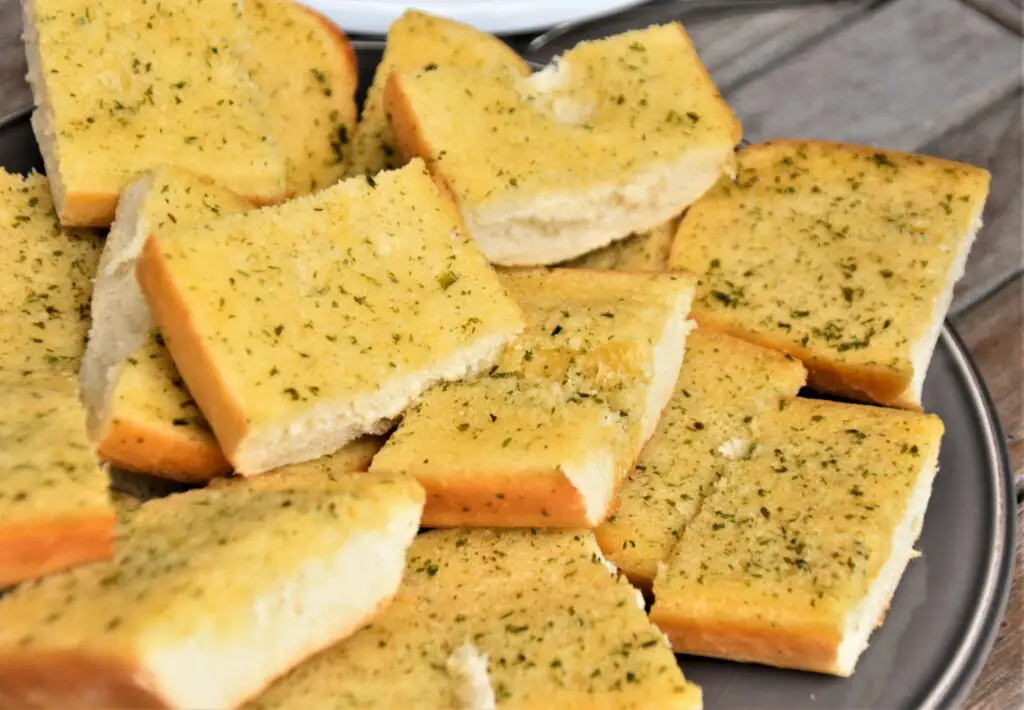
Golden, crispy edges. A soft, buttery center. That rich garlic aroma curling through your kitchen like a warm hug.
Making garlic bread from scratch sounds fancy, but it’s actually super simple.
In this guide, I’ll walk you through every step. You’ll get a foolproof dough recipe, a melt-in-your-mouth garlic butter spread, baking tips, fun variations, and answers to all your burning garlic bread questions.
Ready to level up your bread game? Let’s get into it.
Why Make Garlic Bread from Scratch?
The Flavor Hits Different (Because It’s Fresh)
Store-bought garlic bread can’t hold a candle to the real deal.
When you make it from scratch, the garlic is freshly minced, the butter is silky and rich, and the bread—oh, the bread—is warm, fluffy, and straight from your oven.
You control every layer of flavor, from the crust to the crumb. No weird aftertaste. No freezer burn. Just pure, honest, garlicky goodness.
Customize It However You Want
Love a little spice? Add chili flakes. Want it extra cheesy? Load it up with mozzarella, parmesan, or even a sprinkle of blue cheese if you’re feeling bold. Craving a herb-forward vibe?
Toss in fresh parsley, rosemary, or basil. Whether you’re a minimalist or a flavor maximalist, homemade garlic bread bends to your cravings. No two loaves have to be the same.
Save Money—and Skip the Mystery Ingredients
A loaf of store-bought garlic bread can cost more than the ingredients for two homemade batches.
And let’s be honest, have you ever tried pronouncing the stuff on the label?
When you make it at home, you know what’s going in: flour, water, garlic, butter, and love (the secret ingredient, obviously). No preservatives. No additives. Just real food.
It Looks Impressive (Even If You’re Just Wingin’ It)
There’s something magical about pulling a golden loaf of garlic bread from the oven—especially if you’re hosting.
It makes you look like you really know what you’re doing, even if you just followed a few simple steps.
It’s perfect for pasta nights, potlucks, or when you want to jazz up a weeknight dinner without actually doing too much.
Ingredients You’ll Need
Here’s everything you’ll need to bake garlic bread from scratch—split into two parts: the dough and the buttery garlic topping.
For the Bread Dough
This makes one medium loaf or about 8–10 slices of garlic bread.
- 2 ½ cups all-purpose or bread flour
(Scoop and level for accuracy) - 1 cup warm water (about 110°F / 43°C)
(Think warm bath water—not hot) - 2 ¼ teaspoons active dry yeast
(One standard packet) - 1 tablespoon sugar
(To feed the yeast and help it activate) - 1 teaspoon salt
(Adds flavor to the dough) - 2 tablespoons olive oil
(Keeps the dough soft and helps it rise)
For the Garlic Butter Topping
You can scale this up if you’re a “more garlic is better” kind of person.
- 4 tablespoons unsalted butter, melted
(You can use salted butter—just reduce added salt elsewhere) - 3–4 cloves fresh garlic, finely minced
(Adjust to your garlic love level) - 1 tablespoon chopped fresh parsley
(Or 1 teaspoon dried Italian herbs) - Optional add-ins:
- 2 tablespoons grated parmesan
- ¼ cup shredded mozzarella
- ½ teaspoon chili flakes (for a spicy kick)
Equipment Checklist
You don’t need a professional kitchen to make garlic bread from scratch. Just a few everyday tools will do the trick. Here’s what you’ll want to have on hand:
- Mixing bowl: For combining and kneading your dough. One large bowl works fine for both mixing and rising.
- Whisk or spoon: Use it to stir together your yeast mixture and later to bring the dough together before kneading.
- Baking sheet or loaf pan: A standard sheet pan works great for flat or braided styles. A loaf pan is ideal if you want taller, sandwich-style slices.
- Pastry brush (or spoon): A brush makes it easy to evenly coat the dough with garlic butter. No brush? A spoon or even your fingers will get the job done.
- Rolling pin (optional): Helpful if you’re shaping the dough into flatbread, knots, or garlic breadsticks—but not strictly necessary.
Step-by-Step Instructions
Let’s break this down into simple, manageable steps. No need to rush. Bread takes time, but each phase is easy—and totally worth it.
Step 1: Make the Dough
Start by activating your yeast. In a large mixing bowl, combine 1 cup warm water (about 110°F), 1 tablespoon sugar, and 2¼ teaspoons active dry yeast.
Give it a quick stir and let it sit for about 5–10 minutes. You’ll know it’s ready when it starts to foam and smell a little yeasty—like the start of pizza night.
Next, add 2½ cups flour, 1 teaspoon salt, and 2 tablespoons olive oil to the bowl. Stir with a spoon or dough hook until it starts to come together. Then knead it.
You can use your hands or a stand mixer with a dough hook. Knead for about 8–10 minutes by hand (or 5–6 minutes in a mixer) until the dough is soft, smooth, and slightly springy. It shouldn’t be sticky—add a bit of flour if needed.
Step 2: Let It Rise
Form the dough into a ball and place it in a lightly oiled bowl. Cover it with a clean kitchen towel or plastic wrap.
Let it rise in a warm spot for 60 to 90 minutes, or until it’s doubled in size. If your kitchen is chilly, place the bowl in the oven with just the light on—no heat.
This is the part where the magic happens. You can literally watch the dough grow. Go make yourself a coffee or cue up your favorite playlist while you wait.
Step 3: Shape the Bread
Once risen, punch the dough down gently to release the air. Now shape it however you like:
- Classic loaf – roll it tight and place it in a greased loaf pan.
- Braided loaf – divide into three pieces, braid, and tuck the ends.
- Garlic knots – roll and tie small strips into knots.
- Baguette-style – shape into a long oval on a baking sheet.
If you want that artisan look, score the top with a sharp knife. Just a few shallow slashes will help the bread expand while baking—and look gorgeous.
Step 4: Prepare Garlic Butter
While the shaped dough rests for a few minutes, prep the garlic butter. In a small pan, melt 4 tablespoons butter over low heat.
Stir in 3–4 minced garlic cloves and 1 tablespoon fresh parsley (or your herb of choice).
Let it simmer gently for 1–2 minutes, just until the garlic softens a bit. Don’t let it brown—it’ll turn bitter.
If you’re adding extras like parmesan, mozzarella, or chili flakes, stir them in now or save them for after baking.
Step 5: Brush and Bake
Preheat your oven to 375°F (190°C).
Generously brush the shaped dough with the garlic butter. Make sure you hit the sides and creases—no dry spots allowed. Then pop it in the oven.
Bake for 20 to 30 minutes, depending on the shape and size. A loaf will take closer to 30; smaller rolls or knots will be ready in about 20.
The top should be golden brown, and the bottom should sound hollow when tapped.
Step 6: Final Touch
As soon as it comes out of the oven, hit it with a second round of garlic butter. This step seals in flavor and gives the bread a glossy finish.
Want to really win people over? Sprinkle grated parmesan, fresh parsley, or a little more mozzarella while it’s still warm.
The cheese melts, the herbs pop, and suddenly, you’re everyone’s favorite person.
Let it cool just enough to handle—then slice, tear, or pull apart and dig in.
Optional Add-Ons & Variations
Garlic bread is already a crowd-pleaser, but why stop at classic when you can turn it into a showstopper?
These simple tweaks take your homemade loaf from delicious to “where has this been all my life?”
Cheesy Garlic Bread
Cheese lovers, this one’s for you. Right before baking, sprinkle ½ to 1 cup of shredded mozzarella all over the top of the buttered dough.
You can also mix in 2–3 tablespoons of grated Parmesan for extra depth. If you’re using a loaf pan, try layering cheese inside as you fold or roll the dough—like a surprise cheese center.
Once baked, the cheese bubbles, browns, and creates that irresistible crust. Pro tip: Add a final sprinkle of cheese in the last 5 minutes of baking for an extra melty top.
Spicy Version
If you like a little kick, it’s easy to turn up the heat. While melting the butter, toss in ½ teaspoon red pepper flakes or a pinch of cayenne pepper.
Want more fire? Add a dash of hot sauce or finely minced jalapeño to the garlic butter.
The spice balances the richness of the butter and adds a bold twist. Perfect for chili nights or if you’re pairing the bread with a creamy pasta.
Garlic Knots
Fun, snackable, and perfect for parties. After the first rise, divide the dough into small strips (about 8–10 inches long).
Tie each strip into a knot—like tying your shoe—and place them on a greased baking sheet.
Brush with garlic butter before baking, then again right after.
You can sprinkle with Parmesan or herbs, too. Serve with warm marinara for dipping, and you’ve got a restaurant-style appetizer at home.
Stuffed Garlic Bread
This version is next-level cozy. Roll out the dough into a rectangle and spread a layer of garlic butter right in the center.
Add a handful of shredded cheese, a sprinkle of herbs, or even sautéed onions or spinach.
Fold or roll the dough tightly, pinch the seams closed, and place it seam-side down on a baking sheet or in a loaf pan. Bake as usual.
When you slice into it, the filling melts out in cheesy, garlicky ribbons. Pure magic.
Tips for Best Results
Even simple recipes can level up with a few smart tweaks.
If you want garlic bread that tastes like it came out of a bakery (but better), these tips will help you get it just right.
A little extra care goes a long way.
Use Fresh Garlic, Not Garlic Powder
Yes, garlic powder is convenient. But fresh garlic? It hits different. It’s punchy, fragrant, and gives that signature aroma that makes people wander into the kitchen asking, “What are you making?”
Mince it fine so it blends smoothly into the butter. You can sauté it gently or simmer it with the butter to mellow it out.
Either way, fresh garlic brings the flavor to life—don’t skip it unless you absolutely have to.
Let the Dough Rise Fully for a Fluffier Texture
Good bread needs time. If you rush the rise, the dough will be dense and sad—not the soft, pillowy goodness we’re going for.
Wait until the dough doubles in size. It might take 60 to 90 minutes, sometimes a bit more, depending on your room temp.
You’ll know it’s ready when a gentle poke doesn’t spring back immediately. If your kitchen is cold, let it rise in a slightly warm oven (just the light on—no heat!).
Patience pays off in softness.
Don’t Overbake—Look for Golden Edges
Overbaked garlic bread turns dry fast. Instead of guessing, keep an eye on the color.
The bread is done when the top turns golden brown and the bottom sounds hollow when tapped.
Smaller pieces like knots or breadsticks bake quicker, so check around 20 minutes. A full loaf might need 30 minutes, but always trust your eyes more than the timer.
Want a Crispier Crust? Skip the Parchment
If you like that slightly crunchy bottom (think bakery-style), bake directly on a sheet pan or pizza stone. No parchment paper.
Parchment is great for easy cleanup, but it can block heat and leave the bottom too soft.
Baking directly on the hot surface helps the crust crisp up nicely, especially if you brushed it with a little butter or oil.
Serving Suggestions
Garlic bread doesn’t just sit quietly on the side of your plate—it steals the show if you let it. Here’s how to make your garlic bread the star of the meal (or at least the co-star).
Pair with Pasta, Soup, Salad, or Grilled Meats
Garlic bread was practically born to go with pasta. It’s perfect for scooping up extra sauce, especially with classics like spaghetti Bolognese, creamy Alfredo, or pesto dishes. But don’t stop there.
Got soup? A thick slice of garlic bread turns a light tomato or minestrone into a hearty meal. It’s also great alongside chili, stew, or butternut squash soup.
Salads? Yep. Serve it next to a crisp Caesar or a juicy Caprese for a balanced plate.
And if you’re grilling steak, chicken, or veggies—garlic bread is a golden sidekick. It’s the kind of carb that makes everything else taste better.
Dip It Like You Mean It
Dipping garlic bread is where the fun begins. Try these easy ideas:
- Warm marinara sauce – the classic pizza-adjacent option.
- Olive oil + balsamic vinegar – drizzle in a pinch of salt and pepper for an elegant touch.
- Garlic aioli or spicy mayo – creamy, bold, and addictive.
- Soup or stew – not technically a dip, but we won’t tell if you dunk.
If it’s warm, saucy, or cheesy, it probably loves garlic bread.
Entertaining? Slice It Up for Sharing
Hosting a crowd? Cut your garlic bread into thin strips or small squares. Serve it on a wooden board or tray with a few dips and spreads.
You’ve just created an easy appetizer that feels fancy without the effort.
You can also try a pull-apart version—score the bread in a crisscross pattern and stuff it with garlic butter, cheese, and herbs.
Bake until gooey and golden. People will be fighting for the last piece.
Garlic bread is flexible. Dress it up, keep it casual, serve it solo, or make it a team player. However you do it, just make enough. It disappears fast!
Storage and Reheating Tips
If you somehow manage to have leftovers (rare, but it happens), garlic bread stores and reheats surprisingly well, as long as you do it right.
To keep it fresh, store any cooled leftovers in an airtight container or zip-top bag at room temperature for up to 2 days. Any longer than that, and it’s best to freeze it.
Simply wrap slices in foil or plastic wrap, then place them in a freezer-safe bag; they’ll keep for about a month.
When you’re ready to reheat, skip the microwave—it makes the bread rubbery and sad. Instead, wrap it in foil and pop it in the oven at 300°F (150°C) for about 10 minutes.
This brings it back to life, keeping the crust crisp and the inside warm and soft. For extra flavor, brush on a little fresh garlic butter right after reheating.
If you’re working with frozen slices, there’s no need to thaw—just add 3–5 extra minutes to the bake time. Garlic bread deserves a proper encore, not a soggy second act.
Final Words
Homemade garlic bread is warm, buttery magic—crisp on the outside, soft on the inside, and packed with flavor you can actually control.
It’s easy, customizable, and way better than anything frozen.
Try it once, and you might never go back. Add cheese, spice, or keep it classic. Your kitchen, your rules.
Tried it? Tag us in your garlic bread creations—we’d love to see them!
FAQs
Can I use store-bought dough?
Absolutely. If you’re short on time or just not in the mood to make dough from scratch, store-bought works fine. Look for pizza dough in the refrigerated section.
Let it come to room temp, shape it, and follow the same garlic butter and baking steps. You’ll still get fresh, homemade vibes with half the work.
How do I make it vegan?
Easy! Swap the butter for a plant-based alternative—vegan butter or even olive oil works well. For cheesy versions, use dairy-free cheese shreds.
And make sure your dough doesn’t contain milk or honey (some pre-made ones do). The flavor still slaps, and no one will miss the dairy.
Can I prep it ahead of time?
Yes. You can make the dough in advance and store it in the fridge for up to 24 hours before shaping and baking.
Or, shape and brush the dough with garlic butter, then cover and chill for a few hours.
When you’re ready to bake, let it sit at room temp for 20–30 minutes while the oven preheats. Fresh garlic butter can also be made ahead and stored in the fridge for up to a week.
What if I don’t have yeast?
No yeast? No problem. You can make a quick version using baking powder and a no-rise dough (think biscuit-style bread).
The texture will be different—more dense and crumbly—but still tasty. Or try garlic flatbread or naan for a fast, yeast-free fix.
Can I use whole wheat flour?
You can, but expect a denser loaf. Whole wheat flour has less gluten, so the rise won’t be as airy. Try using half whole wheat and half all-purpose flour for the best of both worlds.
Add a splash more water if the dough feels dry, and let it rise fully. The nutty flavor pairs great with garlic and herbs.