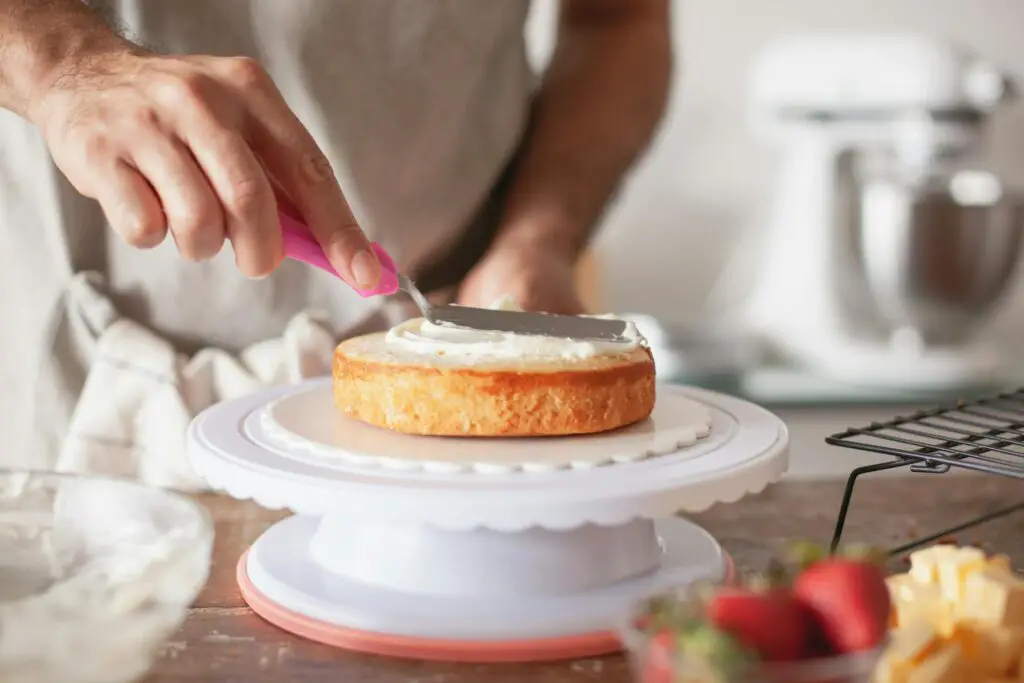
Ever wondered how bakeries get that dreamy, cloud-like frosting? Let’s recreate it at home.
Buttercream is the crown jewel of cakes, cupcakes, and even cookies. It’s rich, fluffy, sweet—but not too sweet—and ridiculously easy to make once you know the trick.
In this post, you’ll learn the exact steps for perfect homemade buttercream. Smooth, spreadable, pipeable perfection—no fancy tools or pastry degree required.
Ready to whip it good? Let’s dive in.
What Is Buttercream Frosting?
Buttercream frosting is a smooth, sweet, and creamy topping made primarily from butter and sugar, used to frost cakes, cupcakes, cookies, and just about anything that needs a little extra joy.
It’s the kind of frosting that spreads like a dream, pipes beautifully, and tastes like childhood birthdays in a bowl.
While there are several types of buttercream—each with its own flavor and technique—American buttercream is the simplest and most forgiving.
Swiss and Italian buttercreams use egg whites and involve heating sugar, which gives them a silky, meringue-like texture but also adds complexity and extra steps.
French buttercream is even richer, using egg yolks for a custard-like finish.
But if you’re just starting out or want something quick, reliable, and delicious, American buttercream is your best friend.
It’s made by creaming softened butter with powdered sugar, then adding a touch of vanilla and milk or cream to get the right consistency.
No thermometers, no double boilers—just a bowl, a mixer, and a few pantry staples. That’s why it’s the go-to for home bakers: easy to make, easy to love, and endlessly customizable.
Tools and Ingredients You’ll Need
Equipment
- Hand mixer or stand mixer – essential for whipping the frosting until light and fluffy
- Large mixing bowl – deep enough to prevent powdered sugar from puffing everywhere
- Rubber spatula – for scraping down the sides and folding the frosting
- Measuring cups and spoons – for accurate quantities
- Optional: piping bag and decorating tips – for a bakery-style finish on cakes and cupcakes
Ingredients
- 1 cup (2 sticks) unsalted butter, softened to room temperature
- 3 to 4 cups powdered sugar, sifted to remove lumps (start with 3 cups and adjust as needed)
- 1½ to 2 teaspoons pure vanilla extract, for flavor
- 2 to 4 tablespoons milk or heavy cream, to adjust consistency
- ⅛ teaspoon salt (optional), to balance sweetness and enhance flavor
Step-by-Step: How to Make Classic American Buttercream
1. Soften the Butter
Start with unsalted butter that’s truly softened—not melted, not cold. You should be able to press your finger into it easily, and it should hold a slight shape.
Cold butter won’t whip properly, and melted butter turns into a greasy mess.
Leave it out on the counter for about 30–60 minutes before you start. Shortcut? Cut the butter into cubes to speed up softening.
2. Beat the Butter
Place the softened butter into your mixing bowl and beat it on medium to high speed for 2–3 minutes. You’re looking for a pale, fluffy texture—almost like whipped cream but buttery.
This step builds the base for that light, cloud-like finish. Don’t rush it; under-whipped butter = dense, sad frosting.
3. Add Powdered Sugar Gradually
Turn your mixer to low and add the powdered sugar one cup at a time. This avoids powdered sugar clouds exploding all over your kitchen—trust me, it happens.
After each addition, beat until the sugar is fully incorporated.
Scrape down the sides of the bowl as you go. Once all the sugar is in, turn the mixer up and beat for another minute until smooth and fluffy.
4. Add Vanilla and Salt
Now’s the time to add your vanilla extract and a pinch of salt.
The vanilla gives the buttercream that classic bakery flavor, and the salt cuts through the sweetness, making everything taste more balanced and intentional—not like a sugar bomb.
Mix for 30 seconds until well blended.
5. Adjust Consistency with Milk or Cream
Start with 2 tablespoons of milk or heavy cream, then add more (up to 4 tbsp) if needed. If the frosting feels too thick or hard to spread, a splash of liquid goes a long way.
Want it thinner for spreading on cakes? Add more cream. Want it firmer for piping roses or swirls? Stick with less. You’re in control here.
6. Beat for Volume
Turn your mixer to high and whip the frosting for an extra 2–3 minutes. This final beat gives it lift and fluff, like turning butter into frosting clouds.
The longer you beat (within reason), the more air you incorporate. Result? A light, airy, spreadable dream that’s ready to top anything from cupcakes to cookies.
Buttercream Tips for Perfection
Always Sift the Powdered Sugar
Yes, it’s one extra step—but it makes a big difference. Powdered sugar tends to clump in the bag, and those little lumps don’t magically disappear when mixed.
Sifting gives your buttercream a silky-smooth texture.
No gritty bites. No awkward crunches. Just smooth, spreadable magic. Use a fine mesh strainer or a traditional sifter, and shake it over a bowl before adding it to your mix.
Don’t Overheat the Butter
Warm butter is great. Melted butter? Not so much. It might seem like a shortcut to microwave the butter to soften it, but resist the urge.
Melted butter won’t whip. Instead, it creates a greasy mess that separates and refuses to fluff.
If you’re short on time, cut the butter into small cubes and let it sit at room temperature—it’ll soften faster without turning into soup.
Use High-Quality Vanilla
Vanilla is the soul of buttercream. It’s what makes it taste like frosting instead of just sweetened butter.
If you can, go for pure vanilla extract over imitation—it’s worth the extra dollar.
A good vanilla adds depth, warmth, and that “wow, this tastes like a bakery” flavor. If you’re feeling fancy, try vanilla bean paste or scrape a real vanilla pod. Small ingredient, big impact.
Beat Longer for a Fluffier Finish
Think of your mixer as your frosting’s personal trainer. The more you whip (within reason), the more air you work into the buttercream.
This extra time gives you volume and that melt-in-your-mouth texture everyone loves.
Two to three minutes of high-speed mixing at the end can take your frosting from good to bakery-tier. Don’t stop too soon—fluffy frosting is worth the wait.
Add a Pinch of Salt to Cut Sweetness
Buttercream can lean on the sweet side—especially American buttercream. A tiny pinch of salt (we’re talking ⅛ teaspoon or less) helps balance things out.
It doesn’t make it salty. It just rounds out the flavor and gives it a more polished, grown-up taste. Like a plot twist in a movie, it’s subtle but powerful.
Flavor Variations to Try
Chocolate (Cocoa Powder or Melted Chocolate)
Craving something rich and chocolatey? You’ve got two great options. Add ½ cup of unsweetened cocoa powder to your finished buttercream for a classic chocolate twist—just sift it in and beat until fully combined.
Want it deeper and fudgier? Melt 4–6 oz of semi-sweet or dark chocolate, let it cool slightly, then beat it into your buttercream.
Cocoa powder gives a lighter, milk-chocolate feel. Melted chocolate brings drama—bold, silky, decadent. Choose your vibe.
Strawberry (Freeze-Dried Powder or Puree)
For berry lovers, strawberry buttercream is a sweet and fruity dream. The best method? Use freeze-dried strawberries.
Blitz about ½ cup in a blender or food processor until it becomes a fine powder, then mix it into your buttercream. It adds real flavor without watering down the texture.
Want to go fresh? Cook ½ cup of strawberry puree down until it thickens, then cool completely before adding. It’s a bit more work, but the flavor payoff is worth it.
Lemon (Zest + Juice)
Need a bright, zesty buttercream to cut through the sweetness? Lemon is your answer. Add 1 to 2 teaspoons of fresh lemon zest and 1 tablespoon of fresh lemon juice to your vanilla base.
The zest carries most of the flavor, while the juice adds brightness and a touch of tartness.
Just don’t go overboard with the liquid or you’ll thin out the frosting. Want more zing? Try a drop of lemon extract to boost it.
Mocha (Coffee + Chocolate)
Mocha buttercream is basically a hug in frosting form. Start by mixing 1 tablespoon of instant espresso powder or strong instant coffee with 1 teaspoon of hot water until dissolved.
Add it to your buttercream with ¼ cup of cocoa powder (or a few ounces of melted chocolate).
The result is deep, rich, and slightly grown-up—perfect for chocolate cakes, brownies, or your secret midnight spoon sessions.
Peppermint, Almond, or Coconut Extract
Sometimes all you need is a drop or two of something unexpected. Peppermint extract makes your frosting feel festive—great for holidays or chocolate cupcakes.
Almond extract gives it a sweet, marzipan-like edge.
Coconut? Tropical, breezy, and perfect on carrot or vanilla cakes. Start slow: ¼ to ½ teaspoon goes a long way.
Taste as you go—extracts are strong, and no one wants a mouthful of toothpaste or almond overload.
Coloring Your Buttercream
Best Food Coloring Types (Gel vs Liquid)
When it comes to adding color to your buttercream, gel food coloring is the way to go. It’s super concentrated, which means you get bold, vibrant shades using just a tiny amount.
Even better, it doesn’t mess with the texture of your frosting.
Liquid food coloring, the kind found in most grocery stores, can work in a pinch—but you’ll need a lot more of it to get rich color, and that extra liquid can make your buttercream too soft or even runny.
For pastel shades, either will do. But for vivid hues (like deep red, royal blue, or pitch black), gel is your best friend.
Tips for Vibrant Colors Without Altering Texture
Start with just a toothpick swipe or a drop, then mix and add more as needed.
Buttercream darkens as it sits, especially reds and blues, so give it 10–15 minutes before deciding if you need more. Want a deep color without ruining the texture? Let it rest overnight.
The pigment continues to develop and deepen, all without turning your frosting soupy.
If you’re chasing true red or black, start with a chocolate or tinted base—adding color to already-brown or grayish buttercream gets you there faster and with less dye.
Bonus tip: Always color your frosting before adjusting the consistency—not the other way around.
Mixing Colors for Creative Combos
Want something fun beyond basic colors? Mix your own shades! For peach, combine a dab of pink and a touch of yellow. Mint green? A bit of green and just a whisper of blue.
You can even swirl multiple colors in a single piping bag for a tie-dye or ombré effect—just spread different tinted buttercreams along the sides of the bag and pipe as usual.
Planning a theme? Match your frosting to party colors, seasons, or holidays.
Just remember: mix in small batches and jot down what you used. That way, if you nail the perfect “sunset coral,” you can actually recreate it again.
Storing and Using Buttercream
How Long It Lasts (Fridge/Freezer)
Buttercream is surprisingly low-maintenance. Once made, it can be stored in the fridge for up to 1 week or frozen for up to 3 months.
Just pop it into an airtight container—no need to overthink it. In the fridge, it may harden a bit, but it’ll hold its flavor and texture just fine.
In the freezer, make sure to label it (your future self will thank you), and when ready to use, thaw it overnight in the fridge.
How to Re-Whip Before Use
Cold buttercream looks sad. It turns stiff and dull—like frosting that gave up. But don’t worry, it just needs a little revival.
Let it come to room temperature first—don’t skip this part. Once it’s soft enough, beat it again for 2–3 minutes on medium-high speed.
This re-whipping brings it back to life, restoring its fluff, shine, and smooth texture. If it feels too thick after whipping, add a tablespoon of milk or cream to loosen it up.
Best Way to Store Leftovers
Got extra frosting? Lucky you. Store it in a clean airtight container, and press a piece of plastic wrap directly onto the surface before sealing the lid.
This keeps air from drying it out or forming a crust. Want to save small amounts in ready-to-use piping bags? Just twist the top tight and store them flat in a Ziploc bag.
Great for quick cookie decorating or emergency cupcake situations (yes, that’s a real thing).
When to Frost: Room Temperature vs Chilled Cakes
Here’s the golden rule: Always frost a completely cooled or slightly chilled cake. Warm cakes = melted buttercream = heartbreak.
You can even chill your cake layers in the fridge before frosting—this helps control crumbs and keeps your frosting from sliding around.
As for the buttercream itself, it’s best applied when soft and spreadable. So if it’s been chilled, give it time to come back to room temp and re-whip it before diving in.
Cold cake + soft buttercream = the dream team.
| Problem | Fix |
|---|---|
| Too runny | Add more sugar or chill it |
| Too stiff | Add more milk/cream |
| Grainy | Keep whipping or use finer sugar |
| Too sweet | Add salt or a splash of lemon juice |
Final Words
Making buttercream at home is easier than it looks—and way more satisfying.
With just a few ingredients and the right technique, you can whip up a batch that tastes like it came straight from a bakery.
Try out new flavors. Play with colors. Have fun with it. Whether you’re frosting a birthday cake or sneaking spoonfuls from the bowl (no judgment), there’s no wrong way to enjoy it.
Tried it? Share your frosting masterpiece in the comments—I’d love to see what you create!
FAQs
Can I make it ahead of time?
Yes! Buttercream is super make-ahead friendly. You can make it up to a week in advance and store it in the fridge, or freeze it for up to 3 months.
Just let it come to room temp before using and re-whip it until smooth and fluffy again.
Can I make it dairy-free or vegan?
Absolutely. Swap unsalted butter with plant-based or vegan butter (choose one with a high fat content for best results). Use non-dairy milk like almond, oat, or soy to adjust consistency.
Same texture, same delicious result—just without the dairy.
Will it hold up in hot weather?
Buttercream and heat are not best friends. In warm temps, especially outdoors, it can start to melt or lose shape.
For better stability, use less milk, and chill the frosting and cake before serving. You can also try using half shortening, half butter to help it stay firm longer.
What’s the best butter to use?
Go with unsalted butter so you can control the flavor. Look for high-quality brands with 80% or more butterfat.
The better the butter, the creamier and richer your frosting will taste. Bonus: high-fat butter also whips up fluffier.


