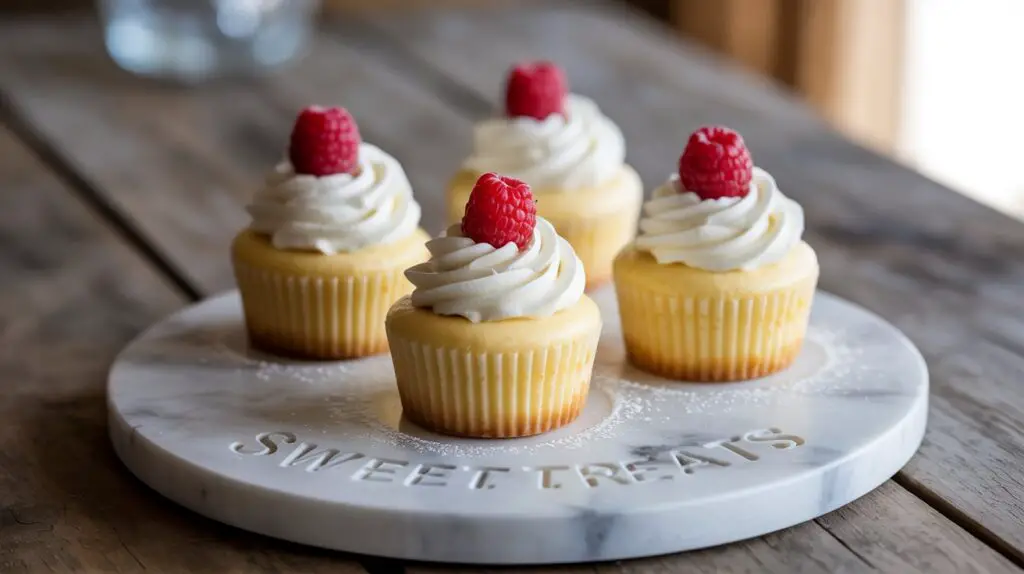
Craving cheesecake but don’t feel like wrestling with a springform pan? Mini cheesecake cupcakes are your shortcut to rich, creamy goodness without the hassle.
They’re small, shareable, and just plain fun. Perfect for parties, late-night cravings, or when you simply want dessert without committing to a full cake.
With easy steps and endless topping ideas, anyone can whip these up—even if the oven usually intimidates you!
Why Mini Cheesecake Cupcakes?
Portion Control
Sometimes you just want a little something sweet without the guilt trip of slicing into a giant cheesecake. Mini cheesecake cupcakes give you that indulgence in a neat, single-serving size.
One cupcake feels satisfying, but you’re not stuck staring down half a cheesecake in the fridge, daring you at midnight. They’re the perfect balance between treat and restraint.
Crowd-Friendly
Ever tried cutting a cheesecake evenly at a party? Chaos. With mini cheesecake cupcakes, everyone gets their own tidy portion—no messy slicing, no awkward serving plates.
They’re easy to pack up, transport, and lay out on a platter. Guests can grab one, two, or three without the pressure of committing to a massive slice. They travel well and disappear even faster.
Beginner-Friendly
Big cheesecakes can be fussy. Water baths, cracks, springform pans—it’s enough to scare off new bakers. Mini cheesecake cupcakes take away the stress. You only need a muffin tin and some liners.
The smaller size means fewer cracks, quicker baking, and way less room for error. If you’ve never baked a cheesecake before, this is the easiest way to get your feet wet (without the water bath).
Versatile
These little cheesecakes are a blank canvas. You can top them with fruit, swirl in chocolate, sprinkle with crushed cookies, or even go seasonal with pumpkin spice or peppermint.
Every batch can be different, which makes them fun to customize for holidays, birthdays, or just a random Tuesday night. They adapt to whatever flavor mood you’re in, and that makes them endlessly exciting.
Essential Ingredients
Here’s everything you’ll need to whip up a batch of mini cheesecake cupcakes.
Crust Basics
- 1 cup graham cracker crumbs (or crushed Oreos/digestive biscuits)
- 3 tablespoons unsalted butter, melted
- 2 tablespoons granulated sugar
Cheesecake Filling
- 16 oz (2 packages) cream cheese, softened
- 2 large eggs, room temperature
- ½ cup granulated sugar
- 1 teaspoon vanilla extract
- ½ cup sour cream or plain Greek yogurt
Optional Add-Ins
- 1 tablespoon lemon zest (for a bright flavor)
- 2 tablespoons cocoa powder (for a chocolate twist)
- ½ teaspoon cinnamon or pumpkin spice (for seasonal flair)
Topping Options
- Fresh berries (blueberries, raspberries, or sliced strawberries)
- 2–3 tablespoons chocolate sauce or ganache drizzle
- 2 tablespoons caramel sauce
- Whipped cream (store-bought or homemade)
- ¼ cup chopped nuts (pecans, almonds, or walnuts)
Tools You’ll Need
Baking these mini cheesecake cupcakes doesn’t require fancy equipment. Most of the tools are probably already sitting in your kitchen drawers.
Here’s the short list:
- 1 standard muffin or cupcake pan (12-cup capacity works perfectly)
- Paper liners or silicone cups to keep the cheesecakes from sticking
- Hand mixer or stand mixer for smooth, lump-free filling (a sturdy whisk can work if you’re up for an arm workout)
- Measuring cups and spoons for accuracy—cheesecake filling doesn’t forgive guesswork
- Optional: a piping bag or zip-top bag with the corner snipped for adding neat swirls of whipped cream or decorative toppings
Step-by-Step: How to Make Mini Cheesecake Cupcakes
Step 1: Prep the Crust
Start with the base—it’s the foundation of every bite. Crush your graham crackers or cookies until they’re fine crumbs.
You can use a food processor, or go the old-fashioned way with a zip-top bag and a rolling pin.
Mix the crumbs with melted butter and a little sugar until the texture feels like damp sand. Spoon about a tablespoon into each liner and press it down firmly with the back of a spoon.
This helps the crust hold together instead of crumbling apart.
Step 2: Mix the Filling
Cream cheese is the star here, and it needs to be silky smooth. Beat it with your mixer until no lumps remain. Add in the sugar, eggs, and vanilla, blending just until combined.
Overmixing can make the cupcakes crack later, so keep it gentle. If you’re using sour cream or yogurt, fold it in at the end for that creamy tang cheesecakes are known for. The filling should be thick but pourable.
Step 3: Fill and Bake
Scoop the filling over each crust, filling the liners about three-quarters full. Don’t worry if it looks a bit uneven—they’ll smooth out as they bake. Place the pan in a preheated oven at 325°F (160°C).
Bake for 16–18 minutes, or until the centers are mostly set but still have a slight jiggle. That wobble means they’ll finish firming up without drying out.
Step 4: Cool & Chill
Patience pays off here. Let the cheesecakes cool in the pan until they’re at room temperature. If you rush and put them straight in the fridge, condensation can mess up the tops.
Once cooled, transfer the pan to the refrigerator for at least 2 hours. Overnight is even better—the chill time helps the texture set and the flavor deepen.
Step 5: Decorate & Serve
Now for the fun part. Add a swirl of whipped cream, a spoonful of fruit, a drizzle of chocolate, or even crushed cookies on top. Keep it simple or go wild—it’s your canvas.
Serve them straight from the fridge for the best texture. They’re small, neat, and guaranteed to disappear faster than you expect.
Flavor Variations
Mini cheesecake cupcakes are like a blank notebook—you can scribble any flavor story you want on top. The base recipe is simple, but a few tweaks can turn each batch into something totally different.
Here are some tried-and-true variations that will keep dessert exciting.
Chocolate Swirl Mini Cheesecakes
Chocolate and cheesecake are a match made in dessert heaven. Melt a few tablespoons of chocolate chips, then swirl it into the filling before baking.
Use a toothpick or knife to create a marbled look—it’ll bake into gorgeous patterns. Each bite will have pockets of rich chocolate alongside the tangy cheesecake.
Lemon Zest + Blueberry Topping
If you like bright, fresh flavors, this combo is unbeatable. Add a tablespoon of lemon zest into the filling for a zippy kick.
Once baked and chilled, top each cupcake with a spoonful of blueberry sauce or a handful of fresh berries. It’s refreshing, tangy, and perfect for spring or summer gatherings.
Peanut Butter + Chocolate Drizzle
For the peanut butter lovers out there, stir two tablespoons of creamy peanut butter into the filling. It creates a nutty, rich base that pairs beautifully with chocolate.
Once chilled, drizzle melted chocolate over the tops. It’s basically a cheesecake version of a peanut butter cup, and nobody will complain about that.
Pumpkin Spice Mini Cheesecakes
Seasonal flavors can make these cupcakes feel extra special. Add half a teaspoon of pumpkin spice (or cinnamon and nutmeg) into the filling.
For an even bolder twist, mix in two tablespoons of pumpkin purée. Top with whipped cream and a sprinkle of spice, and you’ve got a dessert that screams cozy autumn.
Oreo Cookie Crust with Whipped Cream Topping
Skip the graham crackers and use whole Oreo cookies as the crust—just pop one into each liner and pour the filling over it.
Once baked and cooled, add a dollop of whipped cream and maybe a crushed Oreo on top. It’s a playful, crunchy, and creamy twist that kids and adults both love.
Tips for Success
Don’t Overmix the Batter
It’s tempting to keep beating the cream cheese until it looks flawless, but too much air in the mix is your enemy.
Overmixed batter can cause the tops to rise too much in the oven, then collapse into cracks as they cool.
Mix just until the ingredients are combined and smooth. Think gentle, not aggressive—your mixer doesn’t need to go beast mode here.
Bake at a Moderate Temperature
Cheesecake doesn’t like extremes. High heat can make the tops puff, split, or dry out before the centers are done. Stick with a moderate oven, around 325°F (160°C).
The goal is even, slow baking. If you see a slight jiggle in the center when you pull them out, you’ve nailed it.
Use Room Temperature Cream Cheese
Cold cream cheese refuses to blend smoothly, leaving you with lumps in the filling. Set it out on the counter about 30 minutes before baking so it softens. This small step makes a big difference.
Smooth batter equals silky cheesecake texture, and nobody wants to bite into a chunk of unmixed cream cheese.
Chill Thoroughly for Best Texture
Cheesecake needs time to set. If you rush and serve them warm, the texture will feel loose and less satisfying. Let them chill in the fridge for at least 2 hours, but overnight is even better.
The cold helps the flavors meld together and gives you that rich, creamy bite that makes cheesecake so addictive.
Store Airtight for Freshness
Leftovers don’t last long, but if you manage to save a few, store them in an airtight container in the fridge for up to 5 days. They also freeze surprisingly well—wrap each cupcake tightly and freeze for up to a month.
When the craving hits, just thaw in the fridge. Future you will be grateful!
Fun Serving Ideas
Dessert Platters for Parties
Mini cheesecake cupcakes shine at parties. Arrange them on a big platter with different toppings—berries, chocolate drizzle, caramel swirls—so they look like a colorful dessert buffet.
Guests love the variety, and you’ll love how quickly the tray empties. They’re bite-sized conversation starters that disappear faster than chips and dip.
Personalized Toppings Bar
Want to make dessert interactive? Set up a “decorate-your-own” toppings bar. Put out bowls of whipped cream, sprinkles, crushed cookies, fresh fruit, and sauces.
Let guests go wild, creating their own dream cheesecakes. It’s fun, playful, and guaranteed to get everyone snapping photos before they dig in.
Gift Boxes for Holidays or Birthdays
These mini treats also double as thoughtful gifts. Pack a few in cupcake boxes or small bakery-style containers, tie with a ribbon, and you’ve got a homemade present that feels both personal and indulgent.
Perfect for birthdays, Valentine’s Day, or just surprising a friend who needs a pick-me-up.
Cute Portion-Controlled After-Dinner Treat
Not every cheesecake moment needs to be a big event. Keep a few of these in the fridge for a simple, portion-controlled dessert after dinner.
It’s just enough sweetness to end the meal on a high note without feeling heavy. One little cupcake, fork in hand, and you’ve got a happy ending to your evening.
Final Words
Mini cheesecake cupcakes prove that big flavor can come in small packages. They’re easy to make, fun to customize, and guaranteed to please any crowd.
So why not whip up a batch this week? Top them with your favorite flavors, enjoy a bite (or two), and share the love.
Bake, snap, and share your cheesecake creations—you’ll be surprised how quickly they disappear!
FAQs
Can I make these without eggs?
Yes. You can use egg substitutes like flax eggs, chia eggs, or even a store-bought egg replacer. The texture may be slightly different, but they’ll still taste great.
How long do they keep in the fridge?
Stored in an airtight container, mini cheesecake cupcakes will stay fresh for up to 5 days. Keep them chilled until you’re ready to serve.
Can I freeze mini cheesecake cupcakes?
Absolutely. Wrap each cupcake tightly in plastic wrap, then place them in a freezer-safe bag or container. They’ll last about a month. Thaw overnight in the fridge before eating.
Can I make them gluten-free?
Yes. Simply swap the crust with gluten-free cookies or crackers. The filling itself is naturally gluten-free, so no changes are needed there.
Do I need to use paper liners?
Paper liners make them easy to remove and serve, but they’re not mandatory. If you skip them, use a silicone pan or grease the muffin tin well to avoid sticking.


