Molten Chocolate Lava Cake: A Gooey, Decadent Dessert

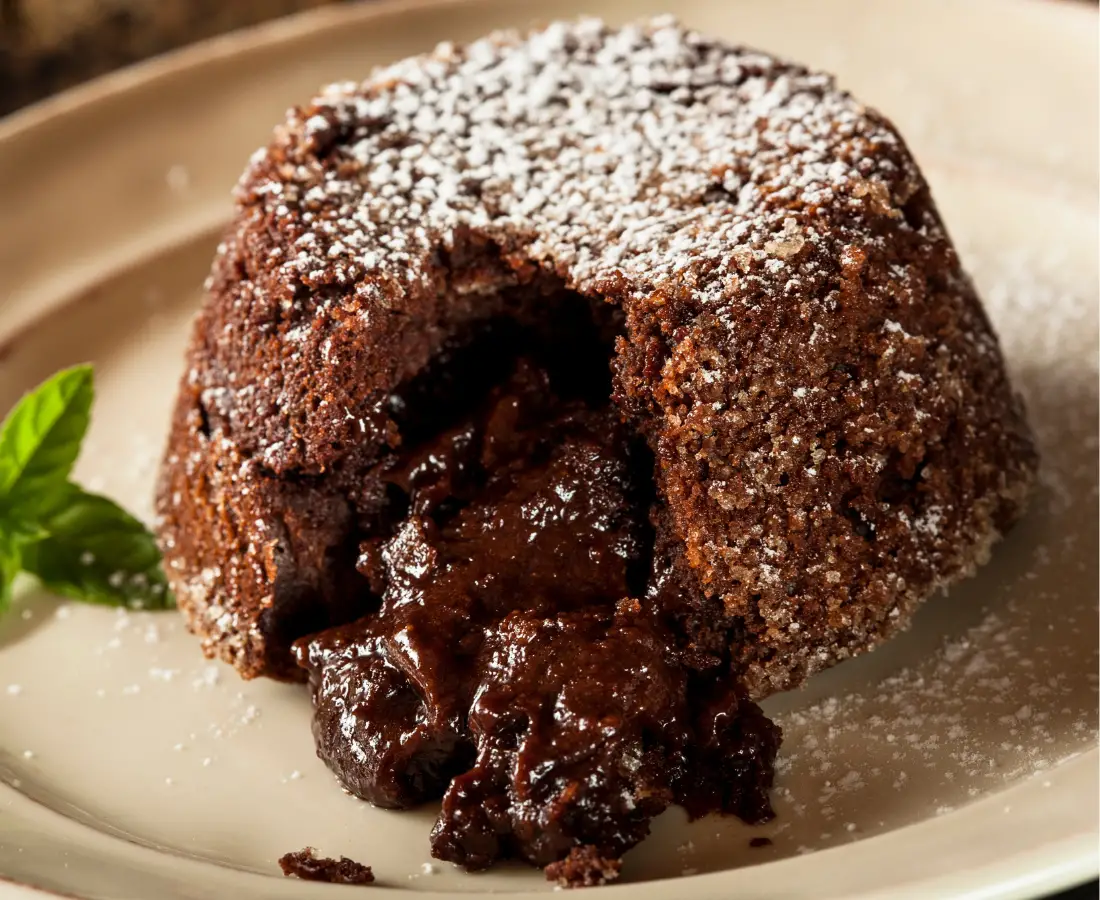
Molten Chocolate Lava Cake is the ultimate dessert for chocolate lovers.

With a rich, fudgy exterior and a warm, gooey center, it’s a treat that never disappoints.

Each bite delivers deep chocolate flavor with a melt-in-your-mouth texture.

This indulgent cake became famous thanks to its luxurious molten core.

Though it looks impressive, it’s surprisingly simple to make at home.

Perfect for dinner parties, romantic nights, or when a chocolate craving hits, this dessert is guaranteed to impress.

Ready to make your own?

Let’s get started!

What is Molten Chocolate Lava Cake?

Molten Chocolate Lava Cake is a rich, individual-sized dessert with a soft, cake-like exterior and a warm, flowing chocolate center.

When cut open, the melted chocolate inside oozes out, creating its signature lava effect.

The texture is a perfect balance between a delicate sponge and a creamy, molten core.

This dessert is made with simple ingredients like butter, chocolate, eggs, sugar, flour, and salt, yet delivers an intense chocolate flavor.

The key to its molten center is precise baking—just enough to set the edges while keeping the middle soft.

Overbaking will solidify the filling, losing the iconic lava effect.

The concept of molten chocolate cake is often credited to French chef Michel Bras, who first developed the idea in 1981.

He created a version with a frozen chocolate ganache center that melted as the cake was baked.

This technique ensured a perfect liquid core every time.

Since then, variations of the dessert have gained worldwide popularity, appearing in fine dining restaurants and home kitchens alike.

Ingredients Needed

Molten Chocolate Lava Cake requires just a few basic ingredients, but each one plays a key role in achieving the perfect texture and flavor.

  • 6 ounces (170g) high-quality semisweet or bittersweet chocolate – Use a chocolate bar with at least 60% cocoa for the best flavor and smooth texture.
  • ½ cup (113g) unsalted butter – Adds richness and ensures a silky-smooth batter. Use unsalted butter for better control over flavor.
  • ¼ cup (50g) granulated sugar – Sweetens the cake and helps create a tender texture.
  • 2 large eggs + 2 large egg yolks – Provide structure while keeping the center creamy and molten. The extra yolks add richness.
  • 1 tablespoon (8g) all-purpose flour – A small amount binds the ingredients without making the cake too firm.
  • Optional Flavor Enhancers:
    • ½ teaspoon vanilla extract – Enhances the chocolate flavor.
    • ½ teaspoon espresso powder – Intensifies the richness without adding a coffee taste.
    • 1 tablespoon (15ml) liqueur (e.g., Grand Marnier, Kahlúa, or Baileys) – Adds a subtle flavor boost.

Equipment Needed

Having the right tools makes preparing Molten Chocolate Lava Cake easy and ensures perfect results.

Here’s what you’ll need:

  • Ramekins or Muffin Pan – Traditional lava cakes are baked in 4 (6-ounce) ramekins, which help shape the cakes and ensure even baking. If ramekins aren’t available, a muffin pan can be used as an alternative, but the baking time may need slight adjustment.
  • Mixing Bowls – At least two mixing bowls are needed—one for melting the chocolate and butter, and another for whisking the eggs and sugar.
  • Whisk and Spatula – A whisk is essential for beating the eggs and sugar until thick and pale. A spatula helps fold the melted chocolate into the batter without deflating it.
  • Double Boiler or Microwave-Safe Bowl – A double boiler (a heatproof bowl placed over a pot of simmering water) melts the chocolate and butter gently without burning. A microwave-safe bowl can also be used for quicker melting in 30-second intervals with stirring in between.
  • Baking Sheet – Placing the ramekins on a baking sheet makes it easier to move them in and out of the oven and ensures even heat distribution.

Step-by-Step Recipe Instructions

Step 1: Preparation

Preheat the oven to 425°F (218°C).

A hot oven is key to baking the cake quickly while keeping the center molten.

Grease 4 (6-ounce) ramekins generously with butter, ensuring the sides and bottom are fully coated.

Lightly dust them with flour and tap out the excess.

This prevents the cakes from sticking and allows for easy unmolding.

If using a muffin pan, grease and flour each cup thoroughly.

Step 2: Melting the Chocolate and Butter

Place 6 ounces (170g) of chopped semisweet or bittersweet chocolate and ½ cup (113g) unsalted butter in a heatproof bowl.

Use a double boiler by setting the bowl over a pot of simmering water.

Stir constantly until the mixture is smooth and fully melted.

If using a microwave, heat the mixture in 30-second intervals, stirring well after each, until completely melted and combined.

Set aside to cool slightly.

Step 4: Mixing the Batter

In a separate mixing bowl, whisk together 2 large eggs, 2 egg yolks, and ¼ cup (50g) granulated sugar until the mixture becomes thick and pale.

This step aerates the eggs, helping to create a light and tender cake.

Slowly pour the melted chocolate and butter mixture into the eggs, whisking continuously to prevent scrambling.

Gently fold in 1 tablespoon (8g) all-purpose flour and any optional flavor enhancers, such as ½ teaspoon vanilla extract, ½ teaspoon espresso powder, or 1 tablespoon (15ml) liqueur.

Stir just until combined—overmixing can affect the texture.

Step 5: Filling the Ramekins

Divide the batter evenly among the prepared ramekins, filling each about ¾ full.

If using a muffin pan, distribute the batter equally among the cups.

Make sure the batter is smooth on top to promote even baking.

Step 6: Baking

Place the ramekins on a baking sheet for easy handling.

Transfer to the preheated oven and bake for 12–14 minutes until the edges are set but the centers remain soft and slightly jiggly.

If using a muffin pan, reduce the baking time to 8–10 minutes.

Keep a close eye on the cakes—overbaking will result in a fully cooked center instead of a molten one.

Step 7: Serving

Remove the cakes from the oven and let them rest for 1 minute in their ramekins.

To unmold, run a knife around the edges to loosen, then place a plate over the top of each ramekin.

Carefully invert, let the cake sit for 10 seconds, and gently lift the ramekin away.

If using a muffin pan, use a spoon to lift each cake out.

Serve immediately while the center is still warm and gooey!

Tips for Success

Molten Chocolate Lava Cake is simple to make, but a few key techniques ensure the perfect balance of a firm outer layer and a flowing, molten center.

Follow these tips to get flawless results every time.

Use High-Quality Chocolate for the Best Flavor and Molten Center

Chocolate is the main ingredient, so its quality directly affects the taste and texture of the cake.

Use semisweet or bittersweet chocolate with at least 60% cocoa content for a deep, rich flavor.

Avoid chocolate chips, as they contain stabilizers that prevent smooth melting.

Chopped chocolate bars melt better and create a silkier, more indulgent molten center.

Ensure Eggs Are at Room Temperature for Better Emulsification

Cold eggs won’t mix as smoothly into the batter, which can lead to a denser texture.

Room-temperature eggs blend more easily with the melted chocolate and butter, creating a uniform, airy batter.

To bring eggs to room temperature quickly, place them in a bowl of warm (not hot) water for 5 to 10 minutes before using.

Avoid Overbaking to Maintain the Signature Gooey Center

Timing is crucial for achieving the signature molten center.

The cakes should be baked just until the edges are set, but the center is still soft and slightly jiggly.

If overbaked, the center will solidify, and the lava effect will be lost.

Check for doneness at 12 minutes and adjust as needed.

If baking in a muffin pan, start checking at 8 minutes.

Grease and Flour Ramekins Thoroughly to Facilitate Easy Release

Lava cakes should slide out of the ramekins effortlessly.

To prevent sticking, grease the ramekins generously with butter, making sure to coat the entire interior. Lightly dust with flour, then tap out any excess.

This extra step ensures the cakes release cleanly when inverted onto a plate.

If using a muffin pan, grease and flour the cups well to avoid breakage when removing the cakes.

Variations and Flavor Enhancements

Molten Chocolate Lava Cake is a versatile dessert that can be customized to suit different tastes.

A few simple additions or substitutions can take this classic recipe in a whole new direction.

Incorporate Different Fillings Like Peanut Butter, Caramel, or Fruit Preserves

Adding a surprise filling inside the cake can elevate the flavor and texture.

For a peanut butter lava cake, drop a teaspoon of peanut butter into the center of each batter-filled ramekin before baking.

The heat will soften it into a creamy, nutty core.

Caramel lovers can do the same with thick caramel sauce, creating a sweet, gooey contrast to the dark chocolate.

For a fruity variation, spoon raspberry or strawberry preserves into the center before baking.

The tartness balances the richness of the chocolate, adding depth to each bite.

Add Spices Such as Cinnamon or Chili Powder for a Unique Twist

A pinch of spice can enhance the chocolate’s natural richness.

Cinnamon brings warmth and a subtle sweetness, perfect for a comforting variation.

Chili powder or cayenne pepper adds a gentle heat, making the chocolate even more intense.

For a more complex flavor, try adding cardamom, nutmeg, or even a hint of sea salt to bring out the depth of the cocoa.

Experiment with Different Types of Chocolate to Alter Sweetness and Richness

The type of chocolate used affects both flavor and texture.

Dark chocolate (70% cocoa or higher) creates a bold, slightly bitter taste with a luxurious molten center.

Milk chocolate results in a sweeter, creamier cake with a softer structure.

For a balanced option, mix semisweet and bittersweet chocolate to get both sweetness and depth.

If you prefer a white chocolate variation, reduce the sugar slightly, as white chocolate is naturally sweeter.

Serving Suggestions

Molten Chocolate Lava Cake is best served warm, straight from the oven, when the center is still gooey and molten.

A scoop of vanilla ice cream on the side creates a perfect contrast, with the cold, creamy texture balancing the rich, warm chocolate.

Whipped cream is another great option, adding lightness to each bite.

For a simple yet elegant finish, dust the cakes with powdered sugar just before serving.

Fresh berries like raspberries, strawberries, or blueberries provide a tart contrast to the deep chocolate flavor.

For extra indulgence, drizzle the cakes with raspberry sauce, caramel, or hot fudge.

A small sprig of fresh mint on the side adds a subtle pop of color and a refreshing note to the plate.

Make-Ahead and Storage Instructions

Molten Chocolate Lava Cake is a great dessert to prepare in advance.

The batter can be made ahead of time and stored in the refrigerator for up to 2 days.

Simply cover the filled ramekins tightly with plastic wrap and refrigerate.

Before baking, let them sit at room temperature for about 30 minutes to ensure even cooking.

If baking straight from the fridge, add an extra minute to the baking time to compensate for the colder batter.

Fully baked cakes can also be stored for later.

Once cooled, wrap them individually in plastic wrap and place them in an airtight container before freezing for up to 3 months.

To reheat, unwrap and place a cake on a microwave-safe plate.

Heat in the microwave for 30 seconds or until warm.

Conclusion

Molten Chocolate Lava Cake is easier to make than it looks.

With just a few ingredients and simple steps, you can create a rich, gooey dessert that feels like a restaurant-quality treat.

Give it a try and see how simple it is to get that perfect molten center.

If you make it, share your experience!

What variations did you try? Let us know!

FAQs

Can I make lava cakes without ramekins?

Yes, you can use a muffin pan as an alternative.

Grease and flour each cup thoroughly to prevent sticking.

Since muffin cups are smaller than ramekins, reduce the baking time to 8–10 minutes.

Keep a close eye on the cakes to ensure the edges are set while the centers remain soft.

To remove them, gently run a knife around the edges and use a spoon to lift them out.

How do I know when the cakes are done?

The cakes are ready when the edges are firm and slightly pulled away from the ramekins, but the center is still soft and slightly jiggly.

A toothpick inserted near the edges should come out clean, while the center should still have some batter residue.

Overbaking will result in a fully set center, so check for doneness at the 12-minute mark (or 8 minutes if using a muffin pan) and adjust if needed.

Can I substitute ingredients to make the recipe gluten-free or dairy-free?

Yes, for a gluten-free version, replace the all-purpose flour with 1 tablespoon of almond flour or a gluten-free flour blend.

The texture will remain soft and molten.

For a dairy-free option, swap the butter with coconut oil or a plant-based butter substitute and use dairy-free dark chocolate.

Molten Chocolate Lava Cake: A Gooey, Decadent Dessert

Recipe by Oven Achiever
Servings

4

servings
Prep time

10

minutes
Cooking time

12

minutes
Calories

350

kcal
Total time

22

minutes

This Molten Chocolate Lava Cake is rich, gooey, and incredibly easy to make. With a soft, cakey exterior and a warm, flowing chocolate center, it’s the perfect dessert for any occasion.

Ingredients

  • 6 ounces (170g) semisweet or bittersweet chocolate, chopped (at least 60% cocoa)

  • ½ cup (113g) unsalted butter, cut into pieces

  • 2 large eggs

  • 2 large egg yolks

  • ¼ cup (50g) granulated sugar

  • 1 tablespoon (8g) all-purpose flour

  • Optional: ½ teaspoon vanilla extract, ½ teaspoon espresso powder, or 1 tablespoon (15ml) liqueur

Directions

  • Preheat oven to 425°F (218°C). Generously grease 4 (6-ounce) ramekins with butter and lightly dust with flour. Tap out any excess flour to prevent sticking. Place ramekins on a baking sheet.
  • In a heatproof bowl, combine chopped chocolate and butter. Melt using a double boiler or microwave in 30-second intervals, stirring between each, until smooth. Let cool slightly.
  • In a separate bowl, whisk together eggs, egg yolks, and sugar until thick and pale. This takes about 1-2 minutes by hand or with an electric mixer.
  • Slowly pour the melted chocolate mixture into the egg mixture, whisking continuously. Gently fold in the flour and any optional flavorings until just combined. Avoid overmixing.
  • Divide the batter evenly among the prepared ramekins, filling them ¾ full.
  • Bake for 12–14 minutes until the edges are firm but the centers remain soft and slightly jiggly. If using a muffin pan, bake for 8–10 minutes.
  • Let the cakes cool for 1 minute in the ramekins. Run a knife around the edges to loosen them. Place a small plate over each ramekin, invert, and carefully lift the ramekin off. Serve immediately.

Notes

  • Storage: Unbaked batter can be refrigerated in the ramekins for up to 2 days. Bring to room temperature before baking. Baked cakes can be frozen for up to 3 months and reheated in the microwave for 30 seconds.
  • Avoid overbaking: The center should remain soft and molten. Check for doneness at 12 minutes and adjust as needed.
  • Serving suggestions: Pair with vanilla ice cream, whipped cream, powdered sugar, or fresh berries for extra indulgence.
  • Flavor variations: Try adding peanut butter, caramel, fruit preserves, or spices like cinnamon for a twist.

Leave a Comment