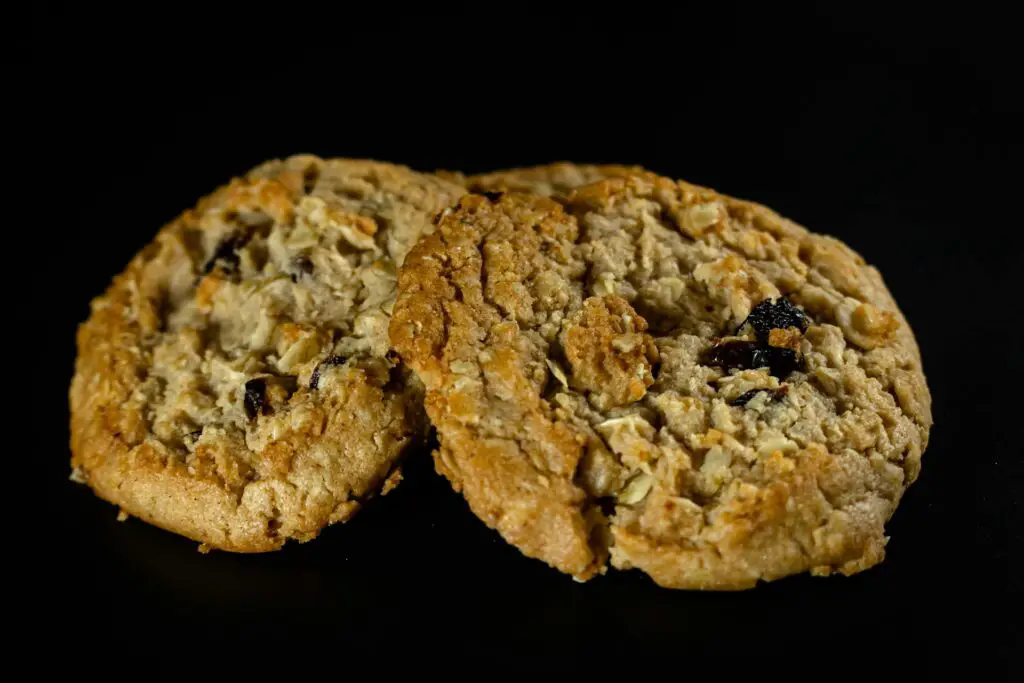
There’s nothing quite like the smell of oatmeal raisin cookies drifting through the kitchen—it’s the kind of aroma that makes you stop mid-stride and smile.
These cookies may not steal the spotlight like chocolate chip, but they’ve been quietly winning hearts for generations.
Chewy, sweet, and just the right amount of wholesome, they prove that simple really can be spectacular.
In this guide, you’ll learn exactly how to make them like a pro—from picking the right oats to mastering the perfect bake, plus insider tips to keep them soft, chewy, and unforgettable.
Why Oatmeal Raisin Cookies Deserve More Love
The Classic Comfort Cookie
Oatmeal raisin cookies are like that reliable friend who never lets you down. They may not be flashy, but bite into one and you’re instantly wrapped in warmth and nostalgia.
The chew of the oats, the burst of sweetness from the raisins, and the cozy hit of cinnamon feel like a hug in cookie form.
While other cookies may come and go as trends, oatmeal raisin has quietly stood the test of time.
A Nutritional Edge
Compared to sugar-loaded cookies that crumble without much substance, oatmeal raisin actually brings something to the table.
Oats are packed with fiber, which helps you feel satisfied instead of just on a sugar high. Raisins contribute natural sweetness along with iron and antioxidants.
Of course, it’s still a cookie—not a health bar—but it has a little more to brag about nutritionally. It’s the rare treat that can be both indulgent and somewhat justifiable.
Perfect Balance of Texture and Sweetness
What makes oatmeal raisin special is its balance. The oats give a hearty chew, the raisins bring bursts of fruity sweetness, and a touch of spice ties everything together.
You don’t get the sugar overload that some cookies deliver. Instead, you get a layered bite—soft, chewy, slightly crisp around the edges, with pockets of sweetness.
It’s a cookie that makes you slow down and actually taste it. That balance is exactly why it deserves more love than it gets.
Gathering the Right Ingredients
The right ingredients make or break oatmeal raisin cookies.
Here’s exactly what you’ll want to have on hand, with notes on why each one matters:
- Oats (2 cups old-fashioned rolled oats)
- Rolled oats give the cookies their signature chewy texture.
- Quick oats will make them softer and less hearty, so go with rolled if you want that classic bite.
- Raisins (1 cup)
- Soak them in warm water for 10 minutes to plump them up.
- For a fun twist, try soaking in a splash of rum or orange juice for extra flavor.
- Flour (1 ¼ cups all-purpose)
- Helps balance the oats and gives the cookies structure.
- Brown Sugar (¾ cup packed) + White Sugar (¼ cup)
- Brown sugar keeps the cookies soft and chewy.
- White sugar adds crispness around the edges.
- The combo creates the best balance of texture.
- Butter (½ cup, unsalted, softened)
- Unsalted butter gives you control over salt levels.
- If you only have salted butter, just reduce the added salt slightly.
- Eggs (2 large)
- They bind everything together and add richness.
- Vanilla Extract (1 teaspoon)
- A small touch, but it makes the overall flavor warmer and more complete.
- Baking Soda (1 teaspoon) + Salt (½ teaspoon)
- Baking soda helps the cookies rise and spread properly.
- Salt enhances every other flavor.
- Spices: Cinnamon (1 teaspoon) + Nutmeg (¼ teaspoon)
- Cinnamon gives warmth and depth.
- Nutmeg adds a subtle, almost nutty complexity.
- Optional Add-ins (½ cup each, if using)
- Walnuts or pecans for crunch.
- Dried cranberries for a tart contrast.
- Chocolate chips, if you want to bend the rules and make them extra indulgent.
Essential Equipment
Baking oatmeal raisin cookies like a pro isn’t just about the ingredients—it’s also about using the right tools.
Here’s what you’ll need to make the process smoother and the results more consistent:
- Mixing Bowls (1 large, 1 medium)
- Use the large one for wet ingredients and the medium for dry.
- A wide, deep bowl makes mixing easier and less messy.
- Sturdy Wooden Spoon or Hand Mixer
- A wooden spoon is great for control and keeps things simple.
- A hand mixer speeds things up, especially when creaming butter and sugar.
- Baking Sheets (2 large)
- More trays mean you can bake in batches without waiting.
- Choose heavy-duty sheets to avoid uneven browning.
- Parchment Paper or Silicone Baking Mats
- Keeps cookies from sticking.
- Makes cleanup a breeze and helps cookies bake evenly.
- Cookie Scoop (1.5 to 2 tablespoon size)
- Ensures all your cookies are the same size.
- Uniform cookies = even baking = fewer burnt bottoms.
- Wire Cooling Rack
- Lets the air circulate under the cookies.
- Keeps them from turning soggy as they cool.
Step-by-Step Baking Process
Step 1: Prep the Raisins
Start with the raisins. Dry, tough raisins can ruin a cookie’s texture, so give them a quick soak. Place them in a small bowl with warm water for about 10 minutes. Drain well before using.
If you want extra flavor, try soaking them in orange juice or even a splash of rum. It’s a small step that makes a big difference.
Step 2: Cream the Butter and Sugars
In your large mixing bowl, beat together the softened butter, brown sugar, and white sugar until the mixture is light and fluffy.
This should take 2–3 minutes with a hand mixer or some solid elbow grease with a wooden spoon. Don’t rush this step—it’s what gives your cookies their soft, chewy texture.
Step 3: Add Eggs and Vanilla
Crack two large eggs, one at a time, mixing until each is fully incorporated. Stir in the vanilla extract. Eggs add structure and richness, while vanilla deepens the flavor.
Think of this as building the cookie’s personality.
Step 4: Mix the Dry Ingredients
In your medium bowl, whisk together the flour, baking soda, salt, cinnamon, and nutmeg.
Keeping the dry ingredients separate at this stage ensures the baking soda and spices get evenly distributed. Nobody wants a bite with all the cinnamon in one cookie.
Step 5: Combine Wet and Dry
Slowly add the dry ingredients to the butter mixture. Mix on low or stir gently until just combined.
Overmixing here will make the cookies tough, so stop as soon as the flour streaks disappear.
Step 6: Fold in Oats and Raisins
Now comes the fun part. Gently fold in the oats and the plumped raisins. Folding keeps the dough airy and the raisins intact.
This is where your cookie dough starts to look like…well, oatmeal raisin cookie dough.
Step 7: Scoop the Dough
Use a cookie scoop (about 1.5–2 tablespoons per cookie) to portion the dough onto your lined baking sheets.
Leave a couple of inches between each scoop—these cookies will spread as they bake.
Step 8: Chill the Dough
Pop the trays into the fridge for 20–30 minutes before baking. Chilling keeps the cookies from spreading too thin and helps concentrate the flavors.
It’s the secret to cookies that are thick, chewy, and golden around the edges.
Step 9: Bake to Perfection
Preheat your oven to 350°F (175°C). Bake the cookies for 10–12 minutes, or until the edges are golden but the centers still look slightly soft.
Don’t wait for the tops to look completely done—they’ll finish baking on the hot tray after you pull them out.
Step 10: Cool the Cookies
Transfer the cookies to a wire rack after a couple of minutes. Cooling them on the rack prevents soggy bottoms and helps them firm up just enough while staying chewy inside.
Resist the urge to grab one too soon—though honestly, stealing one warm from the tray is part of the joy.
Pro Tips for Perfect Cookies
Measure Flour the Right Way
A heavy hand with flour is the fastest way to ruin oatmeal raisin cookies. Instead of scooping straight from the bag, spoon the flour into your measuring cup and level it off with a knife.
This keeps you from packing in too much and ending up with dry, dense cookies. Think of it as the difference between a pillow and a brick—you definitely want the pillow.
Underbake for Chewiness
Here’s the golden rule: pull your cookies out when the edges are golden, but the centers still look a little soft.
Don’t panic—they’ll keep cooking from the heat of the tray even after you remove them. This trick gives you that dreamy, chewy middle without crossing into crunchy territory.
Room-Temperature Butter and Eggs
Cold butter won’t cream properly, and cold eggs can cause the dough to seize up. Let both sit at room temp for about 30 minutes before you start baking.
Softened butter blends smoothly with sugar, and warm eggs incorporate more evenly.
It’s a small detail, but it’s the difference between cookies that spread evenly and ones that look like lumpy little pancakes.
Rotate the Trays
Every oven has hot spots—no exceptions. Halfway through baking, rotate your trays front to back and switch the top tray with the bottom one. This ensures every cookie bakes evenly.
Without this step, you risk having half golden-brown beauties and half pale underachievers.
Keep Them Soft with Bread
Once baked, store your cookies in an airtight container with a slice of plain sandwich bread tucked inside. The cookies will “borrow” moisture from the bread, keeping them soft for days.
The bread will dry out, but your cookies will stay bakery-fresh. It’s a quirky little hack that actually works like magic.
Common Mistakes to Avoid
Using Instant Oats
Instant oats may seem convenient, but they soak up too much moisture and break down too quickly.
The result? Dry, crumbly cookies that taste more like oat cakes than the chewy classics you’re aiming for.
Stick with old-fashioned rolled oats—they hold their shape, keep their chew, and give the cookie its signature texture.
Overmixing the Dough
Once you add the flour, it’s tempting to keep stirring until the batter looks perfectly smooth. Don’t do it.
Overmixing develops too much gluten, which turns your cookies tough instead of tender. Mix just until the flour disappears, then stop. A slightly rustic dough is exactly what you want here.
Skipping the Chill
Skipping the chilling step might feel like saving time, but it comes back to haunt you in the oven. Warm dough spreads too fast, leaving you with thin, flat cookies.
A short chill in the fridge—20 to 30 minutes—helps the dough firm up, keeps the cookies thick, and concentrates the flavors. Patience here pays off in every bite.
Overbaking the Batch
If your goal is soft and chewy, don’t wait until the cookies look fully “done” in the oven. By then, they’re already overbaked.
The edges should be golden, but the centers should still look a little undercooked.
They’ll set as they cool. Pulling them out too late leaves you with crunchy cookies that have lost their charm.
Fun Variations to Try
Oatmeal Chocolate Chip + Raisin Mix
Can’t decide between chocolate chip and oatmeal raisin? Don’t. Toss in a handful of semi-sweet chocolate chips along with the raisins.
The raisins bring that chewy sweetness, while the chocolate melts into gooey pockets. Together, they balance each other out—like the odd couple that just works.
Cranberry White Chocolate Oatmeal Cookies
For a brighter twist, swap out some of the raisins with dried cranberries. Add in chunks of white chocolate, and suddenly you’ve got a cookie that feels festive and slightly fancy.
The cranberries give a tart pop that cuts through the sweetness, while the creamy white chocolate smooths it all out. It’s a holiday party in cookie form.
Oatmeal Raisin Walnut for Extra Crunch
If you’re a fan of texture, walnuts are your best friend here. Fold in a half cup of chopped walnuts along with the oats and raisins.
The crunch of the nuts against the chewiness of the cookie makes every bite more interesting. Pecans also work if you want something a little softer and buttery.
“Breakfast” Version with Seeds and Dried Fruit
Want to feel less guilty about eating cookies in the morning? Mix in sunflower seeds, pumpkin seeds, and a variety of dried fruit like apricots or cherries.
These additions give the cookies a granola-bar vibe without losing the joy of a cookie. Pair one with your coffee, and suddenly “cookies for breakfast” sounds completely reasonable.
Serving & Storing
Oatmeal raisin cookies are at their absolute best when they’re still slightly warm, the raisins soft and chewy, and the edges just crisp enough to dunk into a glass of milk, a hot cup of tea, or even your morning coffee if you’re feeling rebellious.
Once cooled, store them in an airtight container where they’ll stay soft and chewy for about three to four days—though let’s be honest, they rarely last that long.
If you want to always have fresh cookies on hand, freeze unbaked dough balls on a tray, then transfer them to a freezer bag once solid; that way, you can bake off a few at a time whenever the craving strikes, giving you warm, fresh-from-the-oven cookies without having to start from scratch.
Final Words
With the right ingredients and a little care, oatmeal raisin cookies can hold their own against any dessert out there. They’re chewy, flavorful, and endlessly customizable.
Try your own twist, share them with friends, and enjoy the simple joy of a classic done right. Baked a batch? Tag us with your oatmeal raisin creations—we’d love to see them!
FAQs
Can I substitute butter with oil?
Yes, but expect a different texture. Butter adds richness and helps create that soft, chewy bite. Using oil will make the cookies softer and a bit more cake-like.
If you must, swap with the same amount of vegetable or coconut oil, but know they won’t taste quite the same.
How do I make them gluten-free?
Use a cup-for-cup gluten-free flour blend and make sure your oats are certified gluten-free.
The texture will be slightly different—usually a little more delicate—but the flavor holds up beautifully. Adding a spoonful of almond flour can also boost structure.
Can I use golden raisins or other dried fruit?
Absolutely. Golden raisins are plumper and slightly sweeter than the standard variety, so they work really well. You can also try dried cranberries, cherries, or chopped apricots.
Just keep the same measurements so the dough stays balanced.
How do I keep them from getting too flat?
Flat cookies usually mean the dough was too warm or too soft. Chilling the dough for 20–30 minutes before baking helps prevent spreading.
Also, make sure your butter isn’t melted—softened is the key. And don’t skimp on the oats; they give the cookies structure.