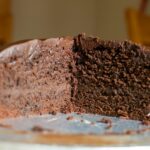
There’s something magical about red velvet cake. Maybe it’s the bold color, the buttery flavor, or the way it feels like a celebration on a plate.
For many of us, it brings back sweet memories—birthdays, weddings, or that one Valentine’s Day that actually went right.
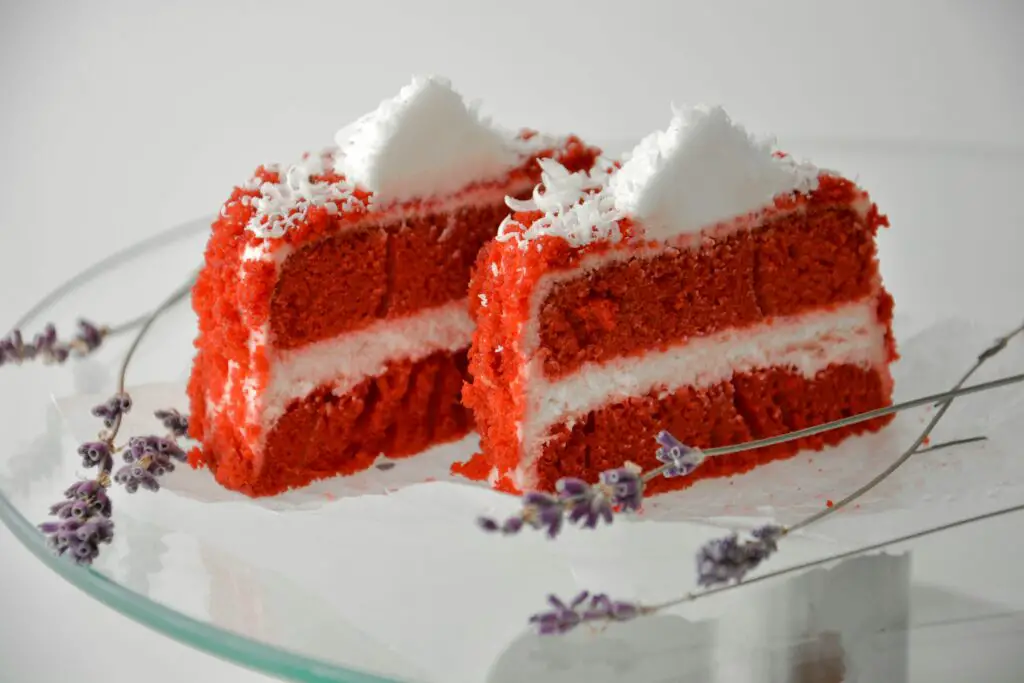
But let’s get one thing straight: red velvet is not just chocolate cake in a red dress. It’s soft, slightly tangy, and downright irresistible—especially when topped with a thick layer of cream cheese frosting.
In this recipe, I’ll show you exactly how to make a moist, fluffy red velvet cake from scratch—with the perfect frosting to match. Let’s bake something unforgettable!
What Is Red Velvet Cake?
Red velvet cake has roots stretching back to the 1800s in the U.S., where it first appeared as a “velvet” cake—a term used to describe cakes with a fine, soft crumb.
During the Great Depression, when ingredients like cocoa powder were scarce or rationed, bakers got creative.
They used a bit of cocoa, buttermilk, and vinegar to tenderize the flour and bring out a reddish hue from the unprocessed cocoa of the time.
Over the years, especially in the South, red velvet took on a more vibrant look with the help of food coloring and became a showstopper dessert for holidays and weddings.
But this cake isn’t just about the color. It has a mild cocoa flavor—not too chocolatey—with a hint of tang that comes from a clever combo of vinegar, buttermilk, and baking soda.
This trio creates a gentle chemical reaction that gives the cake its signature airy texture and “velvet” crumb. That’s the secret sauce behind the soft bite and balanced flavor.
So no, it’s not just chocolate cake dyed red—it’s chemistry, nostalgia, and a little Southern flair baked into every slice.
Ingredients Overview
For the Cake:
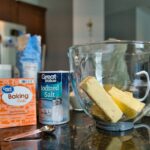
- 2½ cups all-purpose flour
- 2 tablespoons unsweetened cocoa powder
- 1 teaspoon baking soda
- ½ teaspoon salt
- 1½ cups granulated sugar
- 2 large eggs
- 1 cup vegetable oil
- 1 cup buttermilk
- 1 tablespoon white vinegar
- 2 teaspoons vanilla extract
- 1 to 2 tablespoons red food coloring (gel or liquid, depending on desired intensity)
For the Cream Cheese Frosting:
- 8 oz (1 block) cream cheese, softened to room temperature
- ½ cup (1 stick) unsalted butter, softened
- 3½ to 4 cups powdered sugar, sifted
- 1½ teaspoons vanilla extract
- Optional: pinch of salt or 1 teaspoon lemon juice (for extra tang)
Equipment You’ll Need:
- 2 round cake pans (8” or 9”)
- A few large mixing bowls
- Hand mixer or stand mixer
- Whisk and rubber spatula
- Wire cooling rack
- Optional: serrated knife or cake leveler (for trimming cake layers if needed)
Step-by-Step: How to Make the Red Velvet Cake
Step 1: Preheat & Prep
Start by preheating your oven to 350°F (175°C)—don’t skip this step or your timing will be off. While the oven heats, grab your two 8” or 9” round cake pans.
Grease them generously with butter or nonstick spray, then line the bottoms with parchment paper.
This extra step makes it easier to remove the cakes without tearing them. No one wants half a cake stuck to the pan, right?
Step 2: Mix Dry Ingredients
In a large mixing bowl, whisk together 2½ cups of all-purpose flour, 2 tablespoons of cocoa powder, 1 teaspoon of baking soda, and ½ teaspoon of salt.
This mixture is your cake’s backbone. The cocoa adds a touch of chocolate flavor, while the baking soda will later react with the vinegar to give the cake a soft, airy lift.
Don’t rush this step—make sure the dry ingredients are fully combined so there are no clumps hiding in the corners.
Step 3: Mix Wet Ingredients
In a separate large bowl, beat together 1½ cups of granulated sugar, 2 eggs, and 1 cup of vegetable oil until smooth and slightly thickened.
You can use a hand mixer, stand mixer, or just good old-fashioned elbow grease.
Once it’s smooth, mix in 1 cup of buttermilk, 1 tablespoon of white vinegar, 2 teaspoons of vanilla extract, and 1–2 tablespoons of red food coloring.
The batter should look rich, smooth, and vibrantly red. (Don’t taste it yet—it still needs flour and baking time!)
Step 4: Combine
Now slowly add the dry ingredients into the wet ingredients in two or three batches. Mix on low to medium speed just until combined—don’t overmix or you’ll lose that soft, velvety texture.
The final batter should be thick but pourable, and smooth without any dry streaks. This is the moment where everything comes together, like a perfect cake chemistry experiment.
Step 5: Pour and Bake
Pour the batter evenly into your prepared pans. Tap the pans lightly on the counter to release any air bubbles.
Slide them into the oven and bake for 30–35 minutes, or until a toothpick inserted in the center comes out clean.
The tops should spring back gently when touched. Don’t open the oven door too early—give it at least 25 minutes before peeking.
Step 6: Cool
Once baked, take the cakes out and let them cool in the pans for 10 minutes. This helps them set and pull away slightly from the edges.
Then, carefully remove them from the pans and transfer to a wire cooling rack. Let them cool completely before frosting—patience here means a smooth, melt-free frosting finish later.
Step-by-Step: Making Cream Cheese Frosting
Step 1: Beat Butter and Cream Cheese
Start with softened cream cheese (8 oz block) and ½ cup of unsalted butter—both should be at room temperature.
If they’re too cold, you’ll end up with lumps; too soft, and things get greasy.
Using a hand mixer or stand mixer, beat them together on medium-high speed for about 2 to 3 minutes, until the mixture is smooth, fluffy, and a little glossy.
You want it light, creamy, and dreamy—think spreadable clouds.
Step 2: Add Sugar and Vanilla
Turn the mixer to low and slowly add 3½ to 4 cups of powdered sugar, about ½ cup at a time.
This keeps you from getting a powdered sugar snowstorm all over your kitchen (trust me, it happens).
Once the sugar is in and the frosting looks thick and silky, mix in 1½ teaspoons of vanilla extract.
At this point, give it a little taste. If you want extra tang or balance, you can add a pinch of salt or a teaspoon of lemon juice.
Just a little goes a long way—it brightens the flavor without overpowering the richness.
Step 3: Frost the Cake
Make sure your cake layers are completely cool—no cheating! Warm cake + soft frosting = sliding disaster.
Place one cake layer on your serving plate or stand and add a big dollop of frosting on top.
Spread it evenly with an offset spatula, going all the way to the edges. Stack the second layer and repeat, then cover the sides for a full coat. Want bakery-style flair? Use the flat side of the spatula to smooth things out, or swirl it up for texture.
For a simple final touch, sprinkle cake crumbs from trimmed edges, or toss on some festive sprinkles. However you decorate, this frosting brings it all together—sweet, tangy, and ready to steal the spotlight.
Pro Tips for Best Results
Use Gel Food Coloring for Vibrant Red
If you want that bold, classic red velvet look—the kind that pops in photos and makes people go “Whoa!”—gel food coloring is your best friend.
It’s more concentrated than liquid food dye, so you need less to get a deeper color.
Plus, it won’t water down your batter, which helps your cake stay moist and fluffy. A little goes a long way, so start with 1 tablespoon and adjust if needed.
Don’t Overmix the Batter
Once you combine the dry and wet ingredients, go easy on the mixing. Overmixing can turn your soft, dreamy batter into a dense, chewy letdown.
Mix just until everything is combined and smooth—no flour pockets, but no marathon stirring either.
Think of it like folding laundry: enough to get the job done, but no need to iron each sock.
Chill Cake Before Frosting for Cleaner Edges
This one’s a game-changer. Once your cake layers have cooled to room temp, pop them in the fridge for 30 minutes to an hour.
Chilling firms up the cake and makes it easier to frost—no crumbs dragging into the icing, no frosting melting off the sides.
You’ll get sharper, cleaner lines and a smoother finish. If you’re going for that picture-perfect bakery look, this step is your secret weapon.
Store Leftovers in the Fridge — Let Sit at Room Temp Before Serving
Cream cheese frosting doesn’t love heat, so always store your finished cake in the fridge. Cover it loosely with plastic wrap or place it in a cake container to keep it fresh.
When it’s time to serve, let slices sit out for 15 to 20 minutes so the frosting softens and the cake returns to its ideal texture.
Cold cake is fine, but red velvet is magic at room temp—soft, flavorful, and just the right kind of indulgent.
Variations & Add-Ons
Cupcake Version
Want to make red velvet more grab-and-go friendly? Turn the batter into 18 to 24 cupcakes instead of a layered cake.
Simply line your muffin tin with paper liners, fill each about ⅔ full, and bake at 350°F (175°C) for 18–20 minutes.
Use the toothpick test to check for doneness—just like with the full cake.
Once cooled, pipe that luscious cream cheese frosting on top with a swirl or a rosette for a bakery-worthy finish. Great for parties, birthdays, or those days when you don’t feel like slicing anything.
Layered Style
If you want to take things up a notch, go for a filled layer cake. After baking and cooling, slice each cake layer in half horizontally to create four thinner layers.
Then, add a thin spread of raspberry jam, chocolate ganache, or even a whipped mascarpone layer between the cakes before frosting.
The extra layers add flavor, texture, and a surprise element with each bite. It’s perfect for impressing guests—or just impressing yourself.
Decorating Ideas
Want to jazz it up? Start with the basics: a clean frosting coat.
Then sprinkle the top and sides with red velvet cake crumbs (just trim a bit off the domed tops, crumble them, and press gently onto the frosting).
For a more elegant look, top the cake with white chocolate curls, shaved dark chocolate, or a pile of fresh berries—raspberries and strawberries pair especially well with the tangy cream cheese.
If it’s a holiday or special event, themed sprinkles or edible glitter never hurt. Dress it up or keep it simple—the flavor will speak for itself.
Final Words
Red velvet cake is a classic for a reason—soft, rich, and just the right amount of indulgent. And that cream cheese frosting? The perfect finishing touch.
Now it’s your turn. Give this recipe a try and don’t be shy—share your photos, tweaks, or frosting fails (we’ve all been there).
FAQs
Can I make it without food coloring?
Yes, absolutely. The cake will still taste like red velvet—it just won’t be red. If you’re okay with a more natural, cocoa-brown look, skip the dye.
Can I use beet juice as a natural coloring?
You can. Add about 2–3 tablespoons of beet juice to the wet ingredients. Just keep in mind it might add a slightly earthy flavor and won’t be quite as vibrant as gel food coloring.
Can I make it ahead of time?
Definitely. Bake the cake layers, let them cool completely, then wrap tightly in plastic and freeze for up to 1 month. Thaw overnight in the fridge, and frost on the day you plan to serve for the best texture and freshness.