
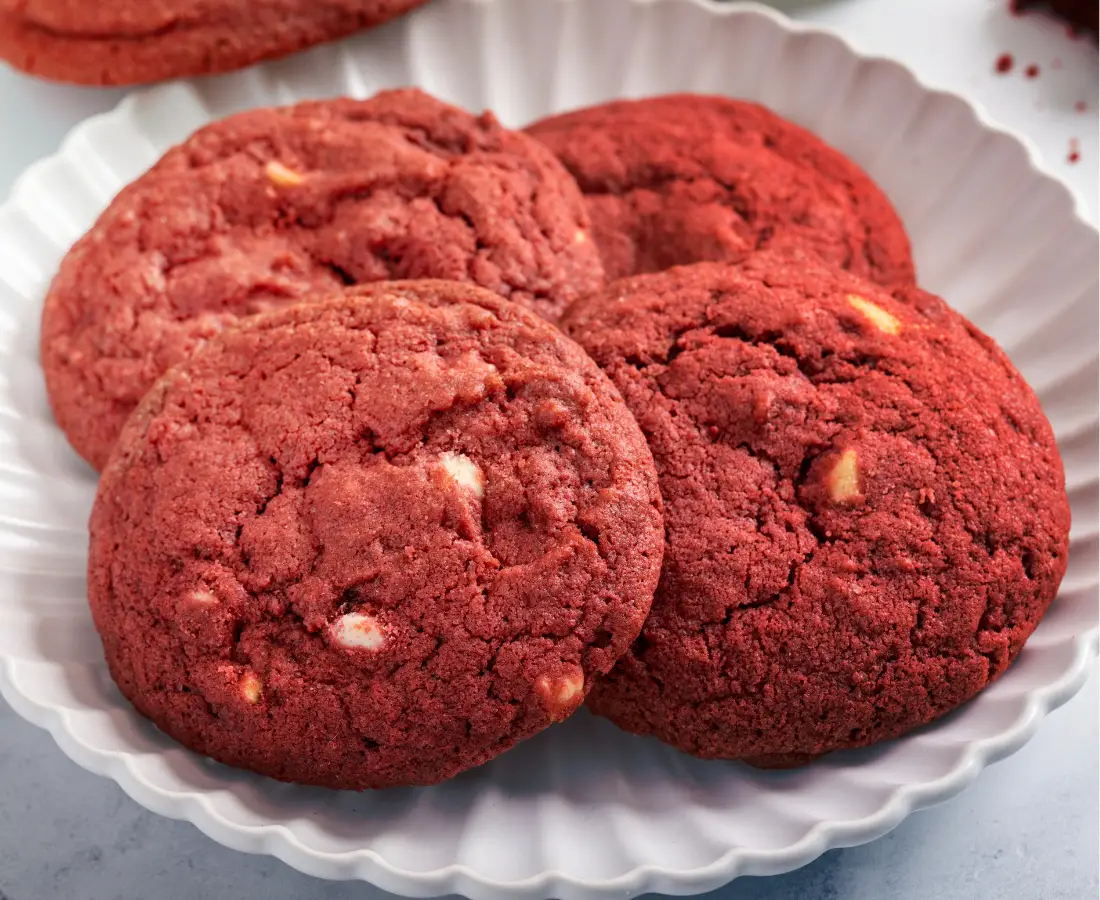
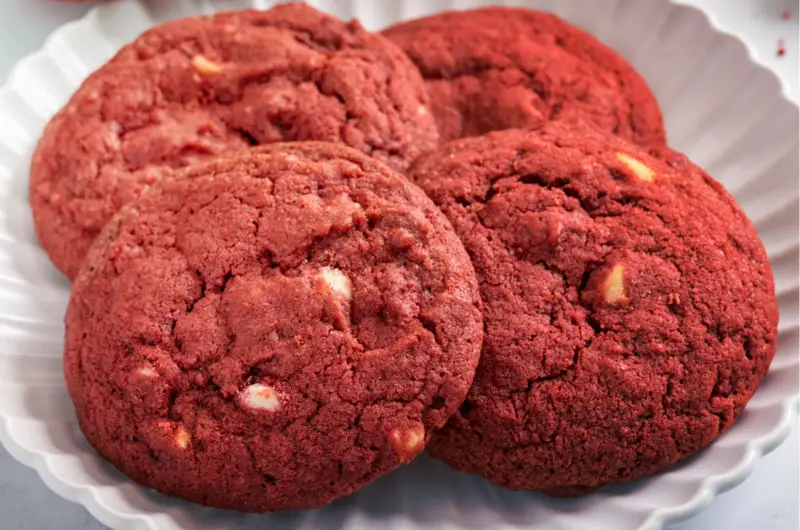
Red velvet chocolate chip cookies are a delightful twist on a classic dessert.
They combine the velvety richness of red velvet cake with the chewy goodness of a chocolate chip cookie.
The result is a treat that’s as beautiful as it is delicious.
Red velvet originated as a luxurious cake in the early 1900s, known for its deep red color and subtle cocoa flavor.
Over time, creative bakers transformed this iconic dessert into everything from cupcakes to cookies.
In this post, you’ll find a foolproof recipe for making soft, chewy red velvet chocolate chip cookies at home.
You’ll also get expert tips for achieving the perfect texture, flavor, and presentation.
Let’s get started!
Ingredients Needed
To make red velvet chocolate chip cookies, you’ll need a mix of basic baking staples and a few special ingredients for flavor and color.
Dry Ingredients
- 1 and 2/3 cups (210g) all-purpose flour, spooned and leveled
- 1/4 cup (21g) unsweetened natural cocoa powder
- 1 teaspoon baking soda
- 1/4 teaspoon salt
Wet Ingredients
- 1/2 cup (113g) unsalted butter, softened to room temperature
- 3/4 cup (150g) packed light or dark brown sugar
- 1/4 cup (50g) granulated sugar
- 1 large egg, at room temperature
- 1 tablespoon buttermilk (or regular milk)
- 2 teaspoons pure vanilla extract
Add-ins
- 1 cup (180g) white or semi-sweet chocolate chips (plus extra for topping)
- 3/4 teaspoon gel red food coloring (or 2 teaspoons beet powder for a natural alternative)
Optional Toppings
- Extra chocolate chips for pressing onto cookies after baking
- Melted white chocolate for drizzling over cooled cookies
Step-by-Step Recipe
Follow these detailed steps to make soft, chewy red velvet chocolate chip cookies:
Step 1: Preparation
- Preheat your oven to 350°F (177°C).
- Line two baking sheets with parchment paper or silicone baking mats to prevent sticking.
Step 2: Mixing Dry Ingredients
- In a medium-sized bowl, whisk together the 1 and 2/3 cups (210g) all-purpose flour, 1/4 cup (21g) cocoa powder, 1 teaspoon baking soda, and 1/4 teaspoon salt.
- Set aside to ensure even distribution of the dry components.
Step 3: Creaming Wet Ingredients
- In a large mixing bowl, use a hand or stand mixer fitted with the paddle attachment to beat 1/2 cup (113g) softened unsalted butter, 3/4 cup (150g) packed brown sugar, and 1/4 cup (50g) granulated sugar on medium speed. Mix for about 2 minutes, or until creamy.
- Add 1 large egg, 1 tablespoon buttermilk, and 2 teaspoons vanilla extract. Mix on high speed until fully combined, scraping down the sides of the bowl as needed.
Step 4: Combining Mixtures
- Gradually add the dry ingredients to the wet mixture, mixing on low speed to avoid overworking the dough.
- Once fully incorporated, the dough will be thick and sticky.
Step 5: Adding Color and Chips
- Mix in 3/4 teaspoon gel red food coloring (or 2 teaspoons beet powder) to achieve a vibrant red hue. Adjust the amount as needed for your desired intensity.
- Fold in 1 cup (180g) white or semi-sweet chocolate chips using a spatula.
Step 6: Chilling the Dough
- Cover the dough with plastic wrap and refrigerate for at least 1 hour, or up to 3 days. Chilling is essential to firm up the dough and prevent the cookies from spreading too much during baking.
- If the dough chills for more than 2 hours, let it sit at room temperature for about 15 minutes before shaping.
Step 7: Shaping and Baking
- Scoop about 1.5 tablespoons (30–35g) of dough per cookie and roll into balls. Place them on the prepared baking sheets, spacing them about 3 inches apart.
- Bake in the preheated oven for 11–13 minutes, or until the edges are set but the centers remain soft.
Step 8: Cooling
- Allow the cookies to cool on the baking sheet for 5 minutes before transferring them to a wire rack. This helps the cookies retain their shape and achieve the perfect texture.
- For an extra decorative touch, press a few additional chocolate chips onto the tops of the warm cookies.
Tips for Perfect Red Velvet Cookies
Achieving the Right Color
The signature red hue of red velvet cookies is what sets them apart.
For the most vibrant and consistent results, use gel food coloring.
It’s more concentrated than liquid coloring, so you’ll need less to achieve the desired shade.
A small amount, about 3/4 teaspoon, is typically enough.
If you prefer a natural alternative, beet powder is a great option.
It offers a subtle red color and doesn’t affect the flavor.
Keep in mind, natural colorings like beet powder may produce a softer, less intense red compared to synthetic options.
Ensuring Soft and Chewy Texture
A soft and chewy cookie is all about balance.
Adding a small amount of cornstarch to the dry ingredients helps create a tender texture.
Baking time also plays a critical role.
For the ideal consistency, remove the cookies from the oven while the centers still appear slightly underbaked.
They will continue to cook on the baking sheet as they cool, ensuring a soft center without becoming dry.
Using brown sugar instead of granulated sugar adds moisture and enhances chewiness thanks to its molasses content.
Preventing Dough Spread
Nothing ruins a cookie faster than watching it flatten too much during baking.
Chilling the dough is the key to preventing excessive spreading.
Refrigerate it for at least 1 hour, as this firms up the butter and allows the flour to fully hydrate.
If you skip this step, your cookies are more likely to spread too thin in the oven.
For best results, keep the dough cold while shaping, and work quickly to avoid it warming up before baking.
Variations and Substitutions
Alternative Chips
While white chocolate chips are a classic choice for red velvet cookies, you can experiment with other types of chocolate to create new flavor profiles.
Dark chocolate chips add a rich, bittersweet contrast to the cookies’ sweetness, making them a great option for those who prefer less sugary treats.
Semi-sweet chocolate chips strike a balance between sweet and bitter.
For added texture and flavor, consider mixing in chopped nuts like pecans or walnuts.
These not only enhance the taste but also add a satisfying crunch.
Natural Coloring Options
If you prefer to avoid artificial food coloring, natural alternatives are a great choice.
Beet powder is a popular option for achieving a reddish tint while keeping the recipe all-natural.
It has a mild flavor that doesn’t overpower the cookie.
Keep in mind that the color from natural alternatives may be less vibrant compared to synthetic dyes.
Another option is using a small amount of pureed red beets, though this may slightly alter the dough’s texture.
Natural cocoa powder can also contribute to the reddish hue, though it won’t be as striking.
Dietary Adjustments
To make these cookies vegan, replace the butter with a plant-based alternative and use a flaxseed egg (1 tablespoon flaxseed meal mixed with 2.5 tablespoons water) as a substitute for the egg.
Opt for non-dairy milk like almond or oat milk in place of buttermilk.
For gluten-free cookies, swap the all-purpose flour with a 1:1 gluten-free baking flour that includes xanthan gum for structure.
Always check that your other ingredients, such as chocolate chips, are certified vegan or gluten-free to ensure they align with your dietary needs.
Serving Suggestions
Red velvet chocolate chip cookies are a showstopper for any occasion, making them perfect for celebrations and special events.
Their vibrant red color and soft texture make them a favorite for holidays like Valentine’s Day, Christmas, or even the Fourth of July with a few added blue accents.
They’re also a delightful addition to birthday parties, bake sales, or as a thoughtful homemade gift.
To enhance the experience, pair these cookies with a warm cup of coffee or espresso for a bold, rich contrast to their sweetness.
For a more comforting treat, enjoy them with a glass of cold milk, which balances the flavors and softens the cookie’s rich chocolatey notes.
These cookies can also shine on a dessert platter, served alongside other baked goods or with a dollop of whipped cream for an elegant touch.
No matter the event, these cookies are sure to impress.
Storage and Shelf Life
Proper storage ensures your red velvet chocolate chip cookies stay fresh and delicious.
At room temperature, store the baked cookies in an airtight container to maintain their softness and flavor.
They will stay fresh for up to one week when kept in a cool, dry place.
For longer storage, freezing is an excellent option.
You can freeze baked cookies by placing them in a single layer on a baking sheet until firm, then transferring them to a freezer-safe bag or container.
They can be frozen for up to three months and enjoyed after thawing at room temperature.
For unbaked dough, shape it into balls and freeze them on a baking sheet until solid.
Store the frozen dough balls in a freezer-safe bag for up to three months.
When ready to bake, place the frozen dough directly onto a baking sheet and bake as directed, adding an extra 1–2 minutes to the baking time.
Conclusion
Red velvet chocolate chip cookies are an irresistible treat that’s easy to make and perfect for any occasion.
With their vibrant color, soft texture, and bursts of chocolate, they’re sure to become a favorite in your home.
Give this recipe a try and see just how simple it is to bake something truly special.
We’d love to hear how your cookies turn out!
Share your experience in the comments, ask any questions you have, and don’t forget to spread the love by sharing this recipe on social media.
Happy baking!
FAQs
Can I use a cake mix for this recipe?
Yes, you can use a red velvet cake mix as a shortcut for this recipe.
To adapt it, combine the cake mix with 2 large eggs and 1/2 cup (113g) softened unsalted butter.
Mix until combined, then fold in the chocolate chips.
The cookies may have a slightly softer texture compared to the original recipe, but they’ll still be delicious and quick to make.
How can I make the cookies more chocolatey?
To boost the chocolate flavor, add an extra 1–2 tablespoons of cocoa powder to the dry ingredients.
You can also use chocolate chunks instead of chips for larger, more decadent bursts of chocolate.
A mix of semi-sweet and dark chocolate chunks works especially well for a richer taste.
What causes cookies to be cakey instead of chewy?
Cakey cookies often result from overmixing the dough, which incorporates too much air and develops excess gluten.
Using too much flour or leavening, such as baking soda, can also create a cake-like texture.
To ensure chewy cookies, measure ingredients accurately, mix just until combined, and avoid overmixing once the dry ingredients are added.
Chilling the dough also helps achieve the desired chewy consistency.
Soft and Chewy Red Velvet Chocolate Chip Cookies
20
servings15
minutes12
minutes150
kcal1
hour30
minutesThese soft and chewy red velvet chocolate chip cookies combine the iconic red velvet flavor with bursts of rich chocolate. Perfect for holidays, parties, or anytime you need a treat!
Ingredients
- Dry Ingredients
1 and 2/3 cups (210g) all-purpose flour
1/4 cup (21g) unsweetened cocoa powder
1 teaspoon baking soda
1/4 teaspoon salt
- Wet Ingredients
1/2 cup (113g) unsalted butter, softened
3/4 cup (150g) packed light or dark brown sugar
1/4 cup (50g) granulated sugar
1 large egg, at room temperature
1 tablespoon buttermilk (or regular milk)
2 teaspoons vanilla extract
- Add-ins and Optional
3/4 teaspoon gel red food coloring (or 2 teaspoons beet powder)
1 cup (180g) white or semi-sweet chocolate chips (plus extra for topping)
Directions
- In a medium bowl, whisk together the flour, cocoa powder, baking soda, and salt. Set aside.
- In a large mixing bowl, beat the butter, brown sugar, and granulated sugar with a mixer on medium speed until creamy, about 2 minutes.
- Mix in the egg, buttermilk, and vanilla extract on high speed until fully combined. Scrape the bowl as needed.
- Gradually add the dry ingredients to the wet mixture, mixing on low speed until just combined.
- Stir in the red food coloring or beet powder until evenly distributed. Fold in the chocolate chips with a spatula.
- Cover the dough and refrigerate for at least 1 hour (or up to 3 days).
- Preheat the oven to 350°F (177°C). Line baking sheets with parchment paper or silicone mats.
- Scoop 1.5-tablespoon-sized portions (30–35g) of dough and roll into balls. Place them 3 inches apart on the baking sheets.
- Bake for 11–13 minutes, or until the edges are set but the centers appear slightly underbaked.
- Press extra chocolate chips onto the tops of warm cookies for a decorative touch. Let them cool on the baking sheet for 5 minutes, then transfer to a wire rack to cool completely.
Notes
- Storage: Store cookies in an airtight container at room temperature for up to 1 week.
- Freezing Dough: Freeze unbaked dough balls for up to 3 months. Bake from frozen, adding an extra minute to the bake time.
- Natural Coloring: Beet powder provides a subtle red hue for those avoiding artificial dyes.
- Chewy Texture Tip: Slightly underbake the cookies for soft, chewy centers.